How to Curl Hair with a Straightener: A Complete Guide
Have you ever wanted to create beautiful curls or beachy waves, but didn’t have a curling iron on hand? No need to worry- you can curl your hair with a straightener instead! Not only is it a versatile tool for creating different types of curls and waves, but it can also give you more control and definition. This article will guide you through the step-by-step process of curling your hair with a straightener and offer tips and tricks to achieve the perfect style for your hair type.
Step-by-Step Guide on How to Curl Hair with a Straightener
Before you get started, make sure you have a heat protectant spray and hairspray on hand. Additionally, make sure your straightener is at the appropriate heat setting for your hair type. For fine hair, use a lower heat setting, and for thick hair, use a higher one.
Step 1: Section your hair. Before curling, section your hair into smaller portions. This makes the process easier and ensures that all parts of the hair are curled correctly.
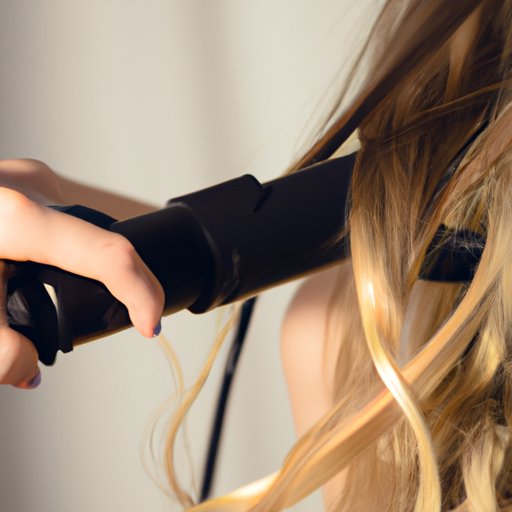
Step 2: Take a section of hair. Place the straightener at the top of the section of hair, twist the straightener inwards and down towards the head. Make sure to keep the straightener pointing downwards and the hair twisted for the whole process.
Step 3: Slowly glide the straightener down. While holding the twisting motion, slide the straightener slowly down to the end of the hair. This will create a beautiful curl.
Step 4: Repeat the process. Do this for the rest of the sections you created until your entire head of hair is curled.
Step 5: Finish the curls. Once you have curled all of your hair, lightly spray it with a flexible hold hairspray to keep the curls in place. If desired, you can also add a small amount of hair oil to create shine and smoothness.
Step 6: Experiment with different styles. You can create different types of curls with this technique, such as tight curls, loose waves, or spiral curls. The key is in matching your twisting and sliding techniques with the desired type of curl.
Top Mistakes to Avoid When Using a Straightener to Curl Your Hair
Curling your hair with a straightener may take some practice, but with time, you’ll become a hair curling master! Here are some common mistakes that beginners tend to make:
Mistake 1: Using too high heat. Using too high heat can cause heat damage to your hair and prevent curls from forming correctly. Always use a heat setting that is appropriate for your hair type.
Mistake 2: Not sectioning hair properly. Not sectioning hair properly makes it difficult to achieve evenly curled hair. Make sure to section your hair before curling, ensuring every section gets the attention needed to create beautiful curls.
Mistake 3: Holding the straightener in one place for too long. When you hold the straightener in one place for too long, it can cause damage or kinks in your hair. A simple solution is to slide the straightener down your hair slower and more evenly, ensuring you get the curl you desire without overheating the hair.

The Benefits of Using a Straightener Instead of a Curling Iron to Curl Your Hair
When it comes to curling your hair, there are two primary tools to choose from – a curling iron or a straightener. While both can create beautiful curls, straighteners offer some unique advantages:
Benefit 1: Versatility. A straightener can be used to create different types of curls and waves, from tight curls to loose beachy waves.
Benefit 2: Efficiency. Using a straightener is more efficient than a curling iron since it can curl larger sections of hair at once.
Benefit 3: Control. With a straightener, you have more control over the type of curl you create, and can customize it to your desired look.
How to Curl Hair with a Straightener for Different Hair Types
While the previous steps are great for most hair types, it’s important to adjust your technique depending on your hair texture and thickness. Here’s how to curl hair with a straightener for different hair types:
Fine hair: Use a lower heat setting to prevent damage and avoid using the straightener too close to the roots. Use smaller sections to create more defined curls.
Medium hair: Use a medium heat setting and take slightly larger sections for more natural-looking curls.
Thick hair: Use a higher heat setting and larger sections to create bold curls.
Beachy waves: Use the straightener to create loose, beachy waves by taking larger sections of hair and not twisting the hair as tightly.
Spiral curls: To create spirals, twist the sections of hair tightly and use a smaller straightener.
Tips and Techniques for Creating Beachy Waves with a Straightener
Beachy waves are a popular and versatile style that can be achieved with a straightener. Here are some tips and tricks on how to achieve this look:
Step 1: Begin by prepping your hair with a sea salt or texturizing spray.
Step 2: Section your hair and begin twisting the straightener as described in the steps above.
Step 3: After releasing the twisted hair section, gently tug on the ends for more of a tousled, beachy look.
Step 4: Repeat on all hair sections, ensuring you’re not curling your hair too tightly.
How to Make Curls Last Longer When Using a Straightener
After spending the time to create the perfect curls, you want them to last as long as possible. Here are some tips on how to make your curls last:
Tip 1: Use a hairspray that has a flexible hold. This will ensure that your curls don’t look stiff and unnatural.
Tip 2: Avoid touching your curls. The oils from your fingers can flatten your curls and make them look less defined and messy.
Tip 3: Refresh your curls with your straightener. The heat from the straightener can help revive your curls and give them a shiny, fresh appearance.
Conclusion
Curling your hair with a straightener may seem intimidating, but with the guidance provided in this article, you’ll be a pro in no time! With the right technique, heat setting, and finishing products, you can achieve any type of curl or wave you desire.


