Introduction
Have you ever wanted to create your own personalized journals or give old books a new lease on life? Look no further – this comprehensive guide will teach you everything you need to know about book binding, from basic to creative projects. We will cover five topics that include DIY handmade journals, upcycling old books, traditional leather binding, and even how to make a personalized guest book that will be cherished for years to come.
The Simple Guide to Book Binding: Everything you Need to Know
Before diving into the different bookbinding projects, let’s start with the basics. Book binding is the process of assembling the pages of a book, along with a cover, to create a complete publication. To get started, you will need some essential materials such as paper, thread, and a cover.
Here is a simple step-by-step guide to binding your own book:
- Gather Your Materials: Paper, thread, a needle, and a cover.
- Fold your paper in half and stack to create a book block – make sure to line up the edges.
- Sew the book block by stitching down the gutter (where the pages are folded) with the needle and thread – this helps keep the pages together.
- Secure your book block in the cover by gluing the first and last pages to the inside of the cover.
- Cut away the excess paper to create a clean edge if needed.
- Let the glue dry and enjoy your newly bound book.
For a more professional finish, use bookbinding glue available in craft stores and specialty bookbinding suppliers. You can also use different binding styles depending on the project you are working on, such as coptic, perfect, or saddle stitch binding.
DIY Book Binding for Beginners: How to Create Your Own Handmade Journals
Creating handmade journals is a fun and easy project that allows you to personalize your notebooks or sketchbooks. All you need are some simple materials like paper, waxed thread, and a needle. Here’s a step-by-step guide to help you get started:
- Cut paper to your desired size and fold sheets in half to create a booklet.
- Sew the booklet together along the spine using waxed thread and needle, making sure to leave some slack.
- Once you’ve sewn all your pages, you can create a cover and bind it onto the pages with glue.
- Finally, trim and decorate the edges of the paper to create a polished look.
You can also try different styles of binding, such as long stitch or Japanese stab binding, to create unique journal designs. Don’t forget to add personalized touches by choosing different colors and patterns for your covers.
Upcycling Books: How to Give Old Tomes a New Lease on Life
Recycling books is a fantastic way to give old volumes a new purpose while still preserving their heritage value. Upcycling books allows you to create customized journals or unique home decor pieces using old books. Here’s how to get started:
- Choose an old book that you’re willing to upcycle and remove the pages.
- Deconstruct the binding and separate the front and back covers.
- Create your new pages or sections using paper or other materials.
- Sew together your new pages or attach them to the cleaned up spine.
- Create a new cover by attaching your new pages to one of the original covers or use something completely new.
- Add some personal touches with decorative elements such as fabric, stamps, or stickers.
- Reassemble the book by attaching your new cover back to the spine, and you now have a unique book made from recycled materials.
You can also use old book covers to create stunning wall art and other DIY home decor projects.
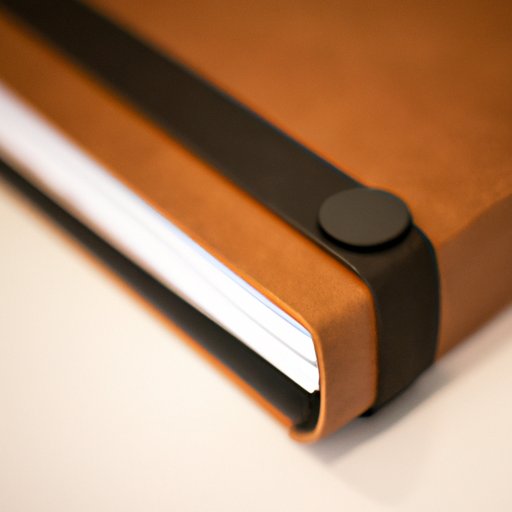
Leather Book Binding: A Step-by-Step Guide to Traditional Bookbinding
There’s something especially appealing about traditional leather bookbinding. Leather-bound books have been around for centuries and are frequently seen in libraries and book collectors’ homes. Here’s how to create your own using traditional techniques:
- Choose your materials (paper, beeswax, thread, and, of course, leather).
- Cut paper to your desired size and fold pages in half to create a booklet.
- Sew all your pages together using a needle and waxed thread.
- Wrap your finished pages in leather and secure it with the proper adhesive.
- Create a spine by stitching through the pages and leather cover.
- Add endpapers to create a polished and professional finish.
- Decorate your cover with title stamps, gold leaf, or other decorative elements to personalize your book.
Leather bookbinding is a skill that takes practice, but the result is a stunning and unique creation that will last for years to come.
The Perfect Gift: How to Create a Personalized Wedding Guest Book
Personalized guestbooks are a thoughtful and cherished keepsake that can be cherished long after the wedding is over. Here’s how to create one:
- Choose high-quality materials such as thick paper and leather or hardcover binding.
- Create a page layout that will work best for your needs; pages can be blank or pre-printed with prompts and questions.
- Personalize your book with the couple’s names, date of the wedding, and other decorative elements.
- Bind your pages together – for added durability, consider coptic or case binding techniques.
- Create a protective cover for the book – it can be anything from a simple wraparound to a slipcover box.
- Present your unique and personalized guest book as a special gift that the couple will treasure for years to come.
Conclusion
Whether you’re a seasoned bookbinder or a complete beginner, these DIY bookbinding projects are perfect for anyone looking to create unique and personalized books. From traditional leather-bound books to upcycling old tomes, there is bound to be a project that piques your interest. Don’t hesitate to experiment with materials and designs – the possibilities are endless!
With a bit of patience and creativity, you can create books that are not only functional but also reflect your personality and style.


