Introduction
If you’ve ever tried to stain treated wood, you may have experienced some frustration. Treated wood is specially treated to protect it from moisture, rot, and insects, but it can also be difficult to stain. In this article, we’ll explore why treated wood can be tricky to stain and provide tips for achieving the best results.
The Dos and Don’ts of Staining Treated Wood: A Comprehensive Guide
Before you apply any stain to treated wood, it’s important to properly prepare it. First, make sure the wood is clean and free of any dirt or debris. Next, use a wood conditioner to help the wood absorb the stain evenly. Finally, choose a stain specially designed for use on treated wood.
There are also some things to avoid when staining treated wood. For example, don’t apply too much stain at once, as this can cause the wood to absorb the stain unevenly. Also, don’t choose a stain that is too dark, as it can exacerbate the uneven absorption of the wood.
Exploring the Effectiveness of Different Staining Techniques on Treated Wood
There are several ways to stain treated wood, including brushing, spraying, rolling, and wiping. Each technique has its pros and cons, and some may be more effective than others depending on the type of wood you’re working with.
After evaluating the different techniques, we’ve found that brushing or wiping the stain onto the wood tends to give the best results. These methods allow you to control the amount of stain applied and ensure even absorption.
The Science Behind Why Treated Wood Can’t Always be Stained
The chemical composition of treated wood can affect how it absorbs stain. Treated wood is often treated with preservatives such as copper, which can react with the stain and cause discoloration or uneven absorption. Additionally, the high moisture content in some types of treated wood can also affect staining.
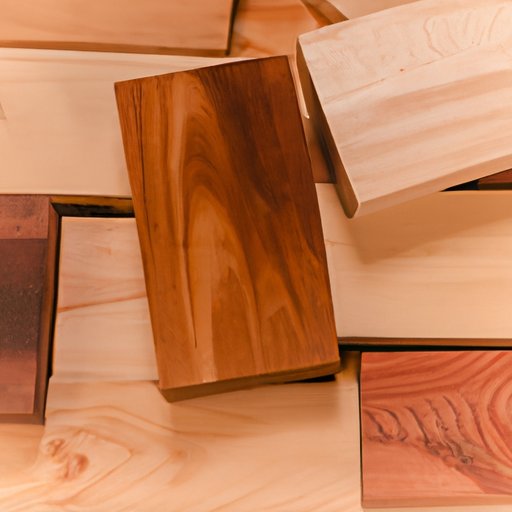
Some types of treated wood are also more difficult to stain than others. For example, pressure-treated pine is notoriously difficult to stain due to its resinous nature, while cedar and redwood are easier to stain.
5 Tried and True Methods for Successfully Staining Treated Wood
Here are five methods that are known for producing great results when staining treated wood:
- Brushing or wiping the stain onto the wood
- Using a wood conditioner before staining
- Choosing a stain specially designed for use on treated wood
- Applying multiple thin coats of stain, rather than one thick coat
- Allowing the wood to dry completely before staining
By following these methods, you can improve the chances of achieving even, consistent staining on your treated wood.
The Pros and Cons of Staining Treated wood: Is it Worth it?
Staining treated wood can have several advantages, such as enhancing its appearance and protecting it from UV damage. However, there are also some potential downsides to consider, such as the extra time and effort required and the risk of uneven staining.
Ultimately, whether or not to stain treated wood comes down to personal preference. If you want to enhance the appearance of your wood and protect it from the elements, staining can be a great option. However, if you’re happy with the natural look of your wood or don’t want to deal with the extra steps involved in staining, it’s perfectly fine to leave it untreated.
Understanding the Chemical Composition of Treated Wood and Its Effects on Staining
As mentioned earlier, the chemical composition of treated wood can affect how it absorbs stain. For example, some preservatives used in treated wood, such as copper and zinc, can react with the stain and cause discoloration. Additionally, the high moisture content in some types of treated wood can cause the stain to bead up instead of absorbing into the wood.
To determine the best approach for staining your treated wood, take into account the specific type of wood and the chemicals used in its treatment. This can help you choose the best stain and application method for your project.
Step-by-Step Guide: How to Properly Stain Treated Wood Without Ruining It
To ensure the best results when staining treated wood, follow these steps:
- Clean the wood thoroughly to remove any dirt or debris
- Apply a wood conditioner to help the wood absorb the stain evenly
- Choose a stain that is specially designed for use on treated wood
- Brush or wipe the stain onto the wood, applying multiple thin coats for even absorption
- Allow the wood to dry completely before applying any additional coats or sealant
By following these steps, you can help ensure that your treated wood is properly stained without damaging or ruining it.
Conclusion
In conclusion, staining treated wood can be a bit more challenging than staining untreated wood, but with the right approach, it can be done successfully. By prepping the wood properly, choosing the right stain and technique, and taking into account the specific type of wood and treatment chemicals used, you can achieve even, consistent coloring while protecting your wood from UV damage and moisture.
Remember to take your time and be patient, as rushing the process can lead to less than stellar results. With these tips and techniques, you’ll be able to stain your treated wood successfully and enjoy your beautiful, protected wood for years to come.


