Introduction
Measuring accurately for replacement windows is essential for getting the right fit, ensuring energy efficiency, and avoiding costly mistakes. Taking accurate measurements may seem intimidating, but with the right tools and know-how, it’s a task that any homeowner can handle. In this article, we’ll provide a comprehensive guide to measuring for replacement windows.
Step-by-step guide
When measuring for replacement windows, it’s important to be as precise as possible. Even a slight error can result in windows that don’t fit or function as well as they should. Here’s a step-by-step guide to measuring for replacement windows:
1. Remove the old window: Carefully remove the trim and window casing to expose the window jamb and framing. Then, remove the sash and any remaining components of the old window. Be sure to wear gloves and eye protection.
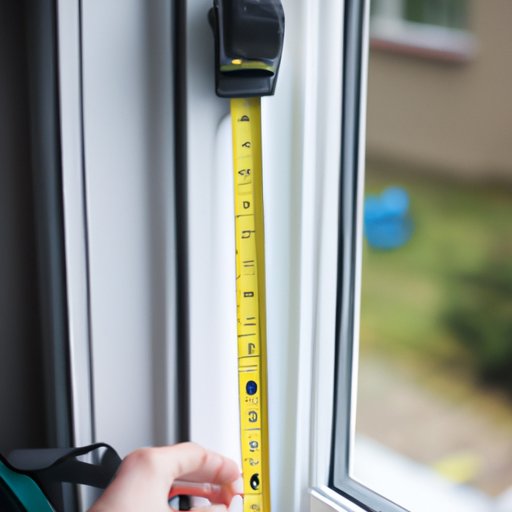
2. Measure the window opening: Measure the width and height of the window opening at three different points – top, middle, and bottom – and record the smallest measurement of each to ensure a proper fit. Make sure to measure from the wood framing rather than the old window itself.
3. Check for level and square: Check the opening for level and square by measuring the diagonal distances between the corners. If they’re equal, the opening is square. If they’re not, make adjustments as necessary.
4. Measure the frame depth: Measure the depth of the window frame from the exterior leading edge to the interior leading edge to make sure the replacement window will fit properly in the opening.
5. Determine the type of window: Determine whether your replacement window will be installed as a retrofit inside the original frame or as a complete replacement that requires removal of the entire frame.
Visual guide
Sometimes, a visual guide can make the process of measuring for replacement windows even easier to understand. Check out the infographic below for a handy reference:
INSERT INFOGRAPHIC HERE
Tips and tricks
Here are some tips and tricks to help you measure replacement windows accurately:
1. Use a level: To ensure accuracy, use a level to make sure the window opening is plumb, level, and square before taking measurements. This will help you achieve a tight, secure fit for your new window.
2. Double-check your measurements: Before ordering your replacement windows, double-check your measurements to make sure they’re accurate. Even a small measurement error can lead to big problems down the line.
3. Measure from multiple points: Measure the width and height at multiple points along the window opening to ensure that your replacement window will fit properly.
4. Have the right tools: Invest in quality tools such as a tape measure, pry bar, and level to make sure your measurements are spot on.
Common mistakes to avoid
Here are some common mistakes people make when measuring for replacement windows – and how to avoid them:
Mistake #1: Measuring the old window instead of the window opening.
How to avoid it: Always measure the window opening, not the old window itself. This will ensure a proper fit for your replacement windows.
Mistake #2: Not checking for level and square.
How to avoid it: Check the window opening for level and square before taking any measurements. This will help you avoid errors that can lead to windows that don’t fit or function properly.
Mistake #3: Not accounting for frame depth.
How to avoid it: Remember to measure the depth of the window frame so that you can choose replacement windows that fit properly in the opening. Make sure to take this measurement into account when ordering replacement windows.
Measuring for different types of windows
Different types of windows may require slightly different measurement techniques. Here’s what you need to know about measuring for some common types of replacement windows:
Casement windows: Measure the width and height of the window opening at three points (top, middle, and bottom) and record the smallest measurement. Be sure to account for any protruding hardware.
Double-hung windows: Measure the width and height of the window opening at three points (top, middle, and bottom) and record the smallest measurement. To measure the height, open the bottom sash and measure from the top of the bottom sash to the head jamb.
Bay windows: Measure the width and height of the entire bay window assembly, including the three individual windows and the spaces between them. Make sure to measure from the framing rather than the old window itself.
Conclusion
Measuring for replacement windows may seem daunting, but with the right tools and techniques, it’s a task that any homeowner can handle. By following the steps outlined in this article, you can ensure a perfect fit for your replacement windows and avoid costly mistakes. So take the time to measure carefully and enjoy the benefits of windows that fit and function perfectly.


