Introduction
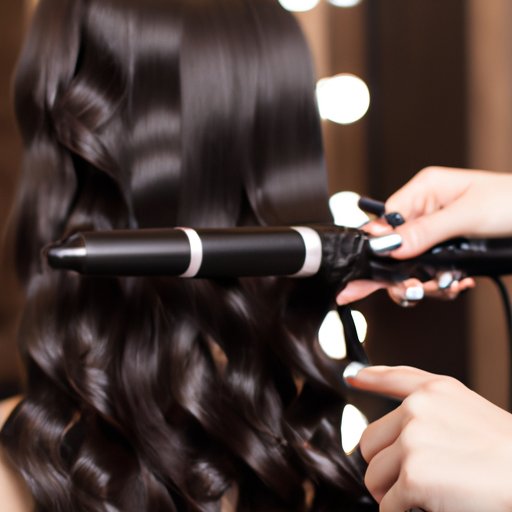
The curling wand is a hot styling tool that allows you to create gorgeous curls and waves effortlessly. Unlike a curling iron, the curling wand has a clip-less, tapered barrel that provides a more natural look. The tool is easy to use, and it creates a wide range of curls and styles.
In this article, we will guide you through the curling wand’s basic use and techniques to create various looks, from beachy waves to voluminous curls. We’ll provide tips and tricks to make sure that your curls come out perfect every time you use the tool.
The Perfect Waves: A Step-by-Step Guide to Using a Curling Wand
The key to creating perfect curls is to section off your hair into suitable sections and choose a temperature that works best for your hair type. We recommend that you start at a low temperature and gradually increase the heat to achieve the desired curl. Make sure to apply a heat protectant and use gloves to prevent burns
- Prepare your hair: Start by washing your hair and drying it thoroughly before you start. Then, apply a heat protectant product to prevent heat damage from the wand.
- Section your hair: Section off your hair into small, manageable sections using hair clips.
- Choose the right temperature: Choose the right temperature and start with the lowest setting for your hair. Most curling wands come with adjustable temperature settings.
- Curl your hair: Starting with a section of hair at the bottom, wrap a small section around the tapered barrel of the curling wand away from the face. Hold the hair for 8-10 seconds before releasing to create loose waves.
- Continue curling: Take another section of your hair and repeat the same steps until you curl your entire hair.
- Finish with a humidity-resistant hair spray: Once you finish curling, use a light hairspray to hold your curls in place for more extended periods.
From Beachy to Glam: How to Create Different Styles with a Curling Wand
The curling wand can create a variety of curls and waves, from beachy and casual to glam and formal, depending on the curl size, temperature setting, and section size.
- Tight curls: To create tight curls, use a small barrel size at high temperature settings and curl small hair sections.
- Beachy waves: Use a larger barrel and curl sectioned hair away from your face. Use vertical methods to create beachy waves.
- Hollywood Waves: Use a large barrel, curl sectioned hair horizontally and then sweep downwards to create a glamorous look.
- Voluminous curls: Use a large barrel and hair volumizing products to create bodied, voluminous curls that last all day.
Do’s and Don’ts of Using a Curling Wand for Beautiful Curls
Using a curling wand is easy, but there are some dos and don’ts that you need to follow to achieve healthy and beautiful-looking curls.
- Do use a heat protectant: A heat protectant spray prevents heat damage and ensures that your curls look healthy.
- Do not use the same heat setting for all types of hair: Hair textures differ, so hair drying time and maximum heat settings vary between different hair types. For a resilient and healthy result, use the temperature best suited for your hair type.
- Do not leave the wand in one spot for too long: This causes damage and burns your hair. The ideal time for a curl is 8-10 seconds.
- Do not neglect hair tools: Leaving the curling iron on for too long, or failing to clean them can cause damage. Clean your curling wand and turn it off after use.
- Do learn from experts: Watch videos on curling wand techniques, read more guides to inspire different styles and keep your hair up with the current trends!
A Beginner’s Guide to Using a Curling Wand: Tips and Tricks
If it is your first time using a curling wand, we’ve got you covered. Here are some simple tips to get you started:
- Choose the right size: Thin hair needs a small barrel, while thick hair needs a larger barrel curling wand. Choose your curling wand accordingly.
- Practice your technique: Practice your wand technique on a small section of your hair. You will get more comfortable with the process as you go along.
- Section your hair: Section your hair to make sure that you don’t miss any strands. Use hair clips to section your hair before curling it.
- Use the right heat setting: Use the right heat setting for your hair type. If you’re not sure, start on the lowest setting and gradually increase the heat until you find the right temperature for your curls.
- Use a glove: Use a curling wand glove to protect yourself from burns. Curling wands get hot and can lead to serious burns if not handled with care.
- Always curl away from your face: Curl your hair section away from your face to create a natural-looking curl.
The Art of Using a Curling Wand: How to Create Voluminous Curls
Are you looking for voluminous curls that last for hours? Use a curling wand and follow these straightforward tips:
- Use volumizing products: Use volumizing products, including hair mousse, to create volume that lasts all day.
- Bend the ends: To add body to your curls, bend the ends slightly using a curling wand. Place the wand upwards from the root towards the tip and hold for a few seconds before releasing.
- Curl in different directions: To create natural-looking, voluminous curls, curl your hair in different directions -away from your face and toward your face for a wavy look.
- Add texture: To add texture to your hair, hold the wand at an angle when curling. This will create curls with more body and movement.
- Use hairspray: After curling, use hairspray to hold your curls in place and give your curls longer-lasting volume.
Hairstyles for Different Occasions: How to Use a Curling Wand
Here are some hairstyle suggestions for different occasions that you can pull off with the curling wand:
- Beachy Waves: For a casual day look, create beachy waves at the lower section of your hair.
- Half-up Half Down: For a more sophisticated look, pull the top section of your head upwards and create loose curls that flow with the rest of your hair.
- Voluminous Curls: Create voluminous curls that go the extra mile in creating an elegant date night or formal look.
- Messy Updo: Create a messy, textured updo by curling individual sections of hair, teasing the roots, and pulling hair backward into a messy bun.
Mastering the Curling Wand: Pro Tips for Salon-Quality Curls at Home
If you are ready to take your curling game to the next level, these pro tips should help:
- Wrap the hair tightly around the wand: For tighter, long-lasting curls, wrap your hair tightly around the wand and hold for longer.
- Use a flat iron: Use a flat iron to create polished, defined curls. Start by clamping the flat iron around a section of your hair near the root and then twist the flat iron away from your face to create a curl.
- Curl in layers: Curl your hair in layers to avoid missing, frizzy or uncurled strands. Work from the back of your head forward, taking small sections at a time.
- Use set and seal technique: After curling, wait until the curls have cooled down. Use bobby pins to hold the curls and spray with a light and flexible hairspray. Release the pins after a few minutes and run your fingers through the curls for a beautiful finish.
- Detangle with a wide-tooth comb: After creating your curls, use a wide-tooth comb to gently brush your curls. This will detangle them and create natural-looking flowing curls.
Conclusion
A curling wand is an excellent tool to create gorgeous curls and waves without damaging your hair. Use this guide to find the perfect curl for your hair type, length and occasion. Remember to practice your technique, use the proper temperature setting, and follow our tips for achieving healthy and salon-quality curls at home.
Now you have all the tools and knowledge you need to master the curling wand.


