I. Introduction
As any avid Nintendo Switch gamer can tell you, Joy-Con drift can be a very frustrating problem. This issue affects the joystick of the Joy-Con controllers, causing them to register an input even when you’re not touching them. The good news, however, is that there are several steps you can take to fix this problem. In this article, we’ll explore the different ways to solve Joy-Con drift, including both simple and more technical solutions. We’ll discuss the causes of Joy-Con drift, the importance of fixing it quickly, and provide a step-by-step guide on how to repair it yourself.
II. Understanding the Causes of Joy-Con Drift and the Best Ways to Fix It
Joy-Con drift can be caused by several factors, such as debris getting stuck under the joystick or the joystick wearing out over time. It’s important to address Joy-Con drift as soon as possible, as it can get worse over time and eventually make gameplay impossible. Fortunately, there are many ways you can fix joy-con drift, and which one you choose will depend on the severity of the issue.
III. 5 Tried and Tested Ways to Fix Joy-Con Drift Quickly and Easily
There are several easy fixes that don’t require any technical skills to fix Joy-Con drift. Here are five popular solutions:
1. Calibration
Before trying anything more drastic, try recalibrating your controller. Go to System Settings > Controllers and Sensors > Calibrate Control Sticks and follow the instructions on-screen. This can help the controller recognize the joystick’s neutral position again.
2. Cleaning the Joystick
Debris and dust can accumulate over time and cause issues with the joystick. Use a clean toothbrush or a can of compressed air to gently clean around the joystick. Be sure to turn off your Switch before cleaning it to avoid causing any damage.
3. Replace the Joystick
You can replace the joystick by purchasing a new one online or from a store that specializes in electronic components. You’ll then need to take apart the Joy-Con to replace it. While this may be challenging if you’ve never done it before, there are tutorials and videos online that can guide you through the process.
4. Contact Cleaner Spray
Using contact cleaner spray can effectively clean the joystick and restore its functionality. You can find contact cleaner spray at any electronics store. Be sure to follow the instructions on the can and use the spray sparingly.
5. Nintendo Repair Service
If you’ve tried all the above solutions and Joy-Con drift persists, you can turn to Nintendo for help. You can either send your Joy-Con to Nintendo for repair or purchase a new one from them.
IV. A Comprehensive Guide to Fixing Joy-Con Drift: Tips, Tricks, and Recommendations
If the above solutions don’t work, there are additional tips and tricks that you can try. Here are some things you can do:
1. Regular Maintenance
The best thing you can do to prevent Joy-Con drift is to practice regular maintenance. This means cleaning your controllers and keeping them stored in a dry, cool place. Don’t allow pets near your controllers to prevent fur, hair, and dust from getting stuck under the joystick.
2. Controller Firmware Update
Updating your controller firmware can help resolve Joy-Con drift. Make sure you have the latest firmware version for both your console and Joy-Con controller by going to System Settings > System > System Update.
3. Change the Orientation of Your Nintendo Switch Console
Sometimes, Joy-Con drift only affects the left or right controller. You can adjust this by simply changing the orientation of your Nintendo Switch console to the opposite side.
4. Peel off the Joystick Rubber Cover
You can try to remove the joystick rubber cover, which can cause friction and hinder the joystick movement. Be careful not to damage the joystick or the controller when doing this.
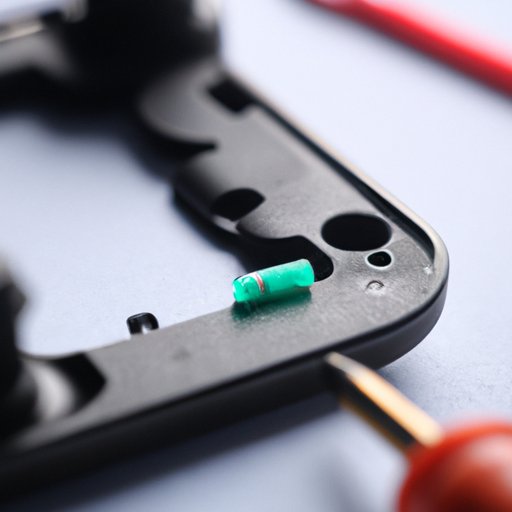
5. Use a Precision Screwdriver
If you need to replace the joystick, be sure to use a precision screwdriver. This will make the process easier and avoid damaging the controller when taking it apart.
V. How to Fix a Joy-Con Drift: Geek Tips and Proven Hacks
If you have experience with repairing electronics, you may feel more comfortable with more technical solutions. Here are some technical hacks you can try:
1. Swap in Potentiometers
If your joystick is beyond repair, you can swap in potentiometers. These are similar to analog sticks but are more easily replaceable. You’ll need a controller circuit board and a potentiometer to do this, however, and it may be more complex than the solutions we’ve discussed so far.
2. Replacement Circuit Board
If the joystick cannot be fixed by cleaning or replacing, you may need to replace the entire circuit board. You can purchase a replacement board online and install it yourself.
3. Be Mindful of Electrostatic Discharge
When working on electronic components, it’s important to be aware of electrostatic discharge. This is when static electricity is discharged from your body and can damage electronic components. To avoid this, wear an anti-static strap when working on electronics.
VI. Step-by-Step Guide on How to Fix Joy-Con Drift Without Losing Your Mind
Repairing Joy-Con drift can be a frustrating and time-consuming process. To avoid getting frustrated or overwhelmed, try these tips:
1. Take a Break
If you begin to feel frustrated or overwhelmed, take a break. Walk away from the problem for a little while and come back to it later with a clearer head.
2. Follow Instructions Carefully
Read the instructions carefully and follow them step-by-step to avoid making any mistakes that could damage your Joy-Con.
3. Be Patient
Remember that repairing Joy-Con drift can be a frustrating process, but with patience and persistence, you can fix the issue.
VII. 3 Simple Ways to Fix Joy-Con Drift: A Beginner’s Guide to Nintendo Switch Repair
If you’re new to repairing electronics, these easy solutions may be right for you:
1. Calibration
Calibrating your controller is a simple solution that can often resolve Joy-Con drift. Make sure you follow the instructions carefully to ensure success.
2. Cleaning the Joystick
Cleaning the joystick can be done easily and should be done regularly to avoid Joy-Con drift from happening in the first place.
3. Replace the Joystick
If you need to replace the joystick, follow these steps carefully and make sure you have a replacement joystick on hand before beginning the repair.
VIII. Solving Joy-Con Drift: Innovative Solutions to An Annoying Problem
If none of the above solutions work, here are some more innovative solutions you may want to try:
1. DIY Conductive Ink Fix
If the potentiometers need replacing, you can try using conductive ink to repair them. There are several tutorials online that can guide you through this.
2. Adjust the Potentiometer Sensitivity
You can adjust the sensitivity of the potentiometer by using a screwdriver to tweak the potentiometer’s screws. This is a more advanced solution, so be careful not to damage the potentiometer or controller while doing so.
3. Change the Joystick Tension
You can change the joystick tension by replacing the springs inside the joystick. This is one of the more complex solutions and should only be attempted by those experienced with electronics.
IX. Conclusion
Fixing Joy-Con drift doesn’t have to be a frustrating and expensive experience. By following the various solutions above, you can get your Joy-Con controller back to working order and get back to gaming without interruption. Remember to stay patient, follow instructions carefully, and take breaks if you need to.


