I. Introduction
Formica countertops have been a popular choice for homeowners for decades. But what happens when they start to look dated or worn out? Replacing them can be expensive, but painting them is a cost-effective solution. In this article, we’ll explore the question on everyone’s mind: can you paint Formica countertops? We’ll provide a step-by-step guide, compare DIY vs. professional options, give a cost breakdown, showcase before and after photos, and share maintenance tips to ensure your newly painted countertops stand the test of time.
II. Step-by-step guide
Before we get started, gather these materials:
- Sandpaper (150-220 grit)
- Tack cloth
- Primer (specifically labeled for use on laminate surfaces)
- Paint (specifically labeled for use on laminate surfaces)
- Painter’s tape
- Roller and/or brushes
Now let’s dive into the step-by-step process:
- Clean the countertop thoroughly with soap and water, removing any dirt or grime.
- Lightly sand the surface with 150-220 grit sandpaper to help the primer adhere to the surface.
- Wipe the surface with a tack cloth to remove any sanding dust.
- Apply a thin coat of primer, following the manufacturer’s directions. Allow to dry completely before applying the first coat of paint. Depending on the product, you may need to wait up to 24 hours before painting.
- Apply the first coat of paint. Be sure to use a paint specifically labeled for use on laminate surfaces, and follow the manufacturer’s directions. Allow to dry completely before applying the second coat of paint.
- Apply the second coat of paint.
- Remove the painter’s tape and allow the surface to dry thoroughly before using the countertop.
Note: Some DIYers suggest using a clear coat finish to further protect the countertop, but this step is optional.
Keep in mind that the process may vary depending on the primer and paint you choose, so always follow the manufacturer’s directions.
III. Pro vs. DIY
If you’re not up for a DIY project, you could consider hiring a professional. Let’s weigh the pros and cons of each option:
A. Pros and cons of hiring a professional
Pros:
- Experience – A professional has the expertise and experience to do the job quickly and correctly.
- Quality – A professional will likely use higher-quality materials than you can find at your local hardware store.
Cons:
- Cost – Hiring a professional can be expensive, typically costing between $25-$50 per square foot.
- Disruption – Depending on the extent of the project, you may have to evacuate your home or kitchen for a few days while the professional completes the job.
B. Pros and cons of doing it yourself
Pros:
- Cost – DIY can be significantly cheaper than hiring a professional. You can expect to pay around $100 for the materials, assuming you already have the necessary tools.
- Control – You have control over the process and can take your time to achieve the desired end result.
Cons:
- Time – Painting your countertops is a time-consuming project that will likely take several days to complete.
- Mistakes – Without proper experience, you may make errors that could lead to a less than perfect end result.
C. Comparison of costs between professional and DIY options
As previously mentioned, hiring a professional can cost between $25-$50 per square foot, which means a 30 square foot countertop could cost between $750-$1500. In comparison, a DIY project could cost as little as $100 for materials, plus your time and effort.
IV. Cost comparison
Let’s break down the costs for a DIY option and a professional option:
A. Detailed cost breakdown for DIY option
- Primer: $20
- Paint: $30
- Sandpaper: $10
- Tack cloth: $5
- Painter’s tape: $5
- Roller and/or brushes: $30
- Total cost: $100
B. Detailed cost breakdown for professional option
- Labor: $25-$50 per square foot (assuming 30 square feet)
- Materials: included in labor cost
- Total cost: $750-$1500
C. Comparison of costs between the two options
As you can see, the DIY option is substantially cheaper than hiring a professional. However, if you’re not particularly handy or don’t have the time or patience to take on a project of this magnitude, hiring a professional may be the better choice for you.
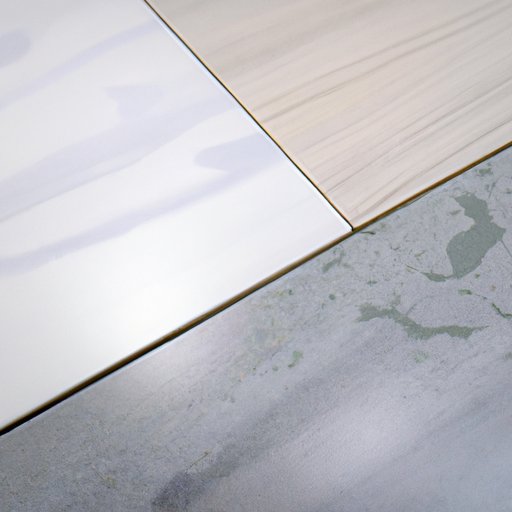
V. Before and after showcase
A picture is worth a thousand words, which is why we’ve included some before and after shots of painted Formica countertops. Take a look at these transformations:

Source: humblebeehome.com
As you can see, painted Formica countertops can make a significant difference in the overall appearance of your kitchen.
C. Tips for achieving a great visual upgrade
- Choose the right color – Depending upon your kitchen color scheme, select a paint color that complements your décor. A neutral color is a safe bet, as you can add color with other accessories, such as dish towels and curtains.
- Remove hardware – Taking off the hardware before you start painting provides a cleaner look and easier painting process.
- Add texture – If you’re feeling creative, try putting faux finish using sea sponge or rag after applying the coat of paint
VI. Maintenance tips
Congratulations, your new painted Formica countertops are complete! To keep them looking their best for years to come, here are some maintenance tips:
A. Importance of maintenance and upkeep
Just like any countertop, painted Formica countertops can get dirty and damaged with regular use. This is why regular maintenance is crucial to maintaining their appearance and longevity.
B. Tips for cleaning and maintaining painted Formica countertops
- Wipe spills immediately – Stains are easiest to remove when they’re still fresh.
- Clean with a mild soap and water – Use a soft cloth and a gentle cleaner to avoid abrasive surfaces from scratching the surface when cleaning.
- Avoid leaving standing water – Water can warp Formica countertops over time, so wipe up any puddles immediately.
C. Tips for touch-ups and keeping the new look for years to come
- Don’t let hot items sit on the surface – Hot pans can damage the painted surface, so always use trivets or potholders.
- Apply touch-up paint as needed -Scratches and chips are easy to fix with a bit of touch-up paint.
- Reapply a clear coat periodically – After prolonged and regular use, consider adding clear coat to your Formica countertops annually to protect the surface and enhance the lifespan of the paint.
VII. Conclusion
In conclusion, painting your Formica countertops is a cost-effective and easy way to refresh your kitchen. By using our step-by-step guide, you can achieve a professional look even if you’re a DIY beginner. If you choose to work with a professional, make sure you do your research and get estimates before committing to a contractor. Either way, painted Formica countertops are a great way to update your kitchen without breaking the bank.
We hope our tips and tricks have been helpful.


