Can you Paint Tile Backsplash?
Tile backsplashes are a common feature in many home kitchens and bathrooms. While they serve a functional purpose, they can often be an eyesore, especially if they’re outdated or don’t match your design aesthetic. Instead of ripping out your existing tile and spending a fortune on new materials, have you considered painting your tile backsplash? In this article, we’ll explore the pros and cons of painting your tile backsplash, provide step-by-step instructions for a DIY project, showcase real-life examples, and give expert advice to ensure a successful outcome.
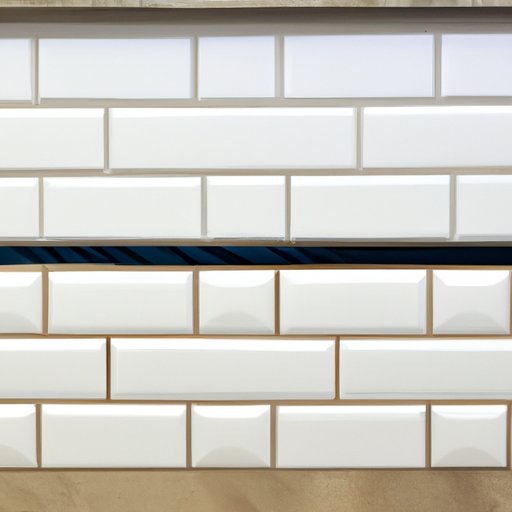
How to Transform Your Kitchen with a Painted Tile Backsplash
Painting your tile backsplash is a budget-friendly and easy way to update your kitchen or bathroom. Not only does it save you money, but it also gives you the design flexibility to create a custom look that complements your personal style. By painting your tile backsplash, you can achieve a fresh, modern look without having to completely overhaul your space.
The Pros and Cons of Painting Your Tile Backsplash
Before tackling any home improvement project, it’s important to weigh the pros and cons. Here are a few to consider when it comes to painting your tile backsplash:
Pros
1. Cost-effective: Painting your tile backsplash is a budget-friendly way to update your space without breaking the bank.
2. Quick and easy update: Unlike ripping out tile and installing new materials, painting your backsplash can be a quick and easy update that can transform your space in just a weekend.
3. Design flexibility: By painting your backsplash, you have the design flexibility to create a custom look that complements your personal style.
Cons
1. Durability concerns: Depending on the type of paint and finish you choose, painted tile backsplashes may not be as durable as traditional tile. They may not withstand heavy scrubbing and can chip or peel over time.
2. Time-consuming: While the overall project can be completed in a weekend, the process of cleaning, sanding, priming, painting, and sealing each tile can be time-consuming.
3. Risk of not achieving the desired outcome: There is always a risk of not achieving the desired outcome when it comes to a DIY paint project. You may not like the color, the finish may be uneven, or the project may not turn out as planned.
DIY Tutorial: Painting Your Tile Backsplash in 5 Easy Steps
Ready to take on the challenge of painting your tile backsplash? Follow these five easy steps:
Preparation steps:
1. Clean and sand the surface: Before painting, clean the surface with a degreaser or TSP cleaner to remove any dirt or residue. After cleaning, sand the tile lightly with a fine-grit sandpaper to create a rough surface for the primer to adhere to.
2. Tape off the surrounding area: Cover any surfaces that you don’t want to be painted with painter’s tape, such as countertops, cabinets, and electrical outlets.
Steps to paint your tile backsplash:
1. Apply primer: Apply a thin coat of tile primer to the tile using a foam roller or brush. Let the primer dry for the recommended amount of time, usually 1-2 hours.
2. Use a stencil (if desired): If you want to get creative with your painted backsplash, use a stencil to create a custom design. Place the stencil on the tile and use a stencil brush to apply paint in the desired pattern. Remove the stencil and let the paint dry for the recommended amount of time before moving on to the next tile.
3. Apply paint: Apply a thin coat of tile paint to the tile using a foam roller or brush. Let the paint dry for the recommended amount of time, usually 2-4 hours. Repeat with a second coat if necessary.
Tips for success:
1. Proper paint selection: It’s important to select the right type of paint for your tile backsplash. Look for a paint specifically designed for tiles or a paint that is oil-based and dries to a hard, durable finish.
2. Techniques for a smooth finish: Use a foam roller or a paintbrush with synthetic bristles to apply the primer and paint. Apply the paint in thin, even coats to prevent drips and ensure a smooth finish.
3. Proper drying time: Give each coat of primer and paint ample time to dry before applying the next coat or removing tape. This will prevent smearing or peeling and ensure a professional-looking finish.
Before and After: Real Life Examples of Painted Tile Backsplashes
To give you an idea of what a painted backsplash can do for your space, here are a few real-life examples:
Example 1: This kitchen had an outdated brown tile backsplash that clashed with the modern cabinetry. By painting the tile a soft white and using a stencil to add a subtle pattern, the space feels bright and refreshed.
Example 2: This bathroom had a yellow and green tile backsplash that was busy and overwhelming. By painting the tile a cool gray-blue, the space feels calm and serene.
While these examples showcase the potential of a painted backsplash, it’s important to note that results may vary. It’s always a good idea to test paint colors and techniques on a small section of tile before committing to the entire project.
Expert Advice: What You Need to Know Before Painting Your Tile Backsplash
Before embarking on a painting project, it’s always helpful to get advice from the experts. Here are a few tips from professionals:
1. Prepare the surface properly: Kelly Roberson, an interior designer and writer for Apartment Therapy, recommends cleaning and sanding the surface properly before applying paint. “The cleaner the surface, the better the paint will adhere, and the smoother your final finish will be,” she says.
2. Don’t skimp on the primer: Jennifer Ott, an architect and writer for Houzz, stresses the importance of using a high-quality primer. “A good quality primer that is specifically made for priming tile and ceramic surfaces will ensure better paint adhesion and result in a more durable finish,” she advises.
3. Seal the painted tile: Sabrina Soto, a designer and writer for HGTV, recommends applying a clear sealant over the painted tile to protect it against wear and tear. “It will give the surface added durability and make it much easier to clean,” she says.
Conclusion
Painting your tile backsplash can be a budget-friendly and easy way to update your kitchen or bathroom. By following our DIY tutorial, you can achieve a custom look that complements your personal style. While there are a few cons to consider, with the proper preparation and techniques, a painted backsplash can be a durable and long-lasting update to any space. Remember to test paint colors and techniques on a small section of tile before committing to the entire project, and don’t be afraid to seek advice from professionals. With a little patience and creativity, your painted tile backsplash can be a successful and rewarding DIY project that transforms your space.


