Introduction
Is your iPhone battery draining quickly? If so, you’re not alone. Many iPhone users experience this common problem, and there are various solutions available to combat it. The best solution, however, is to replace your iPhone’s battery. In this article, we will explore why replacing your iPhone battery is the best option for you and provide a step-by-step guide on how to DIY it.
Why DIY Your iPhone Battery Replacement?
DIYing your iPhone battery replacement is a viable option for several reasons. Firstly, it saves you money. You can save yourself up to $100 by replacing the battery yourself. Secondly, it is convenient. You can replace your iPhone battery from the comfort of your home and at your own time. Finally, it is a crucial skill to have as an iPhone user. You never know when your iPhone battery may need replacement, and being equipped with the necessary skills can save you on time and costs.
If you decide to take your iPhone to an Apple store, be aware that it may cost you between $49 and $69 to replace the battery, depending on the model. Additionally, you may be without your phone for a few days, as Apple technicians will have to replace the battery for you. With DIY, the battery can be replaced within an hour.
When choosing the best replacement battery, it’s advisable to pick one from authorized dealers or reputable retailers. Cheap replacements may not offer the same performance or warranties.
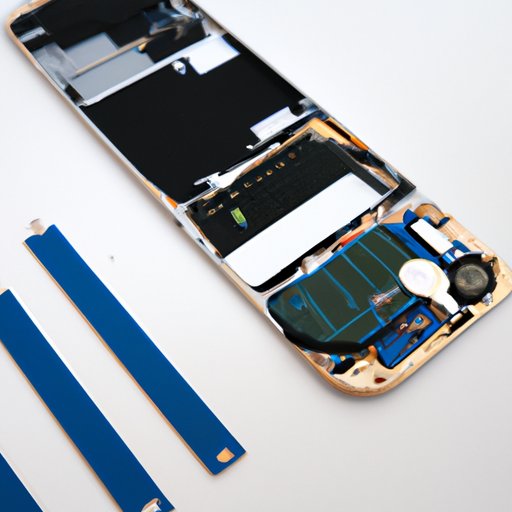
The Equipment You Will Need
Before you start, ensure that you have all the necessary equipment to replace your iPhone battery. Here are the tools you will need:
- Pentalobe screwdriver
- Phillips head screwdriver
- Plastic opening tool
- Suction cup
- Spatula or tweezers
- New replacement battery
The Pentalobe screwdriver will help you to open the iPhone’s casing, while the Phillips head screwdriver will help you remove the battery. The plastic opening tool helps to disconnect the components without causing any damage. The suction cup and spatula or tweezers will help you lift the battery without scratching it. Finally, make sure you get a new replacement battery for your iPhone.
Five Simple Steps to Replace the Battery on Your iPhone: A Quick Guide
Step 1: Power Off the iPhone and Remove Components
Start by turning off your iPhone. Use the Pentalobe screwdriver to remove the two screws at the bottom of the phone. Once removed, gently lift the screen with the suction cup. Use the plastic opening tool to loosen the screen. Then, remove the display assembly and the battery connector shield with the Phillips head screwdriver.
Step 2: Install New Battery
Using the spatula or tweezers, gently lift the battery up and out of the phone. Replace the old battery with the new replacement battery. Align the connectors and adhere it to the phone using adhesive stickers.
Step 3: Reassemble the Phone
Reinstall the battery connector shield, then reattach the display assembly. Apply pressure on the corners to ensure that the adhesive sticks. Reinstall the two screws at the bottom of the phone.
Step 4: Turn On the iPhone
Turn your iPhone back on. If the battery drains quickly, check to ensure that all the connectors are tight.
Step 5: Calibrate Your Battery
Fully charge the phone. Then, let it drain until it shuts off. Charge it again, till it reaches 100% and do not unplug it for at least 2 more hours. This will calibrate the battery and ensure it can hold charge for a longer period of time.
The Ultimate Guide to Replacing Your iPhone Battery at Home
If the above steps seem a little daunting, here is a complete guide:
- Remove the two screws at the bottom of the phone using the Pentalobe screwdriver.
- Use a suction cup to lift the screen.
- Use a plastic opening tool to loosen the screen.
- Remove the display assembly and the battery connector shield with the Phillips head screwdriver.
- Gently lift the battery up and out of the phone with the spatula or tweezers.
- Unscrew the two screws holding the battery connectors down.
- Remove the battery.
- Replace the old battery with the new replacement battery.
- Align the connectors and adhere it to the phone using adhesive stickers.
- Reinstall the battery connector shield.
- Reattach the display assembly.
- Apply pressure on the corners to ensure that the adhesive sticks.
- Reinstall the two screws at the bottom of the phone.
- Turn your iPhone back on.
- Calibrate the battery as described above.
If you experience any issues or errors, check that all the connectors are tight and try again. Alternatively, reach out to Apple support for assistance.
Troubleshooting Your iPhone Battery: How to Replace It and Save Money
Overheating, swelling, and a quickly draining battery are common signs that your iPhone battery needs replacement. It’s advisable to conduct a diagnostic test before getting a replacement battery. This is because some issues may be non-battery related, such as software updates, which can cause the battery to drain quickly.
If you still experience problems with the battery after running the diagnostic test, then it’s time to replace it. As discussed above, DIYing your iPhone battery replacement is the best option and offers several benefits.
If for some reason, you are unable to replace the battery yourself, there are several alternate ways including getting a friend to assist, visiting a local repair shop or repair kiosk at a mall, or shipping the phone to authorized repair shops. Be sure that you entrust your phone to credible individuals or companies, and that you have a backup of your data before doing so.
Replace Your iPhone Battery in Under an Hour: Here’s How
DIYing your iPhone battery replacement can save you on costs, time and gain you valuable technical skills. It’s possible to replace the iPhone battery in under an hour using the steps highlighted above. The convenience of DIYing your iPhone battery replacement has never been more accessible and offers real value to iPhone users.
Furthermore, taking control of your own iPhone’s maintenance will lead to a better understanding of the technology and thus, better functional optimisation. You can also ensure that no unnecessary features or settings are activated, thus saving you even more battery life.
Is Your iPhone Battery Dying? Here’s How to Replace It Yourself
A dying iPhone battery can negatively impact your ability to stay connected with the world. It leads to constant charging and frustration. It’s essential to replace the battery to ensure that your iPhone can perform optimally, without constantly draining. DIYing the replacement is easy, and after following the steps above, you can have a new battery in your phone in no time.
Conclusion: Why Pay Someone Else? Learn How to Replace Your iPhone Battery
As an iPhone user, a dying battery is a common problem. You can fix it yourself and save time and costs. DIYing your iPhone battery replacement is simple, convenient, and offers several benefits. By following the steps outlined above, you can replace your iPhone battery in under an hour.
Take control of your iPhone maintenance and gain valuable DIY skills. Be sure to choose the best replacement battery and conduct a diagnostic test to troubleshoot any issues. If you’re not able to replace the battery yourself, seek options for assistance, but remember, DIY is always the better way to go.


