How to Adjust Your Rainbird Sprinkler Head: A Comprehensive Guide
Having a lush and healthy lawn requires proper and timely watering. That’s where sprinkler systems come into play, and specifically, Rainbird sprinkler heads are a popular choice for their durability and versatility. However, to get the most out of your sprinkler system, you’ll need to know how to adjust your Rainbird sprinkler head. A poorly-performing or unadjusted sprinkler system can lead to water waste and unsightly lawn patches. In this guide, we’ll provide you with a step-by-step guide to adjusting your Rainbird sprinkler head, fixing common problems, maintaining the system, and choosing a Rainbird sprinkler head that matches your needs.
Step-by-Step Guide to Adjusting Your Rainbird Sprinkler Head
Here is a step-by-step guidance of how to adjust your Rainbird sprinkler head:
Step 1: Understand Your Sprinkler Head and Its Adjustment Options
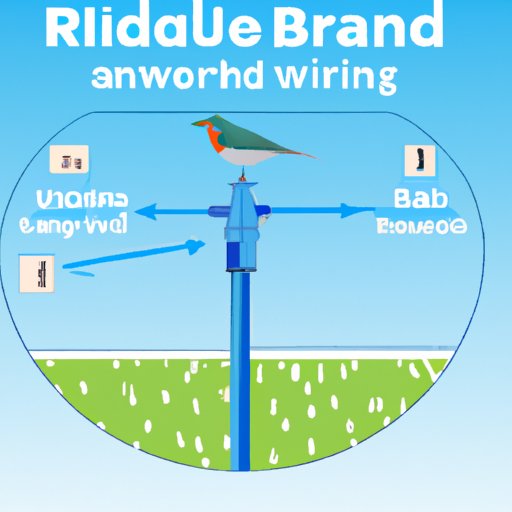
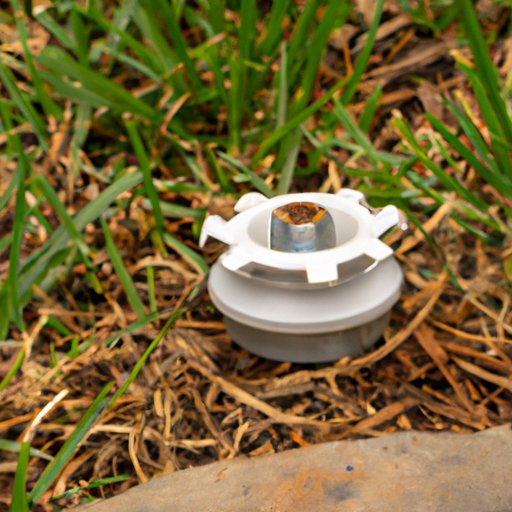
Before you start adjusting your sprinkler head, you need to understand its components and know what adjustments are possible. Some of the common components are the nozzle, arc adjustment screw, radius adjustment screw, and distance control valve.
Step 2: Making Adjustments to the Arc and Radius
The arc and radius controls determine the sprinkler head’s coverage area and the angle of distribution. Adjusting the arc screw controls the direction of the water, whether it sprays 360 degrees or any other partial segment. Similarly, you can adjust the radius screw to fine-tune the distance of the water throw. Start by identifying the right settings for the arc and radius and then adjust them gradually.
Step 3: Fine-tuning the Distance and Flow Rate
Using the distance control valve, you can control the distance of the water spray further. Turn the valve clockwise or counterclockwise to control the distance, but always do it slowly. Also, you can fine-tune the flow rate of water using the pressure regulator, which keeps the water pressure steady and balanced. Adjusting the pressure regulator keeps the nozzle operating at a consistent flow rate, so it’s critical to tune it accurately.
Step 4: Testing and Monitoring Your Adjustments
Once you’ve adjusted your Rainbird sprinkler head, it’s crucial to test and monitor its performance. Run the sprinkler system through a full cycle and observe if there are unevenly-watered areas. If you notice any patchy areas, you’ll need to repeat the process and fine-tune the system until you get it right.
While making adjustments, remember that a little goes a long way, so avoid making drastic changes at once.
Common Problems with Rainbird Sprinkler Heads and How to Fix Them
Even with the best maintenance practices, you might encounter issues with your Rainbird sprinkler head over time. Here are some of the common problems and their solutions:
Problem 1: Clogged Nozzles
Clogged sprinkler nozzles can affect the water pressure and the distance the water travels. Inspect the nozzle regularly and, if clogged, clean it with vinegar and a fine wire. Be careful not to damage the nozzle during cleaning.
Problem 2: Uneven Coverage
If you notice that some areas receive more water than others, it might be due to a misaligned nozzle or a poorly adjusted arc or radius. Adjust the nozzle for a full 360-degree rotation until the water coverage is even across your lawn.
Problem 3: Leaks or Water Seepage
If you notice water seeping around the sprinkler head, check for damaged or cracked parts. Replace any leaky or damaged parts and test the system. It’s also critical to ensure that the sprinkler head is firmly connected to the riser or the pipe.
Problem 4: Broken Gears or Parts
Broken gears or other components might require replacement, which can be done by following the manufacturer’s instructions. Some parts, such as nozzles and valves, are relatively easy to replace, but others such as gears, might require specialized tools and expertise.
The Benefits of Properly Adjusted Sprinkler Heads
Properly adjusted sprinkler heads offer several benefits, including reducing water waste, saving money, and promoting plant growth. A well-maintained and calibrated system ensures that every part of your lawn gets the right amount of water and prevents excess runoff. According to EPA reports, calibrated sprinkler systems can save you up to 30% on your water bill and can reduce water waste by 25%.
Furthermore, plants that get the right amount of water grow healthier, have deeper roots, and are more resistant to pests and diseases. Properly watered lawns also help to reduce soil erosion, stormwater runoff, and water-borne diseases.
Secrets to Maintaining Your Rainbird Sprinkler Head
Maintaining your sprinkling system is critical to ensuring it performs optimally at all times. Here are some of the essential maintenance practices:
Regular Cleaning and Inspection Schedules
Inspect your system regularly and clean it of dirt, debris, and foliage. Dirt and debris can cause blockages and impede water flow, while lawn materials can cause damage to the system.
Lubrication and Replacement of Worn Parts
Lubricating your sprinkler head keeps the gears and bearings moving smoothly and extends the lifespan of the system. Check every six months for damaged or worn parts such as the nozzle and valves, and replace them as soon as possible.
Proper Storage During Winter Months
Before winter sets in, turn off the water supply to your sprinkler system, turn the system on to blow out remaining water, and seal the system’s mainline.In the spring, flush out and recharge the system. Failing to winterize the sprinkler system exposes the system to the risk of cracking and damage when water freezes inside the pipes.
Choosing the Right Rainbird Sprinkler Head for Your Needs
Choosing a Rainbird sprinkler head that matches your needs is essential to ensuring the best watering results for your lawn. Here are some of the factors to consider when choosing a Rainbird sprinkler head:
- Coverage area: what is the size of your lawn?
- Square footage: what is the square footage of your lawn area?
- Water pressure: what is the water pressure in your sprinkler system?
- Special Features: does the sprinkler head come with any special features?
After considering these factors, review the different Rainbird sprinkler heads and their benefits to select one that meets your needs.
Rainbird vs. Other Sprinkler Head Brands
Rainbird is a popular and durable sprinkler head brand that’s often compared to other brands such as Hunter and Toro. While most sprinkler head brands offer similar features, what sets Rainbird apart are its excellent customer reviews, brand reputation, and product reliability. Additionally, Rainbird offers extended warranties for specific product lines and promises excellent after-sale customer support.
Conclusion
Adjusting and maintaining your Rainbird sprinkler head is an essential part of ensuring a vibrant and healthy lawn all-year-round. This guide has equipped you with the right knowledge to adjust and troubleshoot your sprinkler head effectively. Remember, when choosing a sprinkler head, consider the coverage area, square footage, water pressure, and special features that the sprinkler head offers. We trust that this guide has been resourceful in keeping your lawn lush and healthy, saving you money, and promoting smart water usage.


