I. Introduction
If you’re looking for a quick and easy way to elevate your makeup routine, applying bronzer is a great place to start. Bronzer can lend a pop of color, contour your features, and give your skin a beautiful warmth and glow. However, knowing how to apply bronzer correctly can be tricky, leaving many people looking more like an Oompa Loompa than a sun-kissed goddess. In this article, we’ll provide a step-by-step guide to applying bronzer like a pro, exploring tools of the trade, contouring techniques, tips for choosing the right bronzer, and everyday looks you can achieve with this amazing beauty product.
If you’re like most people, you’ve probably experienced some frustration when it comes to applying bronzer. Whether you’ve ended up with a stripe of dark color across your cheekbones or simply can’t get the bronzer to blend evenly, bronzer application can be frustrating. But don’t worry – with a little bit of practice and some insider tips, you’ll be a bronzer pro in no time.
II. Step-by-Step Guide
Before we dive into the details of how to apply bronzer, it’s important to start with prepping your skin. Begin by washing your face and applying a moisturizer to keep your skin hydrated. Once your moisturizer has absorbed, you can start applying your makeup. Remember, the key to successful bronzer application is to start with a light touch and build up the color gradually.
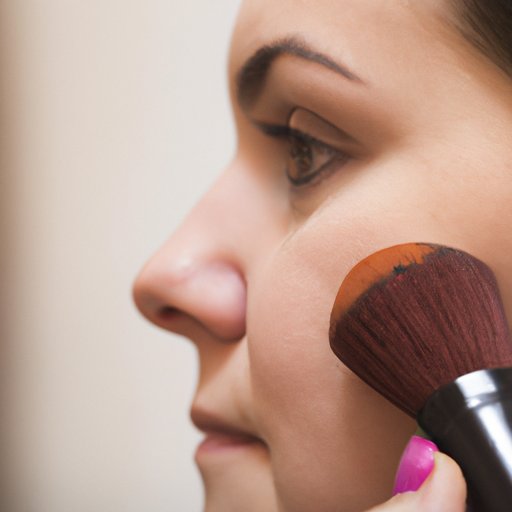
Next, grab your favorite bronzer and a large, fluffy brush. Tap the brush into the bronzer, then tap off any excess. Start by applying the bronzer to your cheeks, sweeping the brush lightly from the apples of your cheeks to your temples. Be sure to blend the bronzer so that it looks natural and not too harsh. If you want a more defined look, you can also apply bronzer to your jawline, the sides of your nose, and your forehead.
It’s important to remember that less is more when it comes to bronzer. Start with a small amount of product, and gradually build up the color until you achieve the desired look. Blending is key, so be sure to blend your bronzer until it looks seamless with the rest of your makeup.
III. Tools of the Trade
Using the right tools is essential for achieving a flawless bronzer application. While you can use your fingers or a sponge to apply bronzer, it’s best to use a large, fluffy brush. A brush will help you to achieve a more even application, while also allowing you to build up the color gradually.
There are many different types of brushes that can be used for applying bronzer, including angled brushes, tapered brushes, and domed brushes. When selecting a brush, consider the size and shape of your face. A larger brush will work well for people with larger faces, while a smaller brush may be better for those with more petite features.
IV. Contouring Techniques
Contouring is a technique that involves applying darker makeup to certain areas of the face to create the illusion of shadows. Bronzer can be a great tool for contouring, and it’s particularly effective for creating a natural, sun-kissed look. To contour with bronzer, apply it to the hollows of your cheeks, the sides of your nose, and the top of your forehead, using a smaller, more precise brush.
It’s important to remember that contouring with bronzer is different than contouring with other products, such as contouring sticks or powders. While other products may be more pigmented and require a lighter hand, bronzer is a more subtle product that should be built up gradually.
V. Choosing the Right Bronzer
Choosing the right bronzer for your skin tone and complexion is essential for achieving a natural, flattering look. When selecting a bronzer, consider your skin tone and undertones. Cool skin tones look best with bronzers that have cooler undertones, while warmer skin tones look best with bronzers that have warmer undertones.
There are many different types of bronzers available in the market, including powders, creams, and sprays. Powders are usually the most popular choice, as they’re easy to apply and blend. If you’re new to bronzer, a powder bronzer is probably your best bet.
VI. Everyday Looks
If you’re looking for a natural, everyday look, applying bronzer can be a great way to achieve a subtle glow. To achieve this look, simply apply bronzer to the apples of your cheeks and blend it upwards towards your temples. You can also apply a small amount of bronzer to your chin, forehead, and the bridge of your nose for a more even, sun-kissed look.
If you want a more dramatic look, you can apply a little bit of bronzer to your collarbones and shoulders to create a subtle contour.
VII. Do’s and Don’ts
When it comes to applying bronzer, there are a few common mistakes that people make. One of the biggest mistakes is applying too much bronzer, which can leave you looking orange or muddy. Another mistake is not blending your bronzer properly, which can make it look harsh and unnatural.
To avoid these mistakes, start with a small amount of bronzer and gradually build up the color until you achieve your desired look. Be sure to blend your bronzer using a large, fluffy brush for a seamless finish. If you do make a mistake, you can fix it by blending it out with a clean brush or using a makeup wipe to remove any excess product.
VIII. Conclusion
Applying bronzer may seem intimidating, but with a little bit of practice and some helpful tips, you can achieve a flawless, beautiful look. Be sure to start with a light touch, blend your bronzer seamlessly, and choose the right bronzer for your skin tone and complexion. With these tips in mind, you’ll be a bronzer pro in no time!
Try these techniques and tips while applying bronzer to transform your look and enhance your natural beauty.


