Introduction
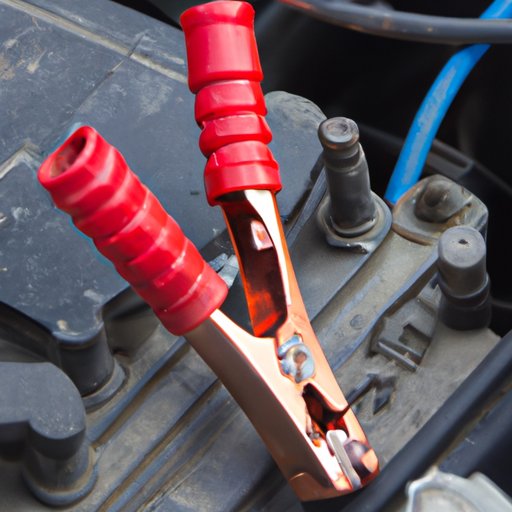
Knowing how to attach jumper cables is an essential skill for any car owner. It can be chaotic and stressful when you need to jumpstart your car, so it’s important to be prepared and confident in your abilities. This article’s purpose is to provide you with a step-by-step guide for safely and effectively attaching jumper cables to jumpstart your car. Whether you are a seasoned driver or just starting out, this guide is for you.
Step-by-Step Guide
Before attaching jumper cables, make sure both cars are turned off and parked next to each other. It’s also important to ensure that the jumper cables are long enough to reach both batteries.

Next, follow these steps:
- Open the hood of both cars
- Locate the battery in each vehicle
- Identify the positive and negative terminals of each battery
- Attach one end of the red jumper cable to the positive terminal of the dead battery
- Attach the other end of the red cable to the positive terminal of the working battery
- Attach one end of the black jumper cable to the negative terminal of the working battery
- Attach the other end of the black cable to an unpainted metal surface on the engine block of the stalled vehicle, away from the battery and the fuel system
- Start the working vehicle and wait for a few minutes
- Try to start the stalled vehicle. If it doesn’t start, let it charge for five more minutes before attempting to start it again
- When the stalled vehicle starts, let it run for a few more minutes before disconnecting the jumper cables
- Remove the cables in the reverse order you attached them: first, remove the black cable from the stalling vehicle’s engine block, then remove the black cable from the working battery’s negative terminal, followed by the red cable from the working battery’s positive terminal, and finally remove the red cable from the stalling vehicle’s positive terminal
The illustrations below can help clarify each of these steps.

Avoiding Mistakes
When attaching jumper cables, it’s essential to know the common mistakes you may make and the potential dangers that can arise from these mistakes. Listed below are some likely mistakes:
- Attaching the cables to the wrong terminals
- Not using the correct gauge of jumper cables
- Not ensuring a proper connection between the cables and the battery terminals
- Touching the cables together or allowing them to touch when attached to a battery
Incorrectly attaching cables can cause serious damage to the car’s electrical system, including blowing fuses or damaging the alternator.
Tips and Tricks
Here are some tips and tricks for a quicker and more effective process of attaching jumper cables:
- Consider purchasing a portable battery jump starter kit, which can be a helpful alternative to jump-starting with jumper cables
- Keep your jumper cables in your car at all times
- Take a photo of the battery to remember the positive and negative terminal locations, especially if you don’t use them often
- Invest in good-quality jumper cables with a thicker gauge and solid clamps for a secure connection
Dead Batteries
It’s important to know how to safely deal with dead batteries. Here are some things to keep in mind:
- Dead batteries can emit explosive gases, so keep any flames, sparks, or cigarettes away from the battery
- Be aware that different types of batteries may have different post configurations or charging requirements, so make sure you consult your owner’s manual for your car’s specific instructions
- Always wear gloves and safety glasses to protect yourself from battery acid and other potentially harmful chemicals
- If the battery is corroded, be especially careful when handling it. Corrosion can cause acid to leak from the battery
When to Call for Professional Help
While attaching jumper cables is a simple process, if you are unsure about any of the steps, or if you notice signs of damage on the battery or cables, it’s best to call for professional help. Similarly, call for help if you see any physical damage to the battery, like cracks or leaks, to avoid the risk of injury or damage to your car. If you are in a busy area or there are people nearby, alert them to the situation, and ask for help if you need it. Remember that safety should always be a top priority.
Safety Guidelines
To ensure a safe experience when attaching jumper cables, keep the following safety tips in mind:
- Do not smoke while working with batteries
- Avoid wearing loose clothing, jewelry, or any other items that may catch on the battery terminals
- Make sure the cables are not touching each other while they are connected to a battery
- Never allow any part of the jumper cable to come into contact with any moving parts of the engine
- When you are finished, dispose of the old battery safely, preferably by placing it in a recycling center or giving it to a specialist to dispose of it
Conclusion
As a driver, knowing how to attach jumper cables can make a huge difference in a difficult situation. A dead battery can happen to any of us, and it’s important to be prepared. By following these simple steps, you can jumpstart your car in no time. Remember, safety is essential when working with any electrical system or a vehicle from any potential hazards.
If you have any additional questions or concerns about attaching jumper cables, reach out for professional help. Whether you are a seasoned driver or a new driver, it’s essential to know how to do this basic car maintenance task properly to avoid potential harm to you or your vehicle.


