Backing up Your MacBook: Everything You Need to Know
MacBooks have become the go-to laptop for many users, thanks to their sleek design, user-friendly interface, and reliable performance. However, while they may be known for their reliability, MacBooks are not invincible. In the event of a hard drive failure, theft, or accidental damage, your precious data could be lost forever if you don’t have a backup plan in place.
Backing up your MacBook might seem like an arduous task, but it’s an essential one. In this article, we’ll explore why backing up your MacBook is so crucial, the best backup methods for MacBook users, and the do’s and don’ts of MacBook backup. We’ll also provide a step-by-step guide to backing up your MacBook and list the seven best tools and software for MacBook backup. So, let’s jump right in!
Why Backing Up Your MacBook Is Crucial and How to Do It Right
Data backup is crucial for anyone using a computer, but it’s especially important for MacBook users. With all your personal and work-related files, photos, videos, and other data stored on your laptop, you don’t want to risk losing everything in the event of a hardware failure or other disaster. Backing up your MacBook ensures that you can recover your important files if something goes wrong.
But what happens if you don’t back up your MacBook? The consequences can be serious. If your MacBook is stolen, lost, or damaged, you risk losing all your valuable data. Additionally, if a hard drive fails, you may not be able to recover any data stored on it. Without a backup, you’ll be forced to start from scratch and recreate all the data you lost.
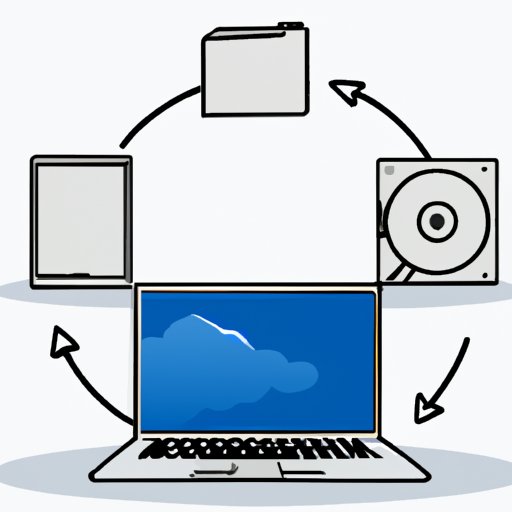
The good news is, backing up your MacBook is relatively easy and can be done in a variety of ways. Here’s a brief overview of the best backup methods for MacBook users:
5 Ways to Back Up Your MacBook: The Ultimate Guide
When it comes to backing up your MacBook, there are plenty of options available. Here are five different backup methods, along with their pros and cons:
1. Time Machine
Time Machine is Apple’s built-in backup software for macOS. It’s a simple, automatic backup solution that’s best for users who want a seamless backup experience without having to think too much about it.
Pros: Time Machine automatically backs up your data on an hourly, daily, and weekly basis, so you don’t have to worry about remembering to do it. You can also easily restore files using Time Machine if you accidentally delete something or need to recover a previous version.
Cons: Time Machine requires an external hard drive, which means you’ll need to purchase one if you don’t already have one. It’s also not the fastest backup solution out there, so it may take a while to complete the initial backup.
2. Cloud storage services
Cloud storage services such as iCloud, Google Drive, Dropbox, and OneDrive offer another way to back up your MacBook. With cloud storage, your data is stored on remote servers owned by the service provider.
Pros: Cloud storage services are convenient because you can access your files from anywhere with an internet connection. They are also highly scalable, so you can easily add more storage space as your needs grow.
Cons: Using a cloud storage service for backup can be costly over time, especially if you require a lot of storage space. You’ll also need a fast and stable internet connection to upload and access your files, which can be a problem if you’re in an area with poor connectivity.
3. External hard drives
External hard drives are an affordable and reliable way to back up your MacBook. With an external hard drive, you can easily copy all your data from your laptop to an external storage device.
Pros: External hard drives are relatively inexpensive and offer high storage capacity. They are also easy to use and can be disconnected and stored in a secure location when not in use.
Cons: External hard drives can be bulky and not very portable, especially if you have a large amount of data to back up. They can also fail unexpectedly, so it’s essential to check and replace them regularly.
4. Disk cloning software
Cloning your MacBook’s hard drive is another way to create a backup. Disk cloning software creates an exact copy of your hard drive on an external storage device.
Pros: Disk cloning is a quick backup solution that creates an exact replica of your hard drive, making it easy to restore all your data if necessary. It’s also a good way to migrate your data to a new MacBook.
Cons: Disk cloning can be time-consuming, especially if you have a large amount of data to back up. It also requires an external hard drive with plenty of storage space, which can be expensive.
5. Network-attached storage (NAS)
Network-attached storage (NAS) is a storage device that connects to your home or office network, allowing you to back up your MacBook wirelessly.
Pros: NAS is an easy-to-use and highly scalable solution that can be accessed by multiple users simultaneously. You can also set up NAS to automatically back up your data at regular intervals.
Cons: NAS can be expensive, especially if you require a large amount of storage space. It also requires a reliable and fast network connection, which may be a problem if you have a poor internet connection.
The Do’s and Don’ts of MacBook Backup
Now that you know the best backup methods for MacBook users, it’s important to follow certain do’s and don’ts to ensure your data stays safe. Here are some tips for effective backup practices:
The Do’s:
- Back up your data regularly: Make it a habit to back up your MacBook at least once a week to ensure all your new data is saved.
- Test your backups: Always check that your backups are working correctly by restoring a file or two to ensure that they are restoring correctly.
- Keep at least one backup offsite: Having an offsite backup is essential in case of fire, natural disasters, or theft. Keep a copy of your data in a secure location, such as a trusted family member’s or friend’s house.
The Don’ts:
- Don’t store backups in the same location as your MacBook: If something happens to your MacBook, such as theft or a natural disaster, your backups are likely to be lost as well.
- Don’t forget to encrypt your backups: Your backup contains sensitive data like your personal and financial information. Always ensure that your backups are encrypted to prevent unauthorized access.
- Don’t rely on just one backup method: Using a single backup method is risky and not reliable. Use a combination of backup methods to ensure data safety.
Step-by-Step Guide: How to Back Up Your MacBook in 3 Easy Ways
Now that you know the best backup methods for MacBook users and the do’s and don’ts of backup practices, it’s time to dive into a step-by-step guide to backing up your MacBook. Here are three different methods that you can use:
1. Using Time Machine
- Connect your external hard drive to your MacBook.
- Go to System Preferences and click on Time Machine.
- Click on Select Backup Disk and choose your external hard drive.
- Click on Backup Automatically and Time Machine will start backing up your data to your external hard drive.
2. Backing up to the cloud
- Choose your cloud storage service provider and sign up for an account.
- Download the cloud storage app to your MacBook.
- Drag and drop your files to the cloud storage app.
- Configure your settings to back up your data automatically to the cloud storage service.
3. Using an external hard drive
- Connect your external hard drive to your MacBook.
- Launch Finder and select your external hard drive from the sidebar.
- Drag and drop the files you want to back up onto your external hard drive.
7 Tools You Need to Know for MacBook Data Backup
There are plenty of tools and software available to help you with MacBook data backup. Here are the seven best tools and software for MacBook backup:
- Time Machine: Apple’s built-in backup software for macOS.
- Carbon Copy Cloner: A disk cloning software that creates an exact copy of your hard drive.
- SuperDuper!: A backup utility that lets you create bootable clones of your hard drive.
- iCloud: Apple’s cloud storage service, which offers automatic backups and syncing of data between all your Apple devices.
- Dropbox: One of the most popular cloud storage services that offers a variety of features, including automatic backup and file sharing.
- Google Drive: Google’s cloud storage service that offers a generous amount of free storage and integrates with Google’s suite of office applications.
- Backblaze: A cloud backup service that automatically backs up all your data, including external hard drives, for a flat monthly fee.
Best Practices for Safeguarding Your MacBook Data in the Cloud
Using cloud storage services for backup can be a great way to keep your data safe, but there are some best practices that you should follow to ensure your data stays secure. Here are some tips:
- Choose a reputable cloud storage service provider that offers two-factor authentication and encryption.
- Encrypt your own data before uploading it to the cloud.
- Regularly monitor your account for any suspicious activity.
- Enable automatic backups with your cloud storage provider, but also create other backups along with cloud storage.
Conclusion
Backing up your MacBook might seem like a daunting task, but it’s crucial to ensure the safety of your data. By following the best backup methods and practices outlined here, you’ll be able to store your data safely and recover it quickly in the event of a disaster. Remember, always have multiple backups, keep one offsite, and test your backups regularly. With these tips and tricks, you can be confident that your MacBook data is safe and secure.


