I. Introduction
Balayage hair is a popular hair coloring technique that provides beautiful, natural-looking highlights. It’s no surprise that many women have fallen in love with this style. In this article, we will teach you how to execute the perfect balayage at home, without breaking the bank. We will cover everything from the necessary tools and products to placement techniques for different hair types.
II. Step-by-Step Guide
1. Prep your hair for the process
If you’re looking to achieve beautiful balayage hair, preparation is key. Start by washing your hair with a clarifying shampoo to remove any buildup and create a clean slate. After washing, towel dry hair until it’s around 80% dry. Leave the remaining 20% damp to help with the application process.
2. Section your hair
Sectioning your hair will help you stay organized and ensure that every strand of hair is colored evenly. Begin by parting your hair down the middle to create two sections. Then, take each section and divide them down the middle again, creating four sections in total. Make sure to secure each section with a hair clip or tie.
3. Applying the products
When it comes to balayage, you have a variety of products to choose from. If you’re a beginner, we recommend starting with a lightening kit to keep it simple. You can also purchase balayage-specific products that make it easier to achieve the look. Start applying the product on each section, starting at the mid-section of the hair and moving towards the ends. Use a dye brush to fan and blend the lightener, creating a soft diffusion between the light and dark shades. Finally, cover up the hair with a plastic wrap.
4. Developing the color
Now that the products are applied, sit back and relax for 45 minutes to let the color develop. If you prefer a light balayage, waiting for 35-40 minutes should be enough. Check the progress every 5-10 minutes.
5. Rinse and condition
After the waiting period is over, rinse your hair thoroughly and apply the appropriate conditioner. This is a crucial step that will lock the color and maintain the health of your hair. Leave the conditioner on for 2-5 minutes before washing.
III. Tools and Products
1. Essential in-home products readers need
- Clarifying shampoo
- Hair clips or ties
- Dye brush
- Lightening kit (optional)
- Conditioner
2. Recommended balayage-specific products
- Balayage hair lightener
- Balayage hair coloring brush
- Foam board or business card
- Non-metallic mixing bowl
- Plastic wrap
3. Necessary tools for proper application
To create a seamless balayage, you must have the right tools. Using a professional dye brush and blending board or business card will help you get a gentle gradient effect. A non-metallic mixing bowl is also necessary since metal reacts with lightener, and could lead to hair damage.
IV. Different Hair Types
1. Tips for achieving beautiful balayage on thin, thick, curly, and straight hair
Balayage is a versatile coloring technique that works on different hair types. For thick and curly hair, you need to keep the hair sections thinner, so the lightener can penetrate effectively. Start with thicker sections for thin and straight hair. For the best results, choose lighter shades, especially if your hair is naturally darker. Also, keep in mind that balayage is a method that suits almost all hair length and texture combinations so that you can experiment and enjoy your balayage to the fullest.
2. Examples and visuals for reference
When it comes to balayage, finding inspiration is key. Pinterest, Instagram, YouTube, and other social media platforms are great resources for visual references. You can also consult with a hairstylist or an expert in the field if you’re looking for more ideas.
V. The Right Placement
1. Importance of proper placement of balayage
Proper placement is the key to achieving natural and beautiful balayage. It creates a customized effect that is unique to your hair type, texture, and tone. Proper-placement also enhances your facial features, making balayage one of the most flattering hair coloring options.
2. Examples of good and bad placements
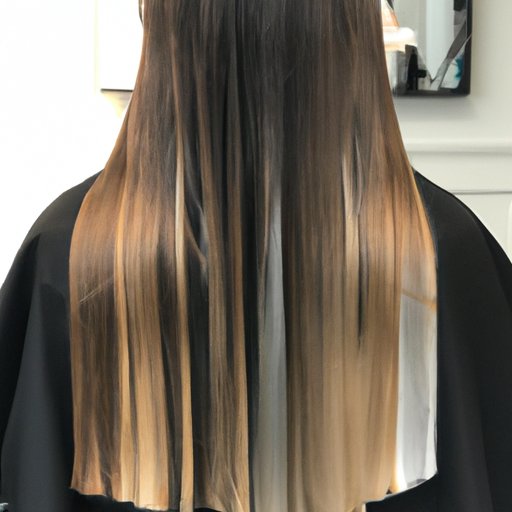
Good placement means keeping the lightness around the face and towards the ends while leaving the darkness at the roots. It creates a natural, sun-kissed look that complements your features. Bad placement means lightening random strands of hair that might not match in color or specific areas in the hair, making it look unnatural and streaky.
3. Techniques and tips for achieving natural and beautiful looks
The best techniques for achieving natural and beautiful balayage is to use a light hand and avoid coloring the same strands. Also, blend and transition your bristles while creating different saturation points that help achieve a soft, diffused look. Start in the areas where the hair naturally gets lighter or try an angled application that starts on one side of the hair and transitions to the other.
VI. DIY Balayage vs. Professional Balayage
1. Comparison between DIY and professional service
DIY balayage is a cost-effective option if you’re on a budget or want to try out the style before committing to it. However, for more complicated looks or for the best results, it’s always best to use a professional service. Professional hairstylists can tailor the balayage to match your hair type, budget, lifestyle, and preferences. You’ll get a beautiful and perfectly styled look that’s unique to you.
2. Pros and cons of each option
DIY balayage is cheaper and perfect for simple techniques. Professional service is more expensive, but it offers a more comprehensive approach with a perfect outcome. Choose the right option depending on your budget, capabilities, expectations, and preferences.
3. Tips for choosing the right option for yourself
If you’re on a tight budget and have experience in coloring your hair, DIY balayage might be the perfect choice. If you’re looking for more complex techniques or to achieve a specific look, it’s best to schedule an appointment with a professional. When looking for a hairstylist, make sure you find one with experience in balayage, ask for recommendations, and check their credentials.
VII. Conclusion
As you can see from this step-by-step guide, achieving beautiful balayage hair is possible with the right tools, products, and techniques. Balayage is a style that complements almost all hair types and textures, and it radiates natural looking highlights that can flatter any face. Whether you choose to try the DIY method at home or leave it to the experts, the results of balayage will take your breath away.
So go ahead and show off your new hairstyle.


