Introduction
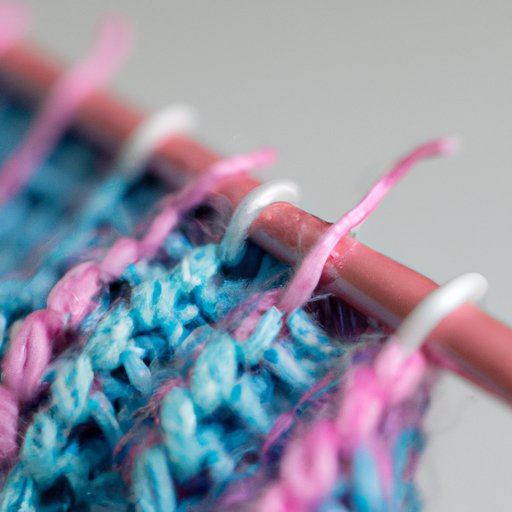
If you’re a knitter, you know that binding off is the final step in a project and one of the most important. A good bind-off creates a neat and polished edge, ensuring that your project looks professional and is functional.
In this article, we’ll cover five different techniques for binding off your knitting, including the standard method as well as some stretchy, decorative, and seamless options. Whether you’re a beginner or an advanced knitter, you’re sure to find a technique that works for you.
Standard Bind-Off
The standard or basic bind-off is the most common and simple method for finishing off your knitting project. It creates a firm, straight edge that’s suitable for most types of projects.
To perform a standard bind-off:
- Knit the first two stitches of your row, then insert your left needle into the first stitch you knit.
- Bring that stitch over the second stitch and completely off the right needle. You should now have one stitch on your right needle.
- Knit the next stitch, then repeat steps 1 and 2 until you’ve bound off all stitches.
- Once you’ve bound off the last stitch, cut your yarn leaving a tail long enough to weave in.
When binding off, it’s important to make sure that your edge isn’t too tight. To achieve an even edge, you can try using a larger needle to bind off or using a stretchy bind-off technique instead.
Stretchy Bind-Offs
Stretchy bind-offs are perfect for projects that require more give, such as socks, mittens, or hats. They ensure a comfortable edge that won’t feel too tight or restrictive.
There are many different types of stretchy bind-offs, but two popular ones are the Russian bind-off and Jenni’s Surprisingly Stretchy Bind-Off (JSSBO).
To work a Russian bind-off:
- Knit the first two stitches together through the back loop.
- Insert your left needle into the new stitch on the right needle and knit it together with the next stitch.
- Repeat step 2 until you’ve bound off all stitches.
Jenni’s Surprisingly Stretchy Bind-Off involves a series of knitting and purling that creates a stretchy, attractive finish. There are various modifications of the technique depending on the stitch pattern used.
(Insert photo or video of JSSBO.)
Picot Bind-Off
Picot bind-off creates a decorative edge that resembles a series of small loops or scallops. It’s perfect for giving a feminine or delicate touch to a knitting project.
To work a picot bind-off:
- Cast on two extra stitches at the beginning of your row.
- Bind off two stitches, then slip the remaining stitch from the right needle back to the left needle.
- Using the cable cast-on method, cast on two stitches.
- Repeat steps 2 and 3 until you’ve bound off all stitches.
- When you reach the end of the row, cut your yarn and weave it in as normal.
There are different variations of picot bind-off, with more or fewer stitches cast on and bound off in between each picot. Try experimenting to find the one that matches your project best.
Tubular Bind-Off
Tubular bind-off creates a seamless, almost invisible edge that’s perfect for ribbing and other designs that require a “knit one, purl one” pattern. It’s a bit more complicated and time-consuming than other techniques, but the results are worth it.
To work a tubular bind-off in 1×1 ribbing:
- Set up your work by knitting one row in the established pattern (e.g., *k1, p1*).
- Row 1: *Slip the first stitch purlwise, knit the next stitch.* Repeat from * to * to the end of the row.
- Row 2: *Slip the first stitch purlwise, purl the next stitch.* Repeat from * to * to the end of the row.
- Repeat rows 1-2 until your work is as long as you want it to be.
- Bind off the knit stitches as follows: *Insert your left needle into the first knit stitch as if to purl, slip it off the right needle but don’t drop it. Insert your left needle into the next purl stitch as if to purl and slip it onto the left needle. Now pass the knit stitch over the purl stitch and off the needle.* Repeat from * to * until all knit stitches are bound off.
- For the last stitch, cut your yarn and pull it through the loop to secure it.
To work a tubular bind-off in 2×2 ribbing, similar steps can be taken to create a more complex bind-off. Check the instructions for the pattern you’re following for this otherwise follow this video tutorial:
(Add video tutorial or photo instructions of 2×2 tubular bind-off.)
Lace Bind-Off
Binding off lace knitting can be tricky, as the pattern can easily become distorted or pulled too tight. A special lace bind-off technique can help to avoid these issues and create a beautiful, professional-looking edge.
To work a lace bind-off:
- Begin by working two yarnovers.
- Knit two stitches together through the back loop (k2tog tbl).
- Work another yarnover and k2tog tbl.
- Repeat steps 2 and 3 until all stitches have been bound off.
- Cut the yarn and weave in the end as normal.
When binding off lace, it’s important to avoid pulling or stretching the fabric too much. Work slowly and carefully and use blocking techniques to ensure that your finished project looks its best.
Conclusion
Now that you’ve learned about these five different techniques for binding off your knitting, you can experiment with each one to see which works best for your project. Remember to take your time and work carefully, and your finished piece will look both neat and polished.
If you need more help, there are many online tutorials and videos available, including those from expert knitters and craft stores. Don’t hesitate to reach out to others in the knitting community for advice or inspiration.


