I. Introduction
Shelves are the ultimate storage solution for any space. They provide a place to display and organize your favorite items, while also keeping clutter at bay. Building your own shelves from scratch can seem daunting, but with the right tools and a little bit of patience, it’s a project that anyone can tackle. This article will provide a step-by-step guide on how to build shelves, from planning to finishing touches.
A. Overview of the article
This article will provide a comprehensive guide on how to build shelves. It will discuss the materials you will need, planning your shelves, cutting and sanding wood, assembling your shelf frame, and finishing touches to make your shelves look great.
B. Importance of building shelves
Building shelves can be an incredibly useful way to organize your space, whether it’s a kitchen, bedroom, or living room. By building custom shelves, you can make the most of the space you have available and tailor them to fit your unique needs.
C. Benefits of building shelves
Building shelves will not only help you keep your space looking tidy and organized, but it will also save you money compared to buying pre-made shelves. Additionally, by building your own shelves, you have complete control over the style, height, and size of the shelves to ensure they fit perfectly in your space.
II. Materials for Building Shelves
Before you start building your shelves, it’s important to gather all the necessary materials. Here’s what you’ll need:
A. Wood
Choose wood that is sturdy and strong enough to hold the weight of your items. Pine is a popular choice and is relatively inexpensive. Hardwoods like oak or maple are also good options, but they tend to be pricier.
B. Screws
Use screws that are appropriately sized for your shelf and the wood you’re using. Consider using wood screws instead of drywall screws for added strength.
C. Drill
A power drill is necessary for making guide holes and attaching screws.
D. Measuring Tape
Measuring tape will help you measure the space where your shelves will go and ensure that your shelves are level.
E. Saw
You will need a saw to cut the wood to your desired length and width.
F. Sandpaper
Use sandpaper to smooth out rough edges and create a polished finish.
III. Planning Your Shelves
Before you start building, take the time to plan out your shelves. This will ensure that you don’t run into any surprises and that your finished product meets your needs.
A. Determine the location for your shelves
Take a look at the space where you want to put your shelves and consider how they will fit into the room. Think about the height and width of your shelves, as well as the amount of weight they will be holding.
B. Measure the space where your shelves will go
Use your measuring tape to measure the height, width, and depth of the space where your shelves will go. This will allow you to create a design that perfectly fits your space.
C. Sketch your shelf design
Use a pencil and paper to sketch out your shelf design. This can be a simple drawing that shows the width, height, and number of shelves. You can also create a more detailed design that includes measurements and specific shelf dimensions.
IV. Cutting and Sanding Wood
Once you have your design in place, it’s time to start cutting and sanding your wood.
A. Measuring and cutting wood to size
Using your measuring tape and saw, cut your wood to the correct measurements. Double-check your measurements to make sure that your shelves are all the same size.
B. Sanding wood to achieve smooth surface
Use sandpaper to smooth out rough edges and create a polished finish.
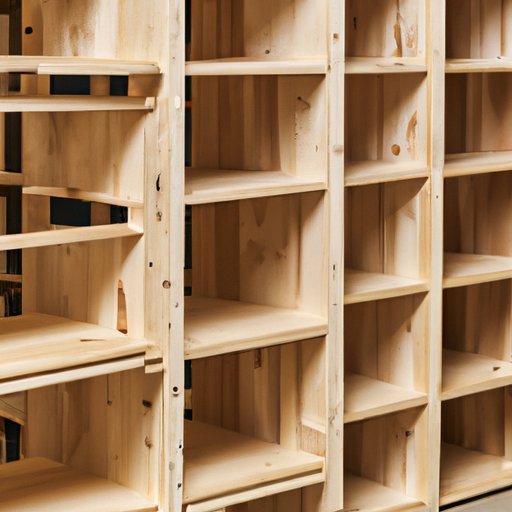
V. Assembling Your Shelf Frame
Now it’s time to assemble your shelf frame.
A. Using a drill to make guide holes in the wood
Using a power drill, make guide holes in the wood where you will be attaching screws. This will ensure that the wood does not split when you attach the screws.
B. Connecting shelf components with screws
Using wood screws, connect the individual components of your shelf frame together. Double-check that each shelf is level as you go.
C. Creating the back support for the shelves
To add extra support to your shelves, you can add a back support. This is a piece of wood that runs along the back of the shelves and is attached to the wall. It will help to distribute the weight of your items more evenly.
VI. Finishing Touches
The finishing touches will make your shelves look great.
A. Sanding rough spots on the frame
Use sandpaper to smooth out any rough spots or imperfections on the frame or shelves. This will create a polished finish.
B. Applying wood stain or paint
If you’d like to change the color or look of your shelves, you can apply a wood stain or paint. Be sure to apply it in a well-ventilated area and allow it to fully dry before using your shelves.
C. Attaching the shelves to the wall
Lastly, you will need to attach your shelves to the wall. Use a level to ensure that they are straight and use screws to secure them to the wall.
VII. Conclusion
A. Recap of the article
In conclusion, building shelves can be a fun and rewarding project. By following this step-by-step guide, you will be able to create your own custom shelves that fit perfectly in your space.
B. Encouraging readers to build their own shelves
We encourage readers to try building their own shelves. It’s a great way to add storage to your space and showcase your personal style.
C. Tips for maintaining their shelves
Lastly, to maintain your shelves, be sure to dust them regularly and avoid overloading them with heavy items. This will help to keep them in good condition for years to come.


