Introduction
Building steps might seem like a daunting task if you don’t have any previous experience. However, with the right plan, materials, and techniques, building steps is a practical and fulfilling DIY project. In this article, we will guide you through the necessary steps you can take to build your own steps successfully and cost-effectively.
Start With A Plan: How To Build Steps That Suit Your Needs
Before you start building steps, it’s important to plan out what you are trying to achieve. Some of the factors that you should consider are the measurement of the area, the materials you want to use, the design, and the end goal. Here are some tips to create a plan that suits your needs:
- Measure the height and width of the area where you want to build the steps using a measuring tape.
- Determine the number of steps you want to create based on the height of the area and the thickness of the materials you want to use.
- Choose the materials and design that suit your preference and budget.
- Research online or consult a professional to get ideas and inspirations before starting the project.
Materials, Equipment, Preparation: A Basic Guide To Building Steps
Now that you have a plan in mind, let’s go through the materials, equipment, and preparation steps that you will need to gather for the project:
- Measuring tape, level, and framing square to ensure accurate measurements
- Hammer, screwdriver, and hand saw to cut and assemble the materials
- Cement, sand, and gravel to create a stable base for the steps
- Masonry adhesive, metal brackets, and deck screws to secure the steps together
- Wood, stone, or concrete materials for the steps and risers, depending on your preference and budget
After gathering these materials, you need to follow these steps to prepare the area for building your steps:
- Clear out the area of any debris or obstacles that might affect the stability of the steps later.
- Remove any old steps or pavement and excavate down to a depth of about 8 inches below the grade.
- Create a frame for the steps using wood planks or stone to contain the cement that will be poured into the frame later.
- Mix the cement, sand, and gravel according to the manufacturer’s instructions before pouring them into the frame to create a solid base for your steps.
- Let the cement dry and set for at least 24 hours before proceeding with the next step.
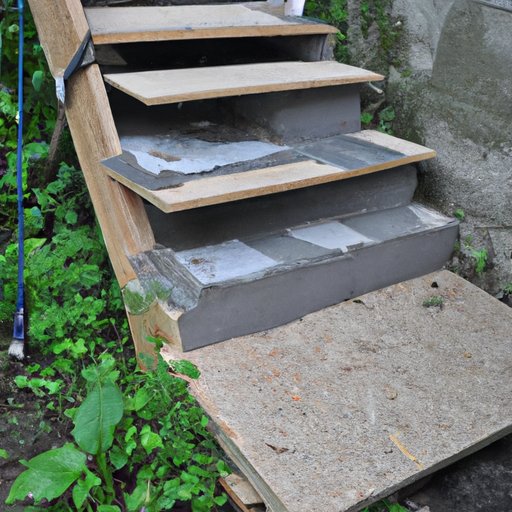
The ABCs Of Building Steps: A Comprehensive Tutorial
Now that you have prepared the base, you are ready to start building your steps. Here is a step-by-step guide on how to build steps:
- Measure the height and width of the steps using the measuring tape and framing square.
- Cut out the pieces of materials for the risers and steps using the hand saw.
- Attach the risers to the frame using the metal brackets and deck screws.
- Apply the masonry adhesive to the surface of the risers and install the steps on top of them.
- Secure the steps and risers together using the metal brackets and deck screws.
- Finish the steps by sanding and sealing them if using wood or stone. With concrete, use a waterproof sealant to protect it from the elements.

From Ground To Top: Building Steps That Look Great And Last Long
Building steps that are sturdy and durable is crucial to preventing accidents and ensuring longevity. Here are some tips to help ensure your steps are in top condition:
- Choose durable materials like stone or concrete that can withstand the elements and high traffic.
- Use proper techniques when installing the stairs to ensure that they are securely anchored and supported.
- Consider adding texture or anti-slip materials to the surface of the steps to increase safety.
Against The Wall: How To Build Steps That Join Two Levels
If you want to build steps that join two levels or against a wall, here are some tips:
- Measure the height and length of the area where you want to build the steps.
- Choose the materials and design that suit the style and design of the surrounding area.
- Use metal brackets or anchors to secure the steps to the wall or the higher level.
- Make sure to add a sturdy railing to ensure safety and prevent accidents.
Go Step By Step: How To Build Steps Without Experienced Help
If you don’t have previous building experience, building steps might seem intimidating. Here are some steps to follow to ensure success:
- Research and gather all the necessary information and materials before starting the project.
- Watch expert tips and tutorials for guidance if needed.
- Start with a smaller project, such as a garden bed or planter, before attempting to build larger steps.
- Attend a DIY workshop or course to get hands-on guidance and assistance in building steps.
Add Style To Your Steps: Unique Ideas And Designs To Consider When Building Steps
Building steps doesn’t have to be just a functional addition to your outdoor space. Here are some creative ideas to consider:
- Use unique materials like reclaimed wood or stone to add character and style.
- Incorporate interesting designs or patterns into the surface of the steps.
- Plant flowers or herbs in small spaces between the steps to bring color and life to the area.
- Add lighting fixtures to highlight the steps and add ambiance to the area at night.
Conclusion
Now that you have read our comprehensive guide to building steps, you are ready to embark on your DIY project with confidence and success. Remember to plan, prepare, and use the proper materials and techniques to ensure your steps are long-lasting, safe, and stylish. Building steps can be a rewarding experience that adds value and charm to your outdoor space.


