Introduction
Canning potatoes is a great way to preserve them for long-term storage. This process allows you to have potatoes all year round, no matter the season. Whether you have a garden with an abundant potato harvest or want to stock up on produce during a sale, canning potatoes is a useful skill to have. In this article, we will cover everything you need to know about canning potatoes, including the benefits, necessary equipment and ingredients, and step-by-step instructions for successful canning.
Complete Guide: How to Can Potatoes for Long-Term Storage
Canning potatoes is a practical way of preserving them for long-term storage. This process provides you with the ability to consume fresh potatoes year-round, aiding you in keeping a well-rounded diet. The benefits of canning potatoes go beyond convenience as well, as they aid in food preservation, food waste reduction, and cost savings.
You will need a few critical supplies to get started, including a canning pot, canning jars, a jar lifter, and a funnel. Additionally, you will want to have a few potatoes on hand, some lemon juice, and salt.
Here are the steps to follow for canning potatoes:
Step 1: Prepare Your Potatoes
When canning potatoes, it is important to select fresh potatoes and skin them before use. Slice the potatoes into uniform pieces, cutting them just under ¼ inch thick. Soak the potato slices in cold water until you are ready to use them.
Step 2: Sterilize Your Jars
Place your jars in your canning pot filled with hot water and bring to a rolling boil. Once the water has boiled for ten minutes, remove from heat, and let the jars stand in the hot water until ready to fill.
Step 3: Add Salt and Lemon Juice
Add one teaspoon of salt per quart of jar and add one tablespoon of lemon juice as well. These two ingredients help in preserving your potatoes over extended periods.
Step 4: Pack Your Potatoes
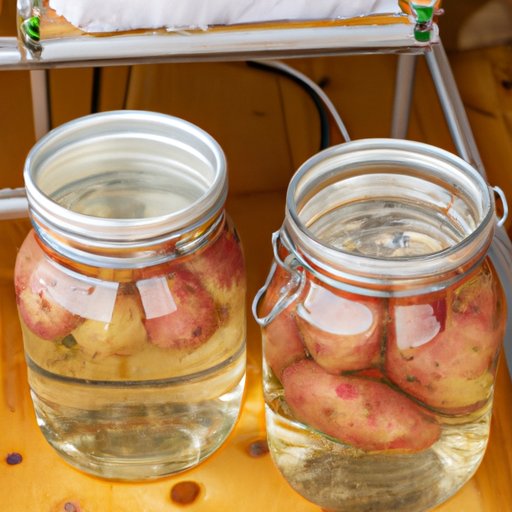
Take your potatoes out of the cold water, and pack them into your jars, using a funnel to prevent any spillage. Try to keep 1-inch headspace in your jars.
Step 5: Seal Your Lids
Wipe the rims of the jars with a damp towel to remove any particles and seal the lids tightly on your jars.
Step 6: Process Your Jars
Place your jars in your canning pot, with hot water covering the jars by at least an inch, before bringing the water to a boil. Continue boiling the jars for 40 – 50 minutes, depending on your altitude, before turning off the heat and allowing the jars to cool for a while.
Once the jars have cooled, check their lids for proper sealing. The lids will be sucked down and should not bounce back if you push them down. If a lid has not sealed correctly, you can either reprocess the jar with the same contents or consume the potatoes within a couple of weeks.
Step-by-Step Tutorial: Canning Potatoes at Home
Here is a step-by-step tutorial for canning potatoes:
Step 1: Gather Your Supplies
Before beginning, ensure you have all the necessary supplies and ingredients for canning potatoes. This will include potatoes, lemon juice, salt, canning jars, a canning pot or pressure canner, jar lifter, funnel, and a potato peeler.
Step 2: Sterilize the Jars
If using a water bath canner, fill the pot with enough water to cover the jars by two inches. Bring the water to a boil and heat the jars for ten minutes. If using a pressure canner, add three inches of water to the bottom of the canner and heat the jars over medium heat for ten minutes.
Step 3: Prepare Your Potatoes
While your jars are boiling, peel your potatoes and slice them into consistent pieces. Soak your potato slices in cold water to prevent discoloration.
Step 4: Add Salt and Lemon Juice to the Jars
Remove the jars from the canner and add one teaspoon of salt and 1 tablespoon of lemon juice per quart jar.
Step 5: Pack Your Potatoes
Fill your jars with sliced potatoes and ensure there is 1-inch headspace remaining in each jar.
Step 6: Seal Your Jars
Wipe the rim of each jar with a damp cloth and seal with your lid and band. Make sure the pack is tight but avoid over-packing as this can lead to an overheated jar.
Step 7: Process the Jars
Place your jars into your canning pot or pressure canner, and ensure there is at least 1 – 2 inches of water covering the jars. For water bath canner users, bring the water to a rolling boil, and process for 40-50 minutes, depending on your altitude. Pressure canner users should proceed according to the manufacturer’s instructions.
Step 8: Store Your Jars
Allow the jars to cool down and check that the lids have sealed correctly. Store your jars in a cool, dark place and enjoy them as you need them.
Preserving Potatoes: The Ultimate Canning Method
The canning method is the ultimate preservation method for potatoes. Canning allows the potatoes to be stored for an extended period, retaining their color, flavor, and nutritional value.
While there are variations on canning potatoes, there are two primary methods: boiling water bath and pressure canning. Boiling water bath canning is suited for high-acid foods, while pressure canning is necessary for low-acid foods, including potatoes.
Pressure canning is the superior method for canning potatoes. Potatoes are classified as a low-acid food, which means that boiling water bath method is not safe for them. The adequate heat produced by pressure canning penetrates the potatoes’ centers and eliminates microorganisms, reducing the risk of botulism and preserving the food’s quality and taste.
Quick and Easy: Canning Potatoes in 5 Simple Steps
If you are looking for a simplified version of the canning process, here are five easy steps to follow:
Step 1: Gather Supplies
Collect the necessary equipment and ingredients for canning potatoes, including canning jars, potatoes, salt, and lemon juice.
Step 2: Sterilize Your Jars
Place the jars in hot water and boil for ten minutes to sterilize them.
Step 3: Add Salt and Lemon Juice
Place one teaspoon of salt and 1 tablespoon of lemon juice per jar.
Step 4: Pack Your Potatoes
Fill your jars with sliced potatoes, leaving 1-inch headspace.
Step 5: Process Your Jars
Place your jars in your canning pot or pressure canner, ensuring there is at least 1-inch of water covering the jars. Boil your jars for 40-50 minutes, depending on your altitude, then turn off the heat and allow your jars to cool. Store in a cool, dry location and enjoy whenever needed.
Mastering the Art of Canning Potatoes: Tips and Tricks
If you are new to canning, it is essential to follow the instructions carefully to preserve your food properly. Here are some useful tips to help you master the art of canning potatoes:
- Ensure that everything you use for canning is clean and sterile.
- Use a pressure canner, not a boiling water bath, to eliminate the risk of contamination
- To prevent cooked potatoes from falling apart, blanch them before canning. Blanching involves putting the potatoes in boiling water for two minutes, then immediately dipping them into ice water for another two minutes.
- Follow the recommended processing times and altitudes for your location.
- When filling your jars, be sure to fill them to the headspace recommended for the recipe. It is essential not to overfill or underfill jars.
Remember that practice makes perfect. Keep learning and make adjustments to get the best results that work perfectly for you and your family.
Healthy and Sustainable Living: Canning Potatoes for a Better Future
Canning potatoes is an excellent way to promote sustainable living and support a healthy lifestyle. Here are some of the benefits of canning potatoes:
- Canning potatoes helps to reduce food waste, which is beneficial for the environment, as it minimizes the amount of food that might otherwise end up in landfills.
- It eliminates the need for preservatives and additives found in store-bought canned products.
- Canned potatoes are a great source of complex carbohydrates, fiber, and vital nutrients like potassium, vitamin B6, and vitamin C.
Furthermore, canned potatoes can be used in various recipes, including soups, stews, casseroles, and as side dishes. They provide an excellent addition to your pantry and kitchen, all year round.
Conclusion
Canning potatoes is a simple and practical approach to food preservation, resulting in a year-round stock of fresh potatoes. By using fresh potatoes or surplus harvest for canning, you can save on costs for groceries and also minimize food waste. With this guide, you can quickly learn and master the art of canning, ensuring that you have the right equipment and follow the recommended steps. So, go ahead and try this out, master the art of canning potatoes, and enjoy the benefits and convenience they provide!
Share your experience of canning potatoes in the comments below. Let’s learn and grow together.


