Introduction
Are you looking for a low-maintenance plant that adds to the beauty of your home while also purifying the air? Look no further than the snake plant! Also known as Sansevieria Trifasciata, this hardy plant comes with a host of benefits, not only for your health and well-being but for your home as well.
But how can you ensure that your snake plant stays healthy and thrives? In this article, we’ll discuss everything you need to know about caring for your snake plant. From watering and sunlight to soil and pests, we’ll cover it all. Plus, we’ll explore how to avoid common mistakes and how to propagate your plant for even more indoor greenery. So, let’s dive in!
The Ultimate Guide: 5 Steps to Keep Your Snake Plant Thriving!
Now that you’ve decided to bring a snake plant into your home, it’s time to learn how to care for it properly. Follow these five steps to keep your plant healthy and vibrant:
Step 1: Watering
One of the reasons snake plants are so popular is because they don’t require a lot of water. In fact, overwatering can be detrimental to their health. Only water your plant when the top inch of soil is completely dry. When you water, do so thoroughly, until water drains out the bottom of the pot.
Step 2: Sunlight
Snake plants prefer moderate to bright indirect sunlight. Too much direct sun can damage their leaves, while too little light can stunt their growth. Keep your plant near a window that gets bright, indirect light for most of the day. If direct sunlight does hit your plant, provide some shade with a sheer curtain or move it to a shadier spot.
Step 3: Soil
The right soil is essential for the health of your snake plant. It prefers well-draining, sandy soil that dries out between waterings. Avoid soil that retains moisture, such as heavy potting mixes meant for other plants. A good rule of thumb is to use a cactus or succulent potting mix, or create your own (see section IV).
Step 4: Pests
As with any houseplant, pests can be a problem for snake plants. Keep an eye out for spider mites, mealybugs, and scale insects, which can all damage your plant’s leaves and slow its growth. If you do spot pests, remove them and treat your plant with an insecticidal soap or neem oil solution.
Step 5: Additional Care Tips
In addition to the basics, there are a few other things you can do to keep your snake plant thriving:
- Rotate your plant every few months to ensure it gets even sunlight on all sides.
- Wipe the leaves down with a damp cloth periodically to remove dust and keep them looking shiny.
- Use a well-draining pot with a drainage hole to help prevent overwatering.
- Don’t fertilize your plant too often – snake plants are slow-growers and don’t need a lot of extra nutrients.
Top 5 Common Mistakes People Make When Caring for Snake Plants
Even with the best intentions, it’s easy to make mistakes when caring for your snake plant. Here are five common ones to avoid:
Mistake 1: Overwatering
We’ve mentioned it before, but it bears repeating – overwatering is the number one mistake people make with their snake plants. Instead, wait until the top inch of soil is dry before you water, and then do so thoroughly but infrequently.
Mistake 2: Not Enough Sunlight
If your plant isn’t getting enough indirect sunlight, it may become leggy and weak. Move it to a sunnier spot or invest in a grow light to supplement its light exposure.
Mistake 3: Using the Wrong Soil
As we’ve discussed, snake plants need well-draining soil that dries out between waterings. Heavy potting mixes can retain moisture and lead to root rot. Make sure you’re using the right type of soil for your plant.
Mistake 4: Not Cleaning the Leaves
Over time, dust can accumulate on your plant’s leaves, blocking sunlight and making it harder for your plant to photosynthesize. Wiping the leaves down with a damp cloth periodically can help your plant stay healthy and looking its best.
Mistake 5: Ignoring Signs of Pest Infestation
As we mentioned earlier, spider mites, mealybugs, and scale insects can all damage your plant’s leaves and affect its overall health. Don’t ignore signs of infestation – nip the problem in the bud before it becomes too serious.
DIY Snake Plant Potting Mix: How to Create the Best Soil for Your Sansevieria Trifasciata
If you want complete control over your plant’s soil mix, you can create your own. Here’s how to do it:
Benefits of using a homemade potting mix
Using a homemade mix can ensure that you’re using only the best ingredients for your plant’s health. Plus, it’s often more cost-effective than buying pre-mixed soil.
Ingredients needed
To create your own snake plant potting mix, you’ll need:
- Cactus soil mix
- Perlite or coarse sand
- Sphagnum moss (optional)
Step-by-step instructions
- Mix together equal parts cactus soil mix and perlite or coarse sand.
- If desired, mix in some sphagnum moss to help retain moisture.
- Use the mix to repot your snake plant, making sure there’s plenty of room for the roots to grow.
Tips for maintaining the soil’s quality
As with any soil mix, you’ll want to make sure it stays healthy to promote your plant’s health:
- Check the soil regularly to ensure it’s not retaining too much moisture.
- If the soil seems too compacted, add more perlite or sand to improve drainage.
- Repot your plant every few years to refresh the soil and give it more room to grow.
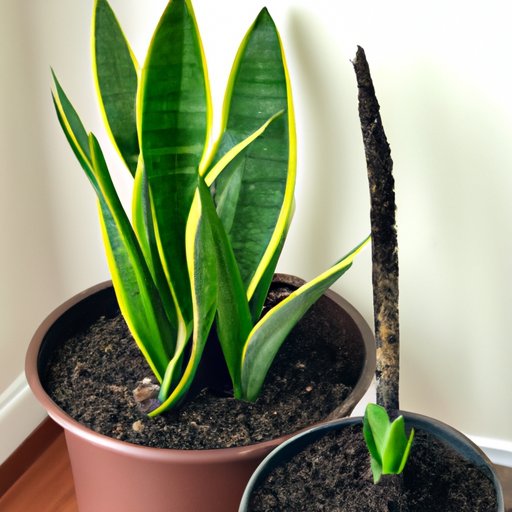
Snake Plant Propagation: How to Multiply Your Plants in 5 Easy Steps
Another benefit of snake plants is that they’re easy to propagate. Here’s how to do it:
Benefits of propagating snake plants
Propagating your snake plant not only allows you to multiply your plants, but it also helps promote your original plant’s health.
Step 1: Preparing the mother plant
Select a healthy mother plant that’s at least a year old and has several leaves.
Step 2: Selecting the cuttings
Select a healthy leaf or leaves to propagate. Make sure they’re at least four inches long and have no damage or disease.
Step 3: Preparing the soil
Use a well-draining soil mix, such as the one described earlier, and moisten it slightly before planting.
Step 4: Planting the cuttings
Plant the cuttings in the prepared soil, making sure they’re at least halfway buried. Water thoroughly.
Step 5: Taking care of the new plants
Place the pot in a warm, bright location, but out of direct sunlight. Make sure the soil stays moist but not soggy, and avoid overwatering. Within a few weeks, you should see new growth!
Snake Plant: A Beginner’s Guide to Indoor Gardening
If you’re new to indoor gardening, snake plants are a great place to start. Here are some tips for getting started:
Overview of snake plants
As we’ve covered, snake plants are hardy, low-maintenance plants that come with a variety of benefits.
Benefits of indoor gardening with snake plants
In addition to their air-purifying qualities, snake plants are also praised for their low light and low water requirements, making them a perfect choice for beginners.
Tips on how to start indoor gardening with snake plants
To get started with your indoor garden, choose a well-draining pot with good drainage and a well-draining soil mix. Place your plant near a bright window but out of direct sunlight, and water it only when the top inch of soil is dry.
Caring for snake plants as a beginner
As with any plant, it can take some trial and error to get the hang of caring for your snake plant. But with some attention and care, you’ll be rewarded with a beautiful, thriving plant.
Conclusion
Caring for your snake plant doesn’t have to be difficult – in fact, it can be quite enjoyable! By following a few simple steps, avoiding common mistakes, and exploring some DIY options like creating your own soil mix or propagating your plant, you’ll be well on your way to having a happy, healthy plant.


