Introduction
Caulking a shower is a crucial part of bathroom maintenance. Not only does it improve the appearance of your bathroom, but it also prevents water damage, keeps mold and mildew at bay, and makes the shower more energy-efficient. If you notice cracks, holes, or gaps in the caulk line, it might be time to reseal it. In this article, we’ll explore how to caulk a shower, including step-by-step instructions, dos and don’ts, types of caulk, common mistakes to avoid, and more.
Step-by-Step Guide
Preparation
Before you start caulking, make sure the shower is completely dry and clean. Remove any old caulk using a caulk remover tool or a utility knife. If necessary, use a cleaning solution to eliminate any traces of mold, mildew, or soap scum. Let the area dry completely before moving on to the next step.
Choosing the right type of caulk
There are several types of caulk available, including silicone, acrylic, and hybrid. Consider the material of your shower and the type of protection you need. Silicone is the most durable and long-lasting option, but it can be tricky to apply and remove. Acrylic is easier to handle and paintable, but it’s not as water-resistant as silicone. Hybrid caulk combines the best of both worlds, but it’s relatively new on the market and may not be readily available in your area.
Application Techniques
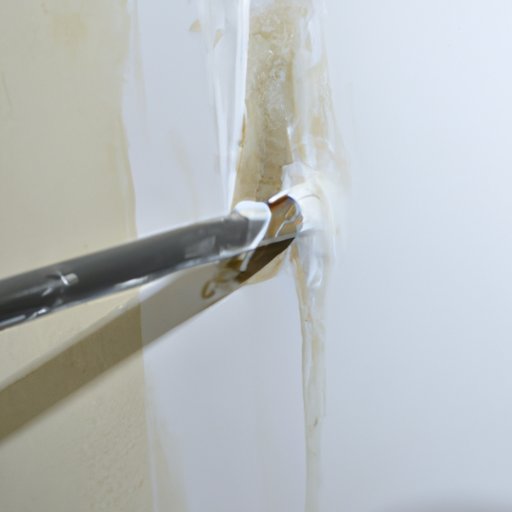
Start by cutting the tip of the caulk tube at a 45-degree angle, according to the gap’s size, you want to fill. Insert the tube into the caulking gun, and squeeze the trigger gently. Apply the caulk evenly and in a continuous stream, moving the gun along the seam. Use a wet finger or a specialized caulk smoothing tool to spread the caulk evenly and remove any excess. Work in small sections to avoid drying out or air bubbles.
Cleanup
Once you’re done with the application, remove any excess caulk using a damp sponge or cloth. Be careful not to pull out the caulk from the gap and avoid water getting in contact with the uncured caulk. If necessary, use a caulk removal tool to correct any mistakes.
Troubleshooting
If you notice any air bubbles, tap lightly on the caulk line with your finger, and smooth them out with a wet finger or smoothing tool. If you accidentally applied too much caulk, use a cloth or sponge to remove it gently. Let the caulk dry completely according to the label instructions before using the shower.
Dos and Don’ts
– Do test the caulk line before letting it dry.
– Do use a caulking gun and a steady hand for a more precise result.
– Don’t rush the process and avoid interruptions.
– Don’t use the shower or bathtub right after caulking.
– Best practices: tips for avoiding mold and mildew growth, letting the caulk dry properly, and maintaining the sealant.
Video Tutorial
For a more visual guide to caulking a shower, watch our video tutorial. Our step-by-step narration will guide you through the entire process, from cleaning the surface to applying and smoothing the caulk. We’ll also show you examples of common mistakes and how to fix them correctly.
Types of Caulk
Silicone Caulk
Silicone is the most popular type of caulk for shower sealing due to its excellent water and mold resistance. It’s also durable and long-lasting, making it ideal for high-traffic areas like showers. However, silicone is more challenging to apply and remove than other types of caulk, and it’s not paintable.
Acrylic Caulk
Acrylic caulk is easier to handle than silicone and can be painted to match the bathroom’s color and style. However, it’s not as water-resistant as silicone and may develop cracks over time. Acrylic is a more affordable option if you need to reseal your shower regularly.
Hybrid Caulk
Hybrid caulk combines the benefits of silicone and acrylic, providing durable and paintable protection that also resists water and mold. Hybrid caulk is a relatively new product, and it may not be available everywhere yet.
Quick Tips
– Do clean the surface and let it dry before caulking.
– Do use a caulk remover tool for old and stubborn caulk lines.
– Do use painter’s tape to create a straight line and avoid smearing.
– Don’t use too much caulk and avoid overfilling gaps.
– Don’t rush the process and avoid creating air bubbles.
– Best practices for saving time and avoiding stress.
Mistakes to Avoid
– Applying too much or too little caulk.
– Not cleaning the area properly and insufficiently preparing the surface.
– Using the wrong type of caulk or an expired product.
– Rushing the process or applying caulk on a damp surface.
– Common problems and how to fix them.
Conclusion
Caulking a shower might seem like a daunting task, but it’s an essential part of maintaining your bathroom’s integrity. With the right tools, techniques, and products, anyone can caulk a shower like a pro. In this article, we’ve provided a step-by-step guide, dos and don’ts, types of caulk, and quick tips to help you avoid common mistakes and maintain your bathroom with ease. Don’t forget to leave us your comments or questions, or share your personal tips and experiences with us.


