Introduction
If you’re tired of your current light fixture or simply want to add a new touch to your space, changing your light fixture is a quick and easy way to do it. However, changing a light fixture can be intimidating, especially if you’ve never done it before. The purpose of this article is to guide you through the process in a safe and comprehensive manner, ensuring that your new fixture will shine bright and beautifully.
It is important to change a light fixture correctly for safety reasons. Electrical work should always be taken seriously, and if you are ever in doubt, it is best to call a licensed electrician.
Preparations
Before you get started, it is important to gather the necessary tools and materials. You will need a screwdriver, pliers, wire nuts, and a voltage tester. Additionally, it’s a good idea to wear protective eyewear and gloves to ensure safety.
Before beginning any work, ensure that the power is off. Locate the correct circuit breaker and switch it off. Double-check that the power is off with a voltage tester, ensuring that the wires are not live.
Step-by-Step Guide: Changing a Light Fixture in 6 Easy Steps
Follow these six easy steps for a safe and successful light fixture installation:
Step 1: Turn off the power source
Before beginning any work, ensure that the power is off. Locate the correct circuit breaker and switch it off. Double-check that the power is off with a voltage tester, ensuring that the wires are not live.
Step 2: Remove the old fixture
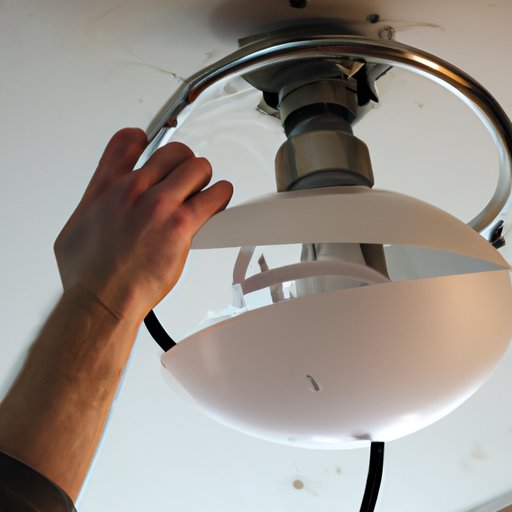
Once power is off, remove the old fixture. Generally, light fixtures are held in place with screws. Remove the screws and carefully lower the fixture to the ground. Remove any excess wired connections between the old fixture and the ceiling.
Step 3: Install the mounting bracket
Follow the manufacturer’s instructions for installing the mounting bracket for your new fixture. This will typically involve attaching the bracket to the ceiling box using screws.
Step 4: Connect the wires
Locate the wires from the ceiling and connect them to the corresponding wires on the new fixture. This will typically involve twisting the wires together and capping them with a wire nut. Follow the manufacturer’s instructions for specific wiring instructions.
Step 5: Attach the new fixture
Once the wires are connected, attach the new fixture to the mounting bracket using screws. Ensure that the fixture is secure and balanced.
Step 6: Turn on the power and test the light
If the fixture is secure and the wiring is complete, turn on the power and test the light.
DIY 101: How to Replace a Light Fixture in Your Home
Before starting the process, it’s important to understand the different types of light fixtures available. Some common types include ceiling-mounted fixtures, wall sconces, and chandeliers. Additionally, understanding the types of light bulbs and wattage compatibility is crucial to ensure that you have the right bulb for your fixture.
Illuminate Your Space: A Beginner’s Guide to Changing Light Fixtures
Choosing the right fixture for your space is crucial to ensure that your space is properly illuminated. Understanding lighting styles and functions can help you make the right decision. Additionally, lighting placement and balance is important to consider when making your installation.
Brighten Up Your Home: A Quick and Easy Tutorial on Changing Light Fixtures
Changing light fixtures can be an easy way to bring a new element to your home, and there are a variety of DIY alternatives to expensive fixtures. These include upcycling old fixtures or creating your own customized fixture.
Lighten the Load: Tips and Tricks to Replace Your Light Fixture on Your Own
Replacing a light fixture can be intimidating, but there are ways to make it easier and less daunting. If the fixture is heavy, you may want to consider using a ceiling fan brace kit or an adjustable mounting bracket for extra support. Additionally, tricks like using a hook to hold the fixture in place while connecting the wires can make solo installation a breeze.
Switching It Up: A Comprehensive Guide to Changing Your Light Fixture
If you’re more advanced and looking to modify or customize your fixture, there are specific tools and techniques you can use to achieve a professional finish. However, if you’re unsure, it’s always best to consult a licensed electrician. Troubleshooting and common mistakes to avoid are also important to understand before beginning your installation.
Out with the Old, In with the New: How to Change Your Light Fixture in a Few Simple Steps
Remember to follow the six simple steps outlined above, double-checking that the power is off before beginning any work. Additionally, ensure that the fixture is balanced and secure before testing the light.
Changing a light fixture can be a quick and easy process to brighten up your space, and with this guide, you can feel confident in tackling it on your own.
Conclusion
Changing a light fixture may seem daunting at first, but with the proper tools and safety measures, it can be a simple and quick process. By following the steps outlined in this guide, you can proudly install your new fixture and enjoy a beautifully lit space. Remember to always prioritize safety and consult a professional if you’re ever in doubt.


