Introduction
If you are an Apple Watch user, you may want to change your band for various reasons. Whether it is to switch up the look of your watch or replace a worn-out band, changing the band can be a challenging task if you do not know how to do it properly. In this article, we will provide a step-by-step guide on how to change band on Apple Watch, including preparing the required tools, removing the current band, installing the new band, and troubleshooting common issues. We will also provide expert tips and a video tutorial to make the process easier.
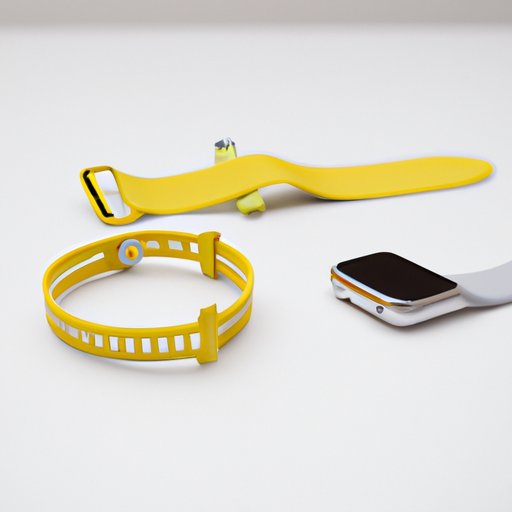
Step-by-Step Guide
Before you begin the process of changing your Apple Watch band, there are a few tools you will need:
- A replacement band that is compatible with your Apple Watch model and size
- A microfiber cloth to clean the Apple Watch and band
- A small flathead screwdriver or plastic spudger tool
Removing the current band from the Apple Watch
Step 1: Turn off your Apple Watch and place it on a clean surface with the display facing downwards.
Step 2: Locate the two release buttons on the back of the watch band. Press and hold one of the buttons while sliding the band out of the groove on the watch’s body. Repeat this process for the other side of the band.
Step 3: Once you have removed both sides of the band, use a microfiber cloth to clean any debris or dust from the watch’s body before installing the new band.
Installing the new band on the Apple Watch
Step 1: Align the band’s connectors with the grooves on the watch’s body and slide them in until you hear a click sound. Repeat this process for the other side of the band.
Step 2: Ensure the band is firmly attached to the watch’s body by trying to wiggle it. If it feels loose, remove the band and try sliding it in again.
Step 3: Once the band is correctly installed, turn on your Apple Watch, and you are good to go!
Tips to make the process easier
- Use a plastic spudger tool instead of a screwdriver to avoid scratching the watch’s body.
- Wipe the connectors of the replacement band with a microfiber cloth before attaching them to the watch to remove any dirt or debris.
- Ensure the band’s size and style are suitable for your wrist and dressing style.
Video Tutorial
If you prefer visual aids, there is a detailed video tutorial available online. The video provides step-by-step instructions, as well as useful tips to make the process easier. Here is the link to the video:
https://www.youtube.com/watch?v=XKFUxAKvzuM
Comparison
Apple offers various types of bands, including sport bands, woven nylon bands, leather bands, and stainless steel bands. Each type has its unique features and pros and cons. Here is a brief comparison of each type:
- Sport bands: Lightweight, sweat-resistant, durable, can be prone to dust build-up.
- Woven nylon bands: Soft, breathable, flexible, non-waterproof.
- Leather bands: Stylish, comfortable, durable, expensive, not waterproof.
- Stainless steel bands: Elegant, durable, water-resistant, expensive.
Steps to change each type of band
The process of changing each type of band is almost identical. The primary difference lies in the type of connectors used and how to remove and install them. Refer to the manufacturer’s instructions for each type of band for further information.
Troubleshooting
Changing your Apple Watch band may come with some issues that you may encounter. Here are some common issues and how to troubleshoot them:
Loose band
If the new band feels loose, remove it and ensure that the connectors are correctly aligned. Clean the connectors, and if they are still loose, try pushing them harder until you hear a click sound. If the problem persists, you may need to replace the band with one that fits better.
Difficult to remove the old band
If the old band is challenging to remove, you may need to apply a little force while pressing the release button. If that does not work, use a plastic spudger tool to gently pry the band out of the groove.
Connector issues
If the connectors on the Apple Watch or replacement band are damaged, the new band may not attach or work correctly. Inspect the connectors for any dirt, debris or damage. Try cleaning the connectors with a microfiber cloth or replacing them with new ones if needed.
Expert Tips
Here are some expert tips to make the process of changing your Apple Watch band more efficient and extend the lifespan of your band:
- Rotate different bands periodically to avoid exposing the same spot to perspiration and wear and tear.
- Avoid wearing the band too tight to prevent skin irritation.
- Clean the band with a damp microfiber cloth regularly to remove dirt and sweat.
- Store your bands correctly by keeping them in a clean, cool, and dry place away from direct sunlight and heat.
Conclusion
Changing the Apple Watch band is a simple process once you understand how to do it. A replacement band can transform your look and provide comfort and durability. Whether you choose a sport band, woven nylon, leather, or stainless steel, following this guide will help you successfully change it without any issues. Always remember to take care of your band to extend its lifespan and ensure it maintains its look and functionality.
Have you changed your Apple Watch band before? Share your experience or tips in the comments below.
Thank you for reading, and we hope this guide has been helpful!
Call to Action
If you found this article helpful, please share it with your friends or on social media. For more helpful tips, follow our blog and subscribe to our newsletter to stay updated with the latest Apple Watch news and information.


