Introduction:
As a driver, it is important to ensure the safety of your vehicle and passengers at all times. One key aspect of vehicle maintenance is checking your brake pads regularly. Brake pads play a crucial role in ensuring that your vehicle comes to a safe and controlled stop when needed. In this article, we will provide a comprehensive guide to checking and replacing brake pads, including a step-by-step guide and tips for beginners.
Why Regularly Checking Your Brake Pads is Important:
It is important to understand how brakes work and the dangers of worn brake pads to realize the significance of regular brake checks. Brake pads are responsible for creating friction between the rotor and caliper, which ultimately stops your vehicle. Over time, brake pads wear down and need to be inspected and replaced. Failure to do so can lead to costly and potentially life-threatening situations. Regular brake checks help prevent the possibility of brake failure, giving you peace of mind while driving.
The Warning Signs of Worn Brake Pads:
There are several warning signs that indicate worn brake pads, including:
Squeaking or grinding noises: If you hear a high-pitched squeaking or grinding noise when you apply the brakes, this can indicate worn brake pads.
Reduced responsiveness: If your vehicle’s brakes don’t respond immediately when you press the pedal, this can be a sign of worn brake pads.
Vibrations or shaking: If you feel vibrations or shaking in the steering wheel or brake pedal when braking, this can indicate worn brake pads or a warped rotor.
Warning lights: Most modern vehicles have a warning light on the dashboard that will illuminate when there is a brake issue. If this light appears, it is crucial to have your brake system inspected immediately.
Step-by-Step Guide: How to Check Your Brake Pads:
To check your brake pads, you will need a few basic tools:
- Jack stand or lift
- Tire iron
- Tire gauge
- Flashlight
- Wrench or socket set
Once you have these tools, you can follow these steps to check your brake pads:
- First, park your vehicle on a level surface and turn off the engine.
- Locate the brake caliper behind each wheel. It will be housed in a metal case and is connected to the rotor with bolts.
- Use the tire iron to remove the wheel from the vehicle.
- With a flashlight, inspect the brake pads. There should be at least 1/4 inch of padding. If the padding is worn down, replace the pads.
- If you notice severe wear and tear or uneven wear on your brake pads, it may be necessary to have the rotors resurfaced or replaced as well.
- Check the brake lines to ensure there are no leaks or signs of damage.
- Reattach the wheel and tighten the lug nuts with a wrench or socket set.
Checking your brake pads regularly can help prevent further damage and extend the lifespan of your vehicle’s braking system.
DIY Guide: Learn How to Inspect and Replace Your Brake Pads:
If you need to replace your brake pads, you will need the following tools:
- Jack stand or lift
- Tire iron
- Tire gauge
- Flashlight
- Wrench or socket set
- New brake pads
- Brake fluid
Replacing brake pads can be a complex process, so it is important to follow the correct steps:
- Park your vehicle on a level surface and turn off the engine.
- Locate the brake caliper behind each wheel. It will be housed in a metal case and is connected to the rotor with bolts.
- Use the tire iron to remove the wheel from the vehicle.
- Use a wrench or socket set to remove the bolts holding the caliper in place.
- Carefully lift the caliper away from the rotor, using a bungee cord to suspend it away from the work area. Be careful not to damage the brake line.
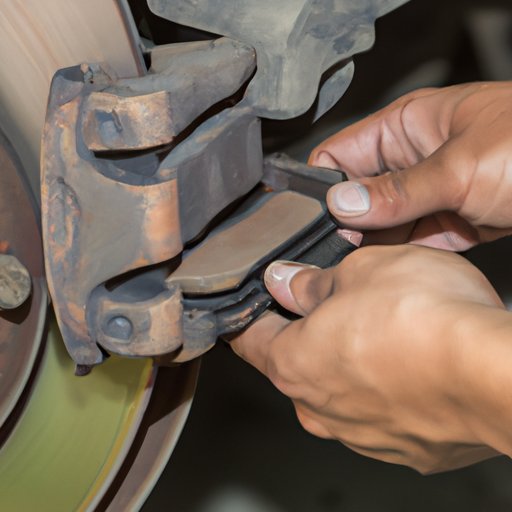
- Remove the brake pads from the bracket. Inspect the bracket and caliper for signs of wear or damage and replace if necessary.
- Install the new brake pads, making sure they fit securely in the bracket.
- Place the caliper back over the brake pads and tighten the bolts firmly in place.
- Refill the brake fluid reservoir if necessary. Be sure to use the appropriate brake fluid for your vehicle.
- Reattach the wheel and tighten the lug nuts with a wrench or socket set.
It is important to take your time when replacing brake pads and ensure that everything is back in its proper place. If you feel uncomfortable doing this yourself, it is best to have a professional mechanic handle the task.
Are Your Brakes Safe? How to Check If You Need New Brake Pads:
Although it is important to check your brake pads regularly, how often they need to be replaced varies based on driving conditions. Typically, brake pads should be replaced between 20,000 and 60,000 miles. However, factors such as driving habits, road conditions, and the weight of your vehicle can all affect brake pad longevity.
To check if you need new brake pads, follow these steps:
- Listen for any unusual noises when you apply the brakes.
- Look at your brake pads. The outside pad will be pressed against a metal rotor. There should be at least 1/4 inch of pad.
- Inspect the brake pads for any signs of wear, such as cracks or unevenness.
- Pay attention to how your car feels when braking. If your vehicle shakes or vibrates when coming to a stop, it may be time to replace the brake pads.
Following these steps can help you determine if you need new brake pads and avoid potential safety hazards.
Keep Your Vehicle Safe: A Beginner’s Guide to Checking Your Brake Pads:
If you are new to vehicle maintenance, checking your brake pads can seem daunting. However, it is a simple process that can be done with a few basic tools. Here are some steps to follow:
- Start by parking your vehicle on a level surface and turning off the engine.
- Locate the brake caliper behind each wheel. It will be housed in a metal case and is connected to the rotor with bolts.
- Use the tire iron to remove the wheel from the vehicle.
- With a flashlight, inspect the brake pads. There should be at least 1/4 inch of padding. If the padding is worn down, replace the pads.
- If you notice severe wear and tear or uneven wear on your brake pads, it may be necessary to have the rotors resurfaced or replaced as well.
- Check the brake lines to ensure there are no leaks or signs of damage.
- Reattach the wheel and tighten the lug nuts with a wrench or socket set.
Checking your brake pads regularly is an essential part of vehicle maintenance, especially for beginners. Simple brake checks can help prevent costly repairs and ensure the safety of your vehicle.
Don’t Ignore Your Brakes: A Quick Guide on How to Check Your Brake Pads:
Regular brake checks should be incorporated into your routine to ensure that your brakes are always working properly. Here are some tips for doing so:
- Pay attention to any warning signs, such as noises or vibrations when you apply the brakes.
- Check your brake pads for wear and tear every 12,000 miles or at least once a year.
- Have a professional mechanic inspect your brakes annually, even if you don’t notice any warning signs or issues.
- Keep in mind that brake pads need to be replaced more often if you frequently drive in stop-and-go traffic or mountainous areas.
With regular brake checks, you can avoid potential safety hazards and keep your vehicle operating properly.
Conclusion:
Checking your brake pads is a crucial component of vehicle maintenance. Regular checks can help prevent costly repairs and keep you and your passengers safe on the road. Use this comprehensive guide as a reference to check and replace your brake pads, or have a professional mechanic handle the task for you. Don’t ignore your brakes and always stay on top of brake maintenance to ensure the safety of your vehicle.


