Introduction
If you’re an avid gamer, graphic designer, or use your PC for resource-heavy tasks, then you understand the significance of the graphics card. A graphics card is literally the engine that powers everything you see on your screen. It helps render high-quality images, impressive 3D animations, and smooth video playback. As such, it’s essential to check your graphics card to ensure that it’s performing up to expectations and troubleshoot any issues that arise. In this article, we’ll explore a variety of ways to check your graphics card performance, model, manufacturer, and troubleshoot any issues that might arise.
Walk-through Guide: A Step-by-step Guide to Check Graphics Card on Windows or MAC PC
Checking your graphics card is relatively simple and can be done using the system resources of your Windows or MAC PC. Below is an overview of the steps you need to take:
- For Windows, right-click on the desktop and click on Display Settings. In the Display settings window, scroll down and click on “Advanced Display Settings.”
- Click on the Display adapter properties link to access the Graphics properties window. The Graphics properties window will provide you with an array of details regarding your graphics card, including the model, type, and memory size.
- For MAC users, click on the Apple icon > About This Mac > System Report. In the System Information window, click on Graphics/Displays. The Graphics/Displays window will provide you with an array of details regarding your graphics card, including the Chipset model and VRAM size.
System Information: How to Use the System Information Utility to Identify the Graphics Card Model and Manufacturer
The System Information utility is a built-in tool available on both Windows and MAC systems. It’s an essential tool for checking system details and specifications, including the graphics card model and manufacturer. Here’s how to access and use the System Information utility on Windows and MAC PC:
- For Windows users, press the “Windows” and “R” keys simultaneously. In the Run dialog box, type “msinfo32” and press “Enter.” Once the System Information window opens, click on “Components,” then “Display,” to access the graphics card model, name, and device ID.
- For MAC users, click on the Apple icon > About This Mac > System Report. In the Hardware Overview window, scroll down and click on Graphics/Displays. The Graphics/Displays window will provide you with an array of details regarding your graphics card, including the Chipset model and VRAM size.
Using Device Manager: A Detailed Explanation of How to Check Graphics Card using the Windows Device Manager
The Device Manager is a tool that allows users to view and manage hardware devices connected to a Windows computer. It’s an essential tool for managing and troubleshooting graphics card related issues. Here’s how to use the Device Manager to check your graphics card on a Windows PC:
- Right-click on the Windows icon. In the context menu that appears, click on “Device Manager.”
- In the Device Manager window, click on “Display Adapters.” Here, you’ll see all the graphics adapters currently installed on your computer. Click on your graphics card name and select “Properties.”
- In the Properties window, click on the “Driver” tab. Here, you’ll see all the details about your graphics card driver, including the version, date, and provider.
Software Utilities: How to Use Third-party Software Tools to Quickly and Easily Check Graphics Card on Various Platforms
There are several third-party software utilities available for inspecting, analyzing, and monitoring graphics card performance. These tools vary in complexity, features, and price. Some of the popular graphics card utility software include:
- MSI Afterburner: A popular graphics card utility software that’s available for free. It enables users to monitor, overclock, and adjust their graphics card settings.
- GPU-Z: A popular graphics card utility software that’s available for free. It gives users detailed information about their graphics card, including clock speeds, temperature, and fan speed.
- HWiNFO64: A free utility software that allows users to monitor system hardware components, including graphics cards. It also provides detailed specifications, including clock speeds, voltage, and performance.
BIOS Settings: A Guide on How to Check If Your Graphics Card Is Properly Detected in the System BIOS
The System BIOS is a firmware component that initializes computer hardware and provides an interface to control the hardware. It’s essential to ensure that your computer’s BIOS settings detect the graphics card properly. Here is how to check if your graphics card is correctly detected in the system BIOS:
- Reboot or power on your computer.
- Launch the system BIOS by pressing the appropriate key combination once your computer starts up. The key combination varies depending on your computer’s manufacturer and BIOS version.
- Once in the BIOS, go to the “PCI/PCIe” configuration menu and ensure that the graphics card is recognized and enabled. Once the changes are made, save and exit the BIOS settings.
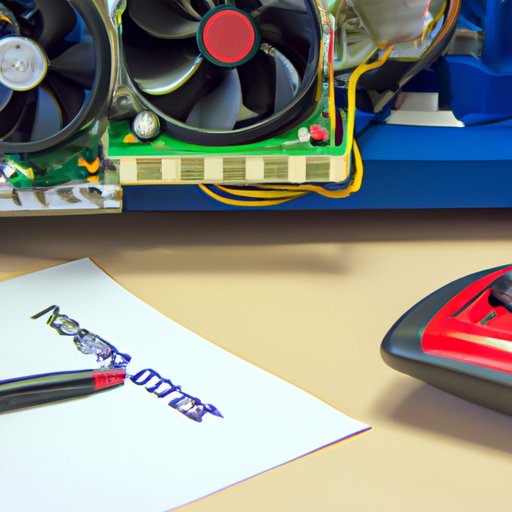
Physical Inspection: How to Physically Check the Graphics Card for Any Visible Damage or Issues That May Affect Performance
Conducting a physical inspection of your graphics card is an essential aspect of troubleshooting graphics card related issues. Below is a list of things to look for when conducting a physical inspection on your graphics card:
- Inspect the cooling fans for any signs of malfunctioning, dust, or obstruction. Overheating is the most common cause of graphics card issues.
- Check the graphics card for physical damage, including scratches, dents, or loose components. This can indicate a malfunctioning or damaged card.
- Check the power cables to ensure that they are securely connected to the graphics card. Loose connections can cause the card to malfunction.
Benchmarks: How to Use Benchmarking Software to Determine Graphics Card Performance and Whether It’s Performing up to Expectations
Benchmarking is the process of evaluating computer performance by running a set of tests and comparing the results to a standard. Benchmarking graphics card performance is an essential aspect of troubleshooting graphics card issues. Here’s how to use benchmarking software to determine graphics card performance:
- Download a reliable benchmarking software, such as Novabench, 3DMark, or Unigine Benchmark.
- Run the benchmarking software and follow the on-screen instructions to perform the benchmark testing.
- Once the benchmark test is complete, compare the results to the standard benchmarks for the graphics card.
Conclusion
Checking your graphics card is an integral part of troubleshooting any issues that arise. Whether it’s using the built-in system tools, third-party software, or conducting a physical inspection, it’s essential to check your graphics card and ensure that it’s performing up to the specified standards. Remember, if you’re not tech-savvy, it’s always best to consult with a professional before attempting any of the troubleshooting methods provided in this article.


