Introduction
Having clean and clear headlights on your car is not just a matter of aesthetics, but of safety and performance as well. Dirty or cloudy headlights can reduce visibility, cause glare, and compromise your ability to see and be seen on the road. In this article, we will provide you with different approaches on how to clean car headlights, including step-by-step guides, product reviews, DIY solutions, expert advice, and common mistakes to avoid.
Step-by-Step Guide
The process of cleaning car headlights can vary depending on the type of headlights you have and the level of dirt and damage they have accumulated over time. However, the basic steps are as follows:
- Gather your tools and materials: you will need a clean sponge or cloth, water, a headlight cleaning solution, and a polishing compound.
- Clean the surface: wet the surface of the headlight with water, then apply the cleaning solution and rub it gently in a circular motion using the sponge or cloth. Rinse with water and repeat if necessary.
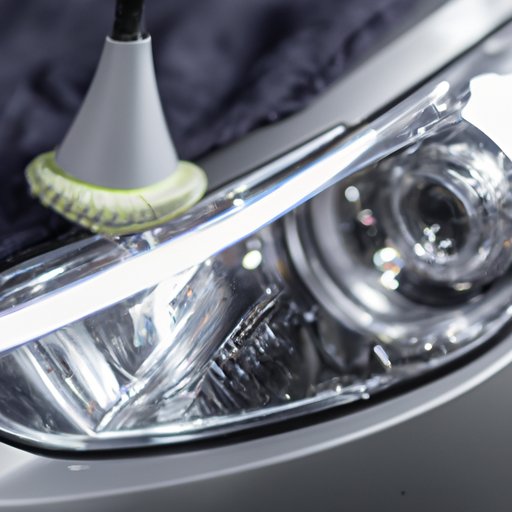
- Polish the lens: apply the polishing compound to the lens and buff it with a clean cloth or buffer. Make sure you cover the entire lens and remove all the residue.
- Apply a protective coating: use a clear coat or protective film to prevent future damage and maintain the clarity of the lens.
It’s important to follow the instructions on the cleaning solution and polishing compound to ensure that you use them correctly and avoid any damage to the headlight. Additionally, make sure you don’t apply too much pressure or use abrasive materials that can scratch the surface.
Product Review
If you’re looking for a reliable headlight cleaning product, here are some of the best options:
- 3M Headlight Restoration Kit: this kit is highly rated for its effectiveness in removing yellowing and haziness from headlights. It includes a sanding disc, polishing pad, and compound, as well as detailed instructions.
- Meguiar’s Heavy Duty Headlight Restoration Kit: this kit is designed for severely damaged headlights and includes a sanding pad, compound, and polish to restore clarity and brightness. It also comes with a sealant to protect the lens from UV damage.
- Turtle Wax Headlight Restorer Kit: this kit is affordable and easy to use, and comes with sanding pads, polish, and sealant. Users report significant improvement in the appearance and function of their headlights.
It’s important to choose a product that suits your needs and budget, as well as your level of experience in headlight cleaning. Make sure to read the instructions carefully and watch tutorial videos or reviews online before making your purchase.
DIY Solutions
If you prefer to use household items to clean your headlights, here are some DIY solutions you can try:
- Baking soda and water: mix equal parts of baking soda and water to make a paste, then apply it to the lens and rub gently using a sponge or cloth. Rinse with water and dry with a clean towel.
- Vinegar and water: mix one part vinegar with three parts water, and apply it to the lens using a spray bottle or cloth. Let it sit for a few minutes, then rinse with water and dry.
- Toothpaste: apply toothpaste (not gel) to the lens and rub it in using a soft-bristled toothbrush. Rinse with water and dry.
These DIY solutions are effective for mild to moderate dirt and discoloration, but may not work as well for severe damage or scratches. However, they are safe and inexpensive options that you can easily find at home.
Expert Advice
To get a professional perspective on headlight cleaning, we interviewed David Smith, a car detailing expert with over 15 years of experience in the industry.
According to David, the most important thing to consider when cleaning car headlights is the type of lens material:
“Different headlights have different types of plastic, and some are more sensitive than others. For example, on newer cars, you’ll typically either have polycarbonate or acrylic lenses. Polycarbonate is a softer plastic that will scratch more easily but can be polished to remove minor scratches. Acrylic is a more rigid type of plastic that is more impact-resistant but not as easy to polish.”
David also recommends using an all-in-one headlight restoration kit, as it saves time and money compared to buying individual products:
“The most effective way to restore headlights is to use a kit that has everything you need in one box. That way, you don’t have to worry about compatibility or buying extra supplies. A good kit will include a cleaning solution, sanding or polishing pads, and a protective coating.”
Finally, David advises against using harsh chemicals or abrasive materials on headlights, as they can cause more damage than good:
“Avoid using products that contain ammonia, bleach, or other aggressive chemicals, as they can eat away at the plastic and leave permanent marks. Also, stay away from abrasive materials like steel wool or sandpaper, as they can scratch the lens and create more problems.”
Common Mistakes to Avoid
While cleaning car headlights can be a straightforward process, there are some common mistakes that people make that can lead to unsatisfactory results or even damage to their headlights:
- Using the wrong type of product: using a cleaning solution or compound that is not compatible with your headlight material can cause discoloration, cloudiness, or cracking.
- Not protecting the surrounding area: using a buffer or abrasive pad can cause damage to the paint or trim around the headlight, so it’s important to mask it off with tape or plastic before starting.
- Skipping the polishing step: while cleaning the surface of the headlight is important, the polishing step is what restores the clarity and brightness of the lens. Skipping this step can cause the lens to remain hazy or yellowed.
- Not using UV protection: after cleaning and polishing the headlight, it’s important to apply a UV-resistant coating to prevent future damage and discoloration. Ignoring this step can render your cleaning efforts useless in the long run.
By avoiding these mistakes, you can ensure that your headlight cleaning efforts are successful and long-lasting.
Conclusion
Cleaning your car headlights is an essential part of maintaining your vehicle’s safety, performance, and appearance. Whether you opt for a commercial product, a DIY solution, or expert advice, make sure you follow the proper steps and precautions to avoid damaging your headlights. Remember to protect the surrounding area, choose a compatible product, and polish and protect the lens for the best results.


