I. Introduction
Clams are a popular seafood delicacy enjoyed by many. However, before cooking them, it’s essential to clean them correctly. Cleaning clams ensures they are free of sand and other debris that can affect the taste of the dish. Moreover, it also helps to ensure your safety by reducing the risks of food poisoning caused by consuming improperly cleaned clams.
II. Why Cleaning Clams is Important
Consuming improperly cleaned clams poses serious health risks such as food poisoning, illness, or worse. Clams are filter feeders, meaning they filter seawater and feed on small organisms, including bacteria, viruses, parasites, and other pathogens. Failing to clean them properly could lead to the presence of these microorganisms and toxins in the final dish. However, cleaning clams removes any unwanted sand or debris and reduces the risk of foodborne illnesses such as hepatitis A, norovirus, and Vibrio infections that can result in diarrhea, vomiting, and nausea.
III. A Step-by-Step Guide to Cleaning Clams: Here’s What You Need to Know
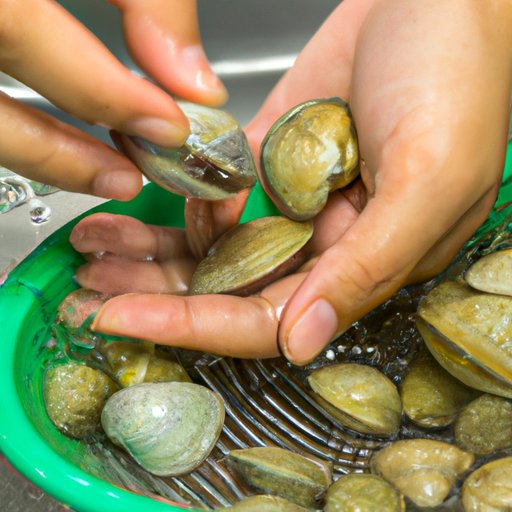
Here’s a step-by-step guide to cleaning clams properly:
- First, fill a large bowl with cold saltwater and place the clams in the water. Add a tablespoon of salt to the water, which will induce the clams to spit out any sand or grit inside.
- Allow the clams to soak in the water for about 20 minutes. As they soak, they will start to release sand and other debris. You can change the water every 5 minutes to make it more effective.
- After 20 minutes, remove the clams from the water and inspect them for any debris not washed away by the saltwater. Discard any clams whose shells remain open, broken, or chipped.
- To scrub off any remaining debris, use a stiff-bristled brush under running cold water. Scrub the shell’s surface and the ridges surrounding the opening.
- Rinse the clams under cold running water, and then place them in a clean bowl. Keep them refrigerated if you don’t intend to use them immediately; otherwise, begin cooking right away.
IV. How to Clean Clams: Tips and Tricks for Removing Dirt and Sand
Cleaning clams can be a time-consuming task, but there are ways to make the process more efficient and effective. Here are some tips to help you:
- Use a soft-bristled brush to remove all sand and mud from the clams effectively. Avoid using a metal sponge or brush that could damage the clam’s delicate shell.
- To make the saltwater mixture more effective, add a little sugar to it. This will draw out the moisture and any impurities present inside the clams quickly.
- Another effective method is to agitate the clams vigorously while they soak. This will encourage them to purge sand and grit a lot more effectively.
- Instead of saltwater, use cornmeal, which can also help get rid of sand in clams.
V. The Best Methods for Cleaning Clams at Home
There are different ways to clean clams, and each method has its pros and cons. Here are some of the best methods:
- Steaming: One way to clean clams is to steam them for a few minutes. As the shells open, it’s effortless to remove any debris or sand inside. However, this method might not be as effective as soaking them in saltwater.
- Boiling: Boiling is another good method for cleaning clams. Put the clean clams in a pot of cold saltwater and cook them for 2 to 3 minutes until their shells open up. Discard any clams that remain closed.
- Soaking: This is the most common method of cleaning clams. The clams are soaked in cold saltwater for 20 minutes to release the sand and debris inside. The salt in the water causes them to spit out any sand or grit they contain, and the process can be repeated as many times as necessary.
VI. Ready to Cook Clams at Home? First, Clean Them Like a Pro
Cleaning clams is a crucial step in preparing a delicious seafood dish. After cleaning clams, store them in the fridge for later use or immediately cook them. Some ways to cook clams include frying, grilling, steaming, or adding them to chowders or soups. Ensure you cook clams thoroughly to the appropriate temperature to eliminate any bacteria present.
VII. A Beginner’s Guide to Cleaning Clams: Don’t Let Dirt Ruin Your Dish
If you’re new to cooking with clams, cleaning them properly can seem daunting, but it’s relatively easy once you learn how to do it. Follow the simple guide provided above, and you can ensure your clam dishes always come out perfect and safe to eat.
VIII. Quick and Easy Ways to Clean Clams Before Cooking – The Ultimate Guide
Cleaning clams before cooking them doesn’t have to be a complicated process. Here is a quick recap of the ultimate guide for cleaning clams:
- Soak the clams in saltwater for 20 minutes.
- Remove clams from the water and rinse them in cold water.
- Use a soft-bristled brush to scrub the surface and ridges of the shell.
- Rinse the clams again and check for any dirt or debris inside.
- Store the clams in the fridge or cook them immediately.
IX. Conclusion
Cleaning clams is an essential step in ensuring your seafood meals are delicious and safe. Failure to clean clams could put your health at risk. By following the step-by-step guide above, you can clean clams efficiently and effectively. Remember also to cook the clams thoroughly to eliminate any bacteria. With these tips, you can enjoy clam dishes confidently without worrying about potential risks.


