Introduction
Ear hygiene is an essential part of overall hygiene, not to mention a crucial aspect of hearing health. Keeping your ears clean can help prevent ear infections and other ear-related problems. In this article, we’ll be covering everything you need to know to safely and effectively clean your ears at home. But first, a disclaimer: Always consult with your doctor before trying any form of ear cleaning, and never use sharp or pointed objects to clean your ears.
The Complete Guide: How to Clean Your Ears Safely and Effectively at Home
Earwax, or cerumen, is a naturally occurring substance that helps clean and protect the ear canal. However, sometimes too much earwax can build up, leading to hearing difficulties, ear infections, and other related problems. Here’s how you can safely remove excess earwax:
Step 1: Softening the Earwax
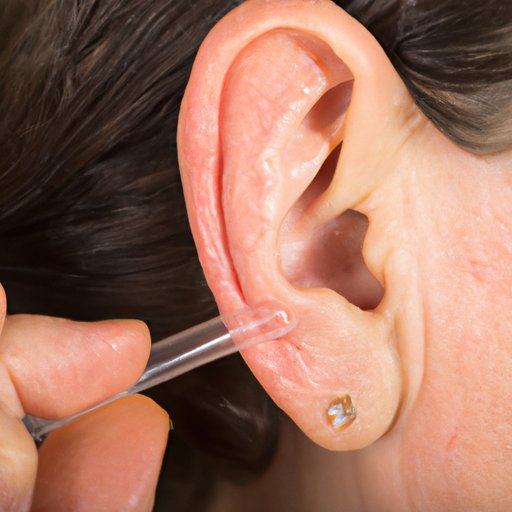
Before you start cleaning your ears, you need to soften the earwax. You can do this by placing a few drops of baby oil, mineral oil, glycerin, or hydrogen peroxide into your ear canal. These substances will help soften the wax and make it easier to remove.
Step 2: Rinsing the Ear Canal with Warm Water
After you’ve softened the earwax, you can rinse your ear canal with warm water. Fill a rubber-bulb syringe with warm water, tilt your head to the side, and gently squirt the water into your ear canal. Let the water sit for a few minutes, then tilt your head in the opposite direction to let the water drain out.
Step 3: Drying the Ear Canal
Finally, you’ll need to dry your ear canal. Use a clean towel, tissue, or cotton ball to gently pat the outside of your ear dry. You can also tilt your head to the side and let the excess water drain out on its own.
Precautions for Ear Irrigation
While ear irrigation can be an effective way to remove excess earwax, it’s not recommended for everyone. If you have a perforated eardrum, a history of ear infections, or other ear-related problems, ear irrigation may not be safe for you. Always consult with your doctor before trying ear irrigation.
DIY Ear Cleaning: How to Keep Your Ears Clean Without Damaging Them
Cotton swabs may seem like a quick and easy way to clean your ears, but they can actually be quite dangerous. Here are some alternative DIY ear cleaning methods:
Using a Warm Washcloth
Soak a washcloth in warm water and wring out the excess. Gently wipe the inside of your ear to remove any wax or debris. Make sure you don’t push anything further into your ear canal.
Using Hydrogen Peroxide
Dip a cotton ball in hydrogen peroxide and squeeze out the excess. Gently insert the cotton ball into your ear and let it sit for a few minutes. Tilt your head to the side and let the hydrogen peroxide drain out.
Using Ear Drops
There are various over-the-counter ear drops you can use to soften and remove earwax. Make sure to follow the instructions carefully and consult your doctor if you have any concerns.
Using Ear Syringes
Ear syringes work similarly to rubber-bulb syringes, but they’re specifically designed for ear cleaning. Make sure to follow the instructions carefully and consult with your doctor before trying ear syringes.
Natural Ear Cleaning Remedies You Can Try at Home
Many natural remedies can help soften and remove excess earwax. Here are some of the most effective:
Olive Oil
Warm up a small amount of olive oil and drop it into your ear canal. Let it sit for a few minutes, then tilt your head to let the oil drain out.
Garlic Oil
Garlic has natural antibiotic and antifungal properties, making it a great choice for ear cleaning. Crush a clove of garlic and mix it with a few drops of olive oil. Let it sit for a few minutes, then strain the mixture and drop it into your ear canal.
Tea Tree Oil
Tea tree oil has antifungal, antibacterial, and antiviral properties, making it a natural ear cleaning agent. Mix a few drops of tea tree oil with a few drops of olive oil and drop it into your ear canal.
Apple Cider Vinegar
Apple cider vinegar has acidic properties that can help reduce earwax buildup. Mix equal parts apple cider vinegar and warm water and use a dropper to drop the solution into your ear canal. Tilt your head to the side to let the solution drain out.
Warm Salt Water
Warm salt water can help soften earwax and remove debris from the ear canal. Mix a teaspoon of salt with a cup of warm water and use a dropper to drop the solution into your ear canal. Tilt your head to the side to let the solution drain out.
Step-by-Step: Easy and Quick Ear Cleaning Techniques at Home
Busy schedules often leave us with little time to devote to ear cleaning. Here’s a quick ear cleaning method you can use when you’re short on time:
Step 1: Softening the Earwax
Place a few drops of hydrogen peroxide or mineral oil in your ear canal and let it sit for a few minutes.
Step 2: Rinsing the Ear Canal
Tilt your head to the side and gently squirt warm water into your ear canal using a rubber-bulb syringe. Let the water sit for a few seconds, then tilt your head to the opposite side to let the water drain out.
Step 3: Drying the Ear Canal
Use a clean towel or tissue to gently pat the outside of your ear dry.
Exploring the Do’s and Don’ts of Ear Cleaning at Home
While ear cleaning is essential, it’s equally important to do it safely and correctly. Here are some important dos and don’ts:
Dos:
- Use warm water to rinse your ear canal.
- Dry your ears thoroughly after cleaning them.
Don’ts:
- Insert cotton swabs or any other sharp or pointed objects into your ear canal.
- Overclean your ears and remove too much earwax.
Conclusion
Cleaning your ears is an essential part of overall hygiene and hearing health. We’ve covered everything you need to know about cleaning your ears safely and effectively at home. Always consult with your doctor before trying any form of ear cleaning, and remember to never use sharp or pointed objects to clean your ears. By following the steps outlined in this article, you can maintain good ear hygiene and stay healthy.
Additional resources for ear cleaning:


