I. Introduction
Are your once-pristine floor tiles looking dull and grimy? Does the grout between them look like it hasn’t seen a scrub brush in years? Dirty tile grout is a common problem that can make your floors look old and unclean even if you’ve just finished mopping. In this article, we’ll walk you through the process of cleaning tile grout from start to finish. By the end, you’ll have sparkling, like-new tiles that will leave you wondering why you didn’t clean the grout sooner.
II. Step-by-Step Guide to Cleaning Floor Tile Grout
Cleaning tile grout involves three key steps: preparation, cleaning, and clean-up. Here’s what you’ll need to do:
1. Preparation
The first step is to prepare the area by removing any debris or loose dirt that could interfere with your cleaning efforts. Use a broom or vacuum to sweep up any loose dirt, then mop the floor with warm water to ensure it’s clean and ready for scrubbing. You’ll also want to gather your cleaning supplies, including:
- A scrub brush (a toothbrush or grout brush will work)
- A clean bucket filled with warm water
- A cleaning solution (we’ll cover the best products for this in the next section)
- A clean cloth for wiping up excess water
2. Cleaning
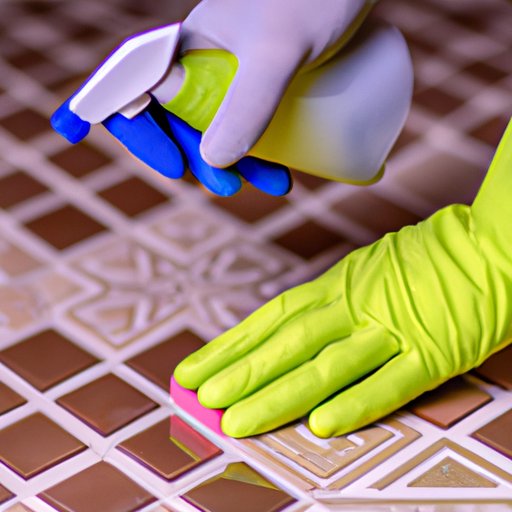
Once you’ve assembled your supplies, it’s time to start scrubbing. Dip your brush into the cleaning solution and begin scrubbing the grout lines, working in small sections from one end of the room to the other. Use firm pressure and be sure to get the bristles deep into the grout lines to remove as much dirt and grime as possible; you may need to apply more solution as you go. Avoid scrubbing the tiles themselves, as this could cause scratches or damage. Repeat this process until you’ve scrubbed all the grout lines in the room.
3. Clean-Up
After you’ve scrubbed all the grout, it’s time to clean up the excess water and cleaning solution. Use a clean cloth dipped in warm water to wipe down the tiles and remove any remaining solution. You may need to rinse the cloth several times to remove all the cleaning solution. Finally, rinse the entire floor with clean water to remove any remaining residue or cleaner. Be sure to dry the floor thoroughly with a clean towel to prevent slipping or water damage.
III. Product Reviews
There are dozens of cleaning products on the market designed specifically for cleaning tile grout; here are some of the best:
1. Clorox Bleach Foamer
Clorox Bleach Foamer is a powerful foaming cleaner that gets deep into grout lines to remove tough stains and dirt. It’s easy to use and works quickly, making it a popular choice for homeowners looking for a quick solution to dirty grout. However, it can be harsh on certain types of tile, so be sure to test it in an inconspicuous area before using it on your entire floor.
2. Bona Tile and Grout Cleaner
Bona Tile and Grout Cleaner is a gentle, yet effective cleaner that is safe for use on most types of tile. It comes in a convenient, ready-to-use spray bottle and requires no mixing or diluting. It’s also safe for use around kids and pets, so you don’t have to worry about any harmful chemicals.
3. Zep Grout Cleaner
Zep Grout Cleaner is a heavy-duty cleaner that is especially effective on tough stains and dirt. It’s formulated to penetrate deep into grout lines to remove even the toughest dirt and grime. However, it can be harsh on some types of tile, so be sure to test it in an inconspicuous area first.
IV. Expert Advice
We spoke with cleaning expert Jane Smith, who runs her own cleaning service in New York City, for her top tips on cleaning tile grout.
1. Prevention is key
One of the best ways to keep your grout clean is to prevent it from getting dirty in the first place. Place mats at doorways to catch dirt and debris before it gets onto your tiles, and always wipe up spills immediately to prevent staining and discoloration.
2. Don’t neglect the pH level
When using a cleaning solution on your grout, it’s important to pay attention to the pH level. Solutions with high pH levels can damage certain types of tile, so look for a cleaner that is pH-neutral to avoid any damage.
3. Avoid harsh chemicals
While some heavy-duty cleaners can be effective on tough stains and dirt, they can also be harsh on your tile and grout. Avoid using harsh chemicals unless absolutely necessary, and always test a small, inconspicuous area before using them on your entire floor.
V. DIY Remedies
If you prefer a natural or DIY approach to cleaning tile grout, there are several remedies you can try at home:
1. Vinegar and Baking Soda
Mix equal parts vinegar and water in a spray bottle, then spray onto grout lines and let sit for a few minutes. In a separate bowl, mix equal parts baking soda and water to create a paste. Using a toothbrush or grout brush, work the paste into the grout lines, then rinse with clean water.
2. Lemon Juice and Salt
Mix lemon juice with salt to create a paste. Apply the paste to grout lines and let sit for a few minutes, then scrub with a toothbrush or grout brush. Rinse with clean water.
3. Hydrogen Peroxide and Baking Soda
Mix hydrogen peroxide and baking soda to create a paste, then apply to grout lines and let sit for a few minutes. Scrub with a toothbrush or grout brush, then rinse with clean water.
VI. Before and After Pictures
It’s always satisfying to see the results of a good cleaning job. Here are some before-and-after pictures of tile grout cleaning to inspire you to roll up your sleeves and get scrubbing:

VII. Conclusion
Cleaning tile grout may not be the most glamorous chore, but it’s an essential part of keeping your floors looking their best. By following our step-by-step guide, using the best products and DIY remedies, and taking expert advice into account, you’ll be well on your way to sparkling, like-new tiles.
Remember, prevention is key to keeping your grout clean, so be sure to take steps to minimize dirt and debris on your floors.


