I. Introduction
A dirty grout in a shower can be an unsightly and unhealthy problem. Over time, grout can become discolored and start to accumulate mold and mildew, which can lead to health problems. Regular cleaning and maintenance can go a long way in preventing these issues. This article aims to provide readers with a step-by-step guide on cleaning grout in a shower, as well as tips and tricks for maintenance and prevention.
II. Step-by-Step Guide
Before jumping into cleaning grout in a shower, it is essential to have a basic understanding of what grout is and why it gets dirty over time. Grout is a material that is used to fill the gaps between tiles, and it can become dirty due to soap scum, hard water buildup, and other factors. Here is a step-by-step guide on how to clean grout in a shower:
- Gather materials: Before getting started, gather the materials you will need, including a grout brush, toothbrush, sponge or cloth, cleaning solution, and safety equipment like gloves and goggles.
- Prepare the grout for cleaning: Begin by removing any loose dirt or debris from the grout. You can do this by using a brush or vacuum cleaner to sweep away any dust or dirt that has accumulated.
- Apply the cleaning solution: Choose a suitable cleaning solution that will effectively clean the grout. There are various options available, such as baking soda and vinegar, hydrogen peroxide and baking soda, bleach, or commercial grout cleaners. Apply the solution to the grout and let it sit for 10-15 minutes.
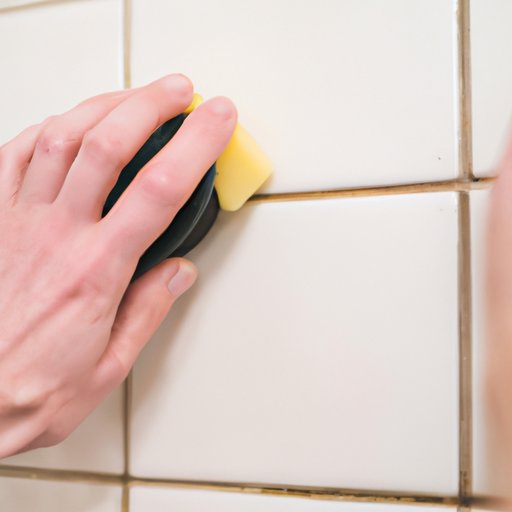
- Scrub the grout: Use a stiff-bristled brush or toothbrush to scrub the grout lines thoroughly. Scrub in circular motions, concentrating on any stubborn stains. Be careful not to damage the tiles while scrubbing.
- Rinse and dry the area: After scrubbing, rinse the area with warm water to remove any residue. Wipe the area dry with a clean sponge or cloth.
It is essential to note that depending on the severity of dirt and grime in the grout lines, some areas might require extra scrubbing.
III. Cleaning Solutions
There are various cleaning solutions that can be used to clean grout in a shower, each with its pros and cons. Here are some of the most common solutions:
- Baking soda and vinegar: This solution is a popular home remedy for cleaning grout. Mix half a cup of baking soda with a quarter cup of vinegar to form a paste, and apply it to the grout. Let it sit for 5-10 minutes before scrubbing and rinsing.
- Hydrogen peroxide and baking soda: Mix baking soda with hydrogen peroxide to form a thick paste. Apply the paste to the grout, let it sit for a few minutes before scrubbing and rinsing.
- Bleach: Bleach is an effective cleaning agent that can kill mildew and mold on grout. Mix a small amount of bleach with water and apply it to the grout. Ensure that you follow safety precautions when using bleach, such as using gloves and proper ventilation.
- Commercial grout cleaners: There are various grout cleaners available on the market that are effective in cleaning grout. Be sure to read the instructions carefully and follow the safety precautions.
It is essential to note that some cleaning solutions can be harsh on certain tile types, and it is best to test them before use.
IV. DIY Solutions
DIY solutions can be simple and inexpensive ways to clean grout without spending too much money on specialized cleaning agents. Here are some of the best DIY grout cleaning solutions:
- Lemon juice and baking soda: Mix lemon juice and baking soda to form a paste, apply it to the grout and let it sit for a few minutes before scrubbing and rinsing.
- Dish soap and warm water: This solution is gentle but effective. Mix dish soap with warm water, and use a toothbrush or sponge to scrub the grout. Rinse with warm water.
- Borax and warm water: Mix Borax with warm water to form a paste, apply it to the grout, and let it sit for a few minutes before scrubbing and rinsing.
V. Tools and Equipment
Having the right tools and equipment will make the cleaning process more effective and efficient. Here are some of the best tools and equipment for cleaning grout in a shower:
- Grout brush: A grout brush has stiff bristles that make it easier to remove grime from the grout lines. It is best to choose a brush that is small enough to fit into tight spaces.
- Toothbrush: An old toothbrush can be an alternative to a grout brush. Ensure that the brush is soft-bristled to avoid damaging the tiles.
- Sponge: Use a sponge or a cloth to wipe away any excess cleaning solution and wash the area.
Remember to use gloves and goggles when handling harsh cleaning chemicals.
VI. Prevention and Maintenance
Preventing grout buildup in a shower can save you time and energy in the long run. Here are some tips for preventing grout buildup:
- Regularly wiping down the shower: After each shower, wipe down the shower walls and grout with a towel or squeegee to remove any excess water.
- Using a squeegee: A squeegee can effectively remove excess water from shower walls, which can prevent mildew and mold buildup.
To maintain grout, it is essential to ensure that sealing is done regularly to prevent water absorption, which can contribute to mildew growth. Clean grout regularly, at least once every two weeks, to prevent a heavy buildup of grime, which can be harder to clean.
VII. Common Mistakes
Here are some common mistakes that people make when cleaning grout in the shower:
- Using harsh chemicals: It can be tempting to use overly harsh chemicals when cleaning grout, which can damage the tiles and grout over time. Always use suitable and safe cleaning solutions.
- Scrubbing too hard: Excessive scrubbing can damage tiles and leave marks on the grout lines.
When cleaning grout in a shower, it is crucial to be gentle yet thorough to avoid damages to the tiles and grout.
VIII. Conclusion
Keeping the grout in a shower clean and free from buildup is essential for the health of your family and the longevity of your bathroom. This article has provided a step-by-step guide on how to clean grout in a shower, tips and tricks for maintenance and prevention, cleaning solutions, DIY solutions, tools and equipment, and common mistakes. By following the recommendations of this guide, you can keep your grout looking clean and fresh for longer.
Try out the recommended solutions and share your experiences with us in the comments or on social media.


