Introduction
Rings are not just fashion accessories, but also a symbol of commitment, love, and devotion. Whether it’s an engagement, wedding, or any other type of ring, it serves as a constant reminder of an important moment. However, with daily wear and exposure to the environment, rings can lose their luster and become tarnished or grimy. That’s why it’s important to clean your rings regularly to maintain their shine and keep them looking new. In this article, we’ll explore 7 simple steps to cleaning your rings, the do’s and don’ts of ring cleaning, 5 DIY ring cleaners that actually work, why regular ring cleaning is so important, how to clean your rings based on their metal type, and expert tips for ring cleaning and maintenance.
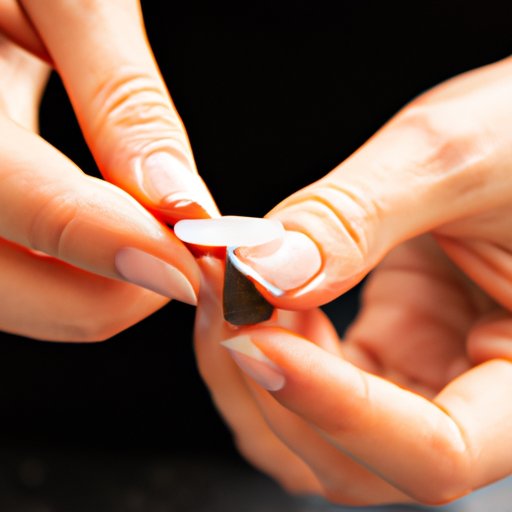
7 Simple Steps to Cleaning Your Rings at Home
Cleaning your rings at home doesn’t have to be a daunting task, and it can save you money and time compared to taking them to a professional cleaner. Here are 7 simple steps to follow:
Step 1: Gather the Necessary Items
You’ll need a soft-bristled brush, warm water, mild dish soap, a lint-free cloth, and a bowl for soaking the rings. It’s also important to have a safe and clean space to work on and avoid any accidents or loss of small items.
Step 2: Soak the Rings in Warm Soapy Water
Place your rings in a bowl of warm water mixed with mild dish soap for 20-30 minutes. This will help loosen any dirt or grime buildup on the surface of the rings.
Step 3: Scrub the Rings Gently Using a Soft-Bristled Brush
After soaking, use a soft-bristled brush to gently scrub the surface of the rings to remove any remaining residue. Be careful not to apply too much pressure, especially if your ring has sensitive stones or materials.
Step 4: Rinse the Rings Thoroughly
Rinse the rings with warm water until all the soap residue is removed. It’s crucial to remove all soap residue as it can contribute to future tarnishing.
Step 5: Dry the Rings Using a Lint-Free Cloth
Using a lint-free cloth, gently dry your rings and make sure there is no excess moisture. Letting the rings dry on their own can lead to water spotting or damage to the band and stone settings.
Step 6: Polish the Rings (Optional)
If your rings still look dull or have spots, you can polish them using a jewelry polishing cloth or a dab of jewelry cleaning solution. Make sure to follow the manufacturer’s instructions and use a microfiber cloth to avoid scratching the rings.
Step 7: Store the Rings Properly
After cleaning, store your rings in a safe place away from direct sunlight, heat, or chemicals. You can use a small jewelry box or a pouch to protect the rings from dust and scratches.
The Do’s and Don’ts of Ring Cleaning
Although cleaning your rings at home is a simple process, there are a few common mistakes people make that can damage their rings. Here are some do’s and don’ts to keep in mind:
Do:
- Use mild dish soap and warm water to soak the rings.
- Use a soft-bristled brush to scrub the rings gently.
- Make sure there is no residue left after rinsing the rings.
- Dry the rings thoroughly with a lint-free cloth.
- Store the rings in a safe and clean place.
Don’t:
- Use abrasive chemicals or cleaners that can harm the rings.
- Scrub too hard or use a toothbrush to clean the rings.
- Expose the rings to high heat or direct sunlight.
- Wear the rings during activities like swimming or exercising.
5 DIY Ring Cleaners That Actually Work
If you prefer to avoid using store-bought cleaners or have specific allergies or preferences, you can try these 5 DIY ring cleaners that actually work:
Recipe 1: Baking Soda and Water
Mix equal parts baking soda and water to form a paste. Dip a soft-bristled toothbrush in the mixture and gently scrub the rings. Rinse the rings with warm water and dry them using a lint-free cloth.
Recipe 2: Vinegar and Baking Soda
Mix 1/2 cup white vinegar and 2 tablespoons baking soda in a bowl. Soak the rings in the mixture for 2-3 hours or until the dirt and grime loosen. Once the soaking is done, scrub the rings with a toothbrush and rinse them with warm water. Dry them with a lint-free cloth.
Recipe 3: Lemon Juice and Salt
Mix 1/2 cup lemon juice and 1 tablespoon salt in a bowl. Soak the rings in the mixture for 5-10 minutes and gently scrub them with a soft-bristled brush. Rinse the rings with warm water and dry them with a lint-free cloth.
Recipe 4: Toothpaste
Add a small dab of toothpaste to a soft-bristled toothbrush. Scrub the rings gently and rinse them with warm water. Dry them with a lint-free cloth. Make sure the toothpaste doesn’t contain abrasive substances like baking soda or charcoal, which can scratch the rings.
Recipe 5: Dish Soap and Warm Water
Mix a few drops of mild dish soap in warm water. Soak the rings in the solution for 20-30 minutes. Scrub the rings using a soft-bristled brush and rinse them with warm water. Dry them with a lint-free cloth.
Why Regular Ring Cleaning is So Important
Regular ring cleaning is essential not only for aesthetic purposes but also for protecting the ring’s integrity and longevity. Here are some benefits of cleaning your rings regularly:
- Removes dirt, oil, and grime buildup that can cause damage to the ring.
- Preserves the ring’s shine and luster, making it look like new.
- Prevents tarnishing and corrosion caused by exposure to moisture, air, and chemicals.
- Identifies any loose stones or cracks that could result in further damage if left untreated.
- Enhances the sentimental and emotional value of the ring by keeping it in good condition.
How to Clean Your Rings Based on Their Metal Type
Different types of rings require different care and cleaning methods to avoid damaging them. Here’s how to clean your rings based on their metal type:
Gold Rings
To clean gold rings, use a solution of warm water and mild dish soap. Soak the rings in the mixture for a few minutes and then scrub them gently using a soft-bristled brush. Rinse the rings with warm water and dry them with a lint-free cloth. To polish your gold rings, you can use a jewelry polishing cloth or a small amount of jewelry cleaning solution. Avoid using vinegar, baking soda, or toothpaste as they can scratch the gold surface.
Silver Rings
To clean silver rings, use a solution of warm water and baking soda or white vinegar. Soak the rings in the mixture for 10-15 minutes and then scrub them gently using a soft-bristled brush. Rinse the rings with warm water and dry them with a lint-free cloth. To remove heavy tarnishing or corrosion, you can use silver cleaning solutions or silver polishing cloths. Avoid using toothpaste or abrasive brushes as they can damage the silver surface.
Other Types of Rings
For other types of rings, such as titanium, tungsten, or platinum, it’s best to use warm water and mild dish soap. You can soak the rings in the mixture for a few minutes and then scrub them gently using a soft-bristled brush. Rinse the rings with warm water and dry them with a lint-free cloth. Avoid using any abrasive chemicals, solutions, or cleaners that can harm the rings’ surface or texture.
Expert Tips for Ring Cleaning and Maintenance
To get more insider tips and tricks for ring cleaning and maintenance, we’ve interviewed a jeweler to share their expertise:
Tip 1: Avoid Using Ultrasonic Cleaners
Although ultrasonic cleaners can clean rings effectively, they can also damage the ring’s stones, particularly emeralds, opals, and pearls. If your ring has any of these stones, avoid using ultrasonic cleaners and stick to mild dish soap and warm water instead.
Tip 2: Take Off Your Rings Before Swimming or Showering
Chlorine, saltwater, and soap can damage the rings’ metal and stones if they’re exposed to them frequently. That’s why it’s recommended to take off your rings before entering any water or showering.
Tip 3: Get Your Rings Checked Professionally Every 6-12 Months
It’s a good practice to take your rings to a professional jeweler every 6-12 months to have them inspected for loose stones, prongs, or settings. This can prevent any further damage or loss of stones.
Conclusion
Cleaning your rings regularly is a simple yet effective way to maintain their shine and extend their lifespan. By following the 7 simple steps to cleaning your rings at home, using the right DIY cleaners, understanding the do’s and don’ts of ring cleaning, and learning how to clean your rings based on their metal type, you’ll be able to keep your rings in top condition. Additionally, expert tips and advice can help you avoid common mistakes and ensure that your rings remain beautiful and sentimental for years to come. We encourage our readers to take action and start cleaning their rings regularly for a long-lasting effect.


