Introduction
Thermal paste is a vital component in keeping your CPU functioning correctly. It helps to transfer heat away from the CPU and into the heat sink, preventing overheating and damage. Over time, however, thermal paste can dry out or become contaminated, necessitating its removal and reapplication. Cleaning thermal paste off a CPU can seem daunting, but it is a simple process that anyone can do with the right tools and techniques. In this article, we will cover everything you need to know about safely and effectively cleaning thermal paste off your CPU.
6 Simple Steps to Safely and Effectively Remove Thermal Paste from Your CPU
Before we dive into the tools and techniques for cleaning thermal paste off your CPU, it’s crucial to understand the basic steps involved in the process. Here is a step-by-step guide to safely and effectively removing thermal paste from your CPU:
Preparation
Gather the necessary tools and materials, including thermal paste remover solution, a lint-free cloth or coffee filter, a plastic card or spatula, isopropyl alcohol, and cotton swabs or a soft-bristled brush. Turn off and unplug your computer before starting to work on your CPU.
Removing the CPU from the motherboard
Locate the CPU socket on your computer’s motherboard. Release the lever holding the CPU in place and carefully remove it from the socket. Check the manufacturer’s instructions for detailed guidance on removing your specific CPU.
Cleaning the CPU and heatsink
Apply thermal paste remover solution to a lint-free cloth or coffee filter. Be sure to wet the cloth, not the CPU, to avoid getting any solution into the CPU socket or other areas of your motherboard. Carefully wipe the CPU and heatsink until they are clean.
Reapplying thermal paste
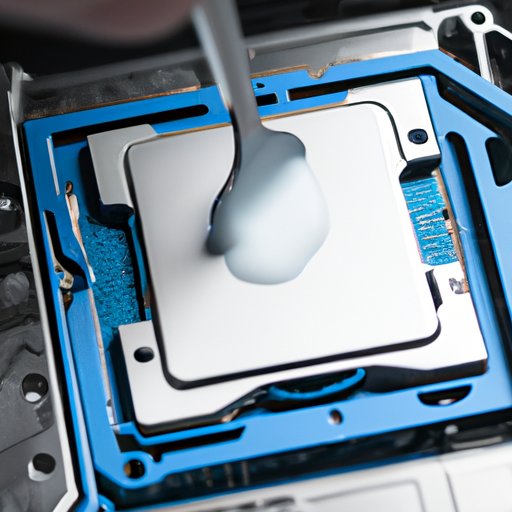
Apply a pea-sized amount of thermal paste to the center of the CPU. Use a plastic card or spatula to spread the paste evenly over the surface of the CPU. Avoid using too much thermal paste, as this can lead to poor heat transfer and overheating.
Replacing the CPU and heatsink
Align the CPU correctly in the socket and lower it gently into place. Close the lever to secure the CPU, and then reattach the heatsink and fan. Be sure to follow the manufacturer’s instructions for your specific CPU and heatsink to avoid damaging your hardware.
The Best Tools and Techniques for Cleaning Thermal Paste Off Your CPU
Now that you know the basic steps involved in cleaning thermal paste off your CPU let’s take a closer look at the tools and techniques that will help you do it safely and effectively.
Tools
Thermal paste remover solution is essential for cleaning thermal paste off your CPU. You also need a lint-free cloth or a coffee filter to avoid leaving any fibers behind on your CPU, which can interfere with heat transfer. A plastic card or spatula can help you spread thermal paste evenly. Isopropyl alcohol is useful for cleaning the CPU and heatsink, and cotton swabs or a soft-bristled brush can help you reach tight spaces.
Techniques
When cleaning thermal paste off your CPU, be sure to apply the solution to the cloth, not directly to the CPU. Use a twisting motion when removing the CPU from the socket, and be gentle when wiping the CPU and heatsink to avoid bending pins or damaging other components. Avoid using too much thermal paste, as this can interfere with heat transfer and cause your CPU to overheat.
Damage Control: How to Clean Thermal Paste from Your CPU Without Ruining Your System
While removing and cleaning thermal paste is a relatively straightforward process, it’s essential to understand the potential risks involved and how to mitigate them.
Potential risks of cleaning thermal paste
The primary risk of cleaning thermal paste from your CPU is accidental damage to the sensitive components of your computer. This can include bending CPU pins, damaging the CPU socket or other components on the motherboard, or using excessive force when cleaning or removing the CPU.
How to mitigate those risks
To mitigate the risks of cleaning thermal paste, be gentle and use appropriate tools and materials. Don’t use excessive force when removing or cleaning the CPU, and avoid bending pins or damaging other components. Follow the manufacturer’s instructions for your specific CPU and heatsink, and be sure to take your time when working on your computer.
The Dos and Don’ts of Removing Thermal Paste from Your CPU
To help you avoid common mistakes when cleaning thermal paste, here are some dos and don’ts to keep in mind:
Dos
Gather the necessary tools before starting the process, turn off and unplug the computer, and use a pea-sized amount of thermal paste when reapplying.
Don’ts
Don’t apply thermal paste on top of existing paste, use too much thermal paste, or use excessive force when removing or cleaning the CPU.
Cleaning Thermal Paste Off Your CPU: A Step-by-Step Guide for Beginners
Now that you understand the basics of cleaning thermal paste off your CPU let’s take a closer look at a step-by-step guide for beginners:
Basic explanation of how thermal paste works
Thermal paste helps to transfer heat away from your CPU and into the heatsink, preventing overheating and damage.
Straightforward instructions on how to remove and reapply thermal paste
Follow the six simple steps listed above to safely and effectively remove and reapply thermal paste to your CPU.
Tips for beginners to follow
Be sure to gather the necessary tools and follow the manufacturer’s instructions for your specific CPU and heatsink. Take your time, and be gentle when working on your computer. If you’re unsure about any part of the process, seek guidance from a professional or a knowledgeable friend.
Expert Tips for Safely Removing Thermal Paste and Keeping Your CPU in Top Shape
Finally, to help you keep your CPU in top shape over the long term, let’s explore some expert tips for safely and effectively removing thermal paste:
Explanation of why thermal paste needs to be replaced periodically
Over time, thermal paste can dry out or become contaminated, reducing its ability to transfer heat from your CPU to the heatsink.
Expert tips for safely and effectively cleaning thermal paste off CPUs
Use a high-quality thermal paste from a reputable manufacturer, and don’t mix different brands or types of thermal paste. Consider using a thermal paste spreader to ensure even coverage. Be sure to follow the manufacturer’s instructions for your specific CPU and heatsink.
Tips for maintaining your CPU’s overall health
Keep your computer clean and dust-free, check your CPU temperatures regularly, and replace your thermal paste every few years or whenever you notice a significant decrease in performance.
Conclusion
As you can see, safely and effectively cleaning thermal paste off your CPU is a simple process that anyone can do with the right tools, techniques, and guidance. By following the steps outlined in this article, you can keep your CPU running smoothly and prevent the risk of overheating and damage. We encourage you to take a proactive approach to maintaining your computer’s hardware and to seek professional guidance if you’re unsure about any aspect of the process.


