Introduction
Are you an avid gamer but find using the keyboard and mouse frustrating or simply prefer using a controller? Xbox One owners can easily connect their controllers to their PC for an improved gaming experience. In this article, we will provide a comprehensive step-by-step guide on how to connect an Xbox One controller to a PC.
Step-by-Step Guide for Windows 10 Users
Before starting, make sure that Windows 10 is running on your PC. It’s important to have the latest version of Windows 10 with all updates installed. Next, ensure that you have the latest version of Microsoft’s Xbox Accessories app installed. This app can be found in the Microsoft Store. Once these prerequisites have been fulfilled, you can proceed as follows:
- On the Xbox One controller, press the Xbox button to turn it on and then press the wireless connection button. It looks like a dot and can be located at the top of the controller, next to the charge port. The controller should start flashing.
- On Windows 10, go to the Start Menu and select the Settings app. Click “Devices” and then select “Bluetooth & other devices.”
- Click on “Add Bluetooth or other device.”
- Select “Everything else.”
- Select “Xbox Wireless Controller.”
- Windows 10 will search for the Xbox One controller. When it appears in the list, click on it and select “Pair.”
- Your Xbox One controller is now connected to your PC.
Using an Xbox Wireless Adapter for Windows
An Xbox Wireless Adapter for Windows is another way to connect an Xbox One controller to a PC. They offer a more reliable, stable and responsive connection, and they’re ideal for gamers who prefer a more traditional gaming experience. Follow these steps to connect your Xbox One controller to your PC using an Xbox Wireless Adapter:
- Insert the Xbox Wireless Adapter for Windows into your PC’s USB port.
- On the Xbox One controller, press the Xbox button to turn it on and then press the wireless connection button. The controller should start flashing.
- On the Xbox Wireless Adapter, press and hold the pairing button for a few seconds until the light on the adapter starts flashing.
- The controller and adapter should now connect to each other automatically. Once the controller is connected, the light on the Xbox Wireless Adapter should stop flashing.
Mapping the Controller Buttons with Third-Party Software
Once you have connected your Xbox One controller to your PC, you can further enhance your gaming experience by mapping your controller buttons with third-party software. This allows you to customize your controller to suit your gaming needs. To do this, follow these steps:
- Download and install the third-party software. There are many available, but we recommend JoyToKey or Xpadder.
- Connect your Xbox One controller to your PC using either of the above methods.
- Open the third-party software and select the “Create New Profile” option.
- Next, assign a button on your controller to a specific key on your keyboard.
- You can customize your buttons further to suit your needs, including setting up macros and triggers, among others.
Connecting via Bluetooth on Windows 10
While connecting your Xbox One controller to your PC via Bluetooth may seem like a convenient option, it may not always be the most reliable. Bluetooth signals can easily be interfered with, which may result in latency or connection lost. However, if you still choose to connect your controller via Bluetooth, follow these steps:
- Ensure that your PC has Bluetooth capabilities. If it doesn’t, you can purchase a USB Bluetooth adapter.
- On the Xbox One controller, press the Xbox button to turn it on and then press the wireless connection button. The controller should start flashing.
- Go to the Start Menu and select the Settings app. Click “Devices” and then select “Bluetooth & other devices.”
- Click on “Add Bluetooth or other device.”
- Select “Bluetooth.”
- Select “Xbox Wireless Controller” from the list of available devices.
- Your Xbox One controller is now connected via Bluetooth to your PC.
Configuring the Controller with Steam Big Picture Mode
If you’re an avid gamer, chances are that you use the Steam platform to purchase and download games. Steam’s Big Picture Mode is a great way to play games on your TV with a controller. Here’s how to configure your Xbox One controller with Steam Big Picture Mode:
- Connect your Xbox One controller to your PC using any of the above methods.
- Launch the Steam app and navigate to the “Big Picture Mode” option.
- In Big Picture Mode, select the “Settings” button to access the “Controller Settings.”
- Check the “Xbox Configuration Support” box.
- Once selected, your Xbox One controller will be automatically mapped to Big Picture Mode.
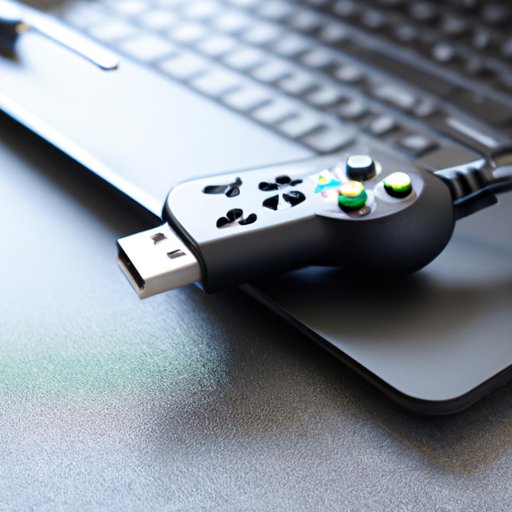
Using a USB Cable to Connect the Controller to the PC
If you’re having difficulty connecting your Xbox One controller wirelessly, or it’s not working correctly, you can also connect it to your PC using a USB cable. Here’s how to do it:
- Connect one end of the USB cable to your Xbox One controller and the other end to your PC.
- Open the Xbox Accessories app on your PC.
- Ensure that your controller is connected and recognized by the app.
- You’re now ready to use your Xbox One controller with your PC.
Troubleshooting Common Issues When Connecting Xbox One Controllers to a PC
While Xbox One controller connectivity is generally straightforward, it’s not uncommon to encounter problems when connecting to a PC. Here are some common problems and tips to troubleshoot them:
- Controller Not Recognized: If your Xbox One controller is not being recognized by your PC, try restarting both devices and then reconnecting again.
- Connection Issues: If you’re experiencing connectivity issues, ensure that your PC has Bluetooth capabilities or the necessary drivers are installed. You can also move your PC closer to the Xbox wireless adapter or reduce the number of wireless devices in the area.
- No Sound: Ensure that the correct audio device is selected in your PC’s settings. Also, make sure that the volume is not muted or turned down too low on your PC or the controller.
- Game Compatibility: Not all games automatically recognize the Xbox One controller. In such cases, you may need to manually map the controller buttons or use third-party software.
Conclusion
In conclusion, connecting your Xbox One controller to your PC can significantly enhance your gaming experience. There are several ways to connect, including the Xbox Wireless Adapter, Bluetooth, and USB cable. Furthermore, you can customize your controller to suit your gaming needs by mapping buttons and using third-party software. If you encounter any issues, make sure to troubleshoot them by following the tips we’ve given.


