Introduction
There’s something special about a perfectly crimped pie crust. Not only does it add to the overall presentation of a pie, but it also shows that the baker put in extra effort to make something truly impressive.
But crimping pie crust can seem intimidating, especially for beginners. That’s why we’ve put together a comprehensive guide to help you master the art of crimping and create beautiful pies every time.
In this article, we’ll cover everything from the basics of crimping to advanced techniques for achieving unique designs. We’ll also provide tips for troubleshooting common mistakes and shortcuts for those short on time. So grab your rolling pin and let’s get started!
10 Easy Steps to Perfectly Crimped Pie Crust
Before diving into the art of crimping, it’s important to understand the basics. Here are 10 easy steps for creating a perfectly crimped pie crust:
1. Roll out your pie crust dough and transfer it to your pie dish.
2. Trim any excess dough from the edges using scissors or a sharp knife.
3. Fold the edges of the dough under to create a thicker border.
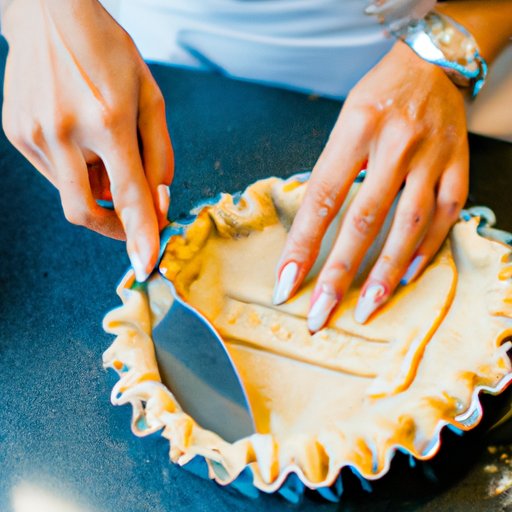
4. Position your fingers on the inside of the crust and use your other hand’s knuckle to press the dough into the middle finger, creating a V-shaped crimp.
5. Move your fingers over to the next section and repeat, creating a scalloped edge.
6. Continue around the crust, alternating between V-shapes and scallops until the entire edge is crimped.
7. Use your fingers to gently shape and refine the crimped edge.
8. Brush the crust with an egg wash or milk for a shiny finish.
9. Chill the crust in the refrigerator for at least 30 minutes before baking.
10. Blind-bake the crust (if necessary) according to your recipe.
The Art of Crimping: A Guide to Mastering Pie Crust Decoration
Now that you have the basics down, it’s time to get creative with your crimping! Here are some techniques for achieving the perfect decorative finish:
– Rope Edge: Roll out a long, thin piece of dough and twist it into a rope-like shape. Press the rope onto the edge of the crust.
– Fork Crimp: Press a fork tine into the edge of the crust, creating a simple yet classic design.
– Braided Edge: Cut thin strips of dough and braid them together, then press the braid onto the edge of the crust.
– Leaf Edge: Cut out small leaf shapes from the excess dough and press them onto the edge of the crust, slightly overlapping each other.
– Cut-Out Edge: Use a small cookie cutter or a knife to cut out shapes from the excess dough. Place the shapes around the edge of the crust, slightly overlapping each other.
Tips and Tricks
– Always work with cold dough and cold hands.
– Use a sharp knife or scissors to trim the dough.
– Experiment with different shapes and designs to add uniqueness to your pies.
– Don’t be afraid to mix and match techniques to create your own signature crimp!
– Practice, practice, practice!
Crimping Without the Fuss: Time-Saving Shortcuts for Pie Crust Decoration
If you’re short on time, don’t worry! There are still ways to achieve a beautifully crimped pie crust without all the fuss. Here are a few tips:
– Use a pre-made or frozen pie crust to save time.
– Skip the crimping altogether and opt for a rustic edge.
– Use a lattice top crust to add visual interest.
Tips for Balancing Time and Effort
– Don’t compromise on flavor. If you’re short on time, focus on making a delicious filling and let the crust be more basic.
– Use simple techniques, like a fork crimp, to add visual interest without adding too much time or effort.
– Plan ahead and make the crust ahead of time to allow for chilling time.
Getting Creative with Pie Crust Crimping
Once you’ve mastered the basics, it’s time to think outside the box and get creative with your crimping. Here are some ideas to get you started:
– Use cookie cutters to create shapes in the crust.
– Experiment with different crimping patterns and combinations.
– Use tools, like a fork or toothpick, to add texture to the edge of the crust.
– Use food coloring to dye the crust for a fun, festive twist.
– Add edible flowers or other decorations to the edge of the crust for a beautiful finishing touch.
Let Your Imagination Run Wild!
The possibilities for pie crust crimping are endless. Don’t be afraid to try new things and have fun with your crusts.
Troubleshooting Common Crimping Mistakes
Even the most experienced bakers make mistakes while crimping. Here are some common issues and solutions:
– Crust cracks or breaks: This can happen if the dough is too dry or has been rolled out too thin. If this happens, patch the dough with some excess dough and press the seam gently to seal.
– Uneven crimping: This can happen if you apply too much or too little pressure when crimping. If this happens, reshape the crust with your fingers and try again.
– Crust shrinks: This can happen if the dough is not chilled long enough before baking. Follow the chilling instructions carefully to avoid shrinking.
– Crust burns: This can happen if the oven temperature is too high or if the crust is too thin. Cover the crust with aluminum foil or a pie shield to prevent burning.
Tips for Preventing Mistakes
– Follow the recipe instructions carefully.
– Use a kitchen scale to measure ingredients accurately.
– Chill the dough for at least 30 minutes before rolling out.
– Keep an eye on the crust while baking, and make adjustments as necessary.
Conclusion
Crimping pie crust is a skill that takes practice, but with a little patience and creativity, anyone can master it. Whether you’re a seasoned baker or just starting out, there’s something truly special about a beautifully crimped pie crust. So take these tips and techniques and start creating your own signature crusts.


