Introduction
Snowflakes are intrinsically beautiful and fascinating to observe. They’re intricate and unique, much like our own fingerprints. Over the years, people have turned snowflake cutting into an art form, and it has become a popular winter craft that can be enjoyed by children and adults alike.
However, cutting snowflakes can be tricky for beginners who don’t know where to start. In this article, we’ll take you through a step-by-step guide on how to create perfect snowflakes. We’ll also provide some tips for those who want to take their snowflake cutting to the next level and explore different techniques for crafting unique and intricate designs.
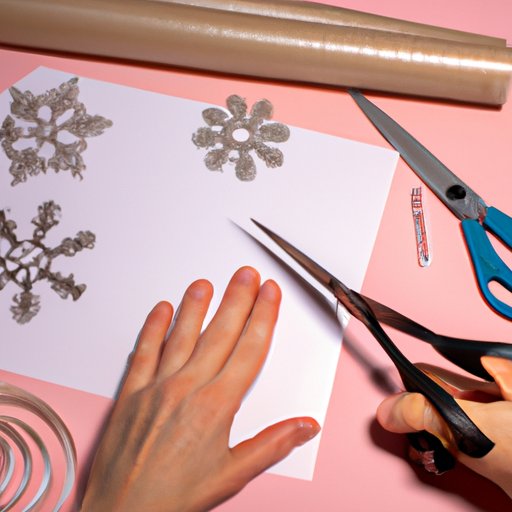
Step-by-Step Guide: How to Cut a Snowflake for Beginners
Before you begin, gather the necessary materials: white paper, scissors, and a pencil.
- Fold the paper in half diagonally to create a triangle.
- Fold the paper in half again diagonally, so that the paper is now a smaller triangle.
- Rotate the triangle so that the point is facing down and the flat edge is at the top. Take the right side of the triangle and fold it inwards towards the center, creating a small crease.
- Repeat the previous step with the left side of the triangle.
- Fold the triangle in half, bringing the top point down towards the bottom point, and press down to make a crease.
- Using your pencil, sketch a design by drawing shapes and lines on your folded paper triangle.
- Using your scissors, carefully cut along the lines of your design, making sure to cut through all of the folded layers of paper.
- Unfold the paper carefully to reveal your one-of-a-kind snowflake.
If your snowflake doesn’t look quite right, don’t worry! Try again by experimenting with different folding techniques or making smaller cuts to create a more intricate design.
Exploring Different Techniques for Cutting Snowflakes
There are different techniques for cutting snowflakes, both traditional and modern. Traditional techniques often involve intricate folding and cutting, while modern techniques incorporate technology like laser cutters or 3D printers. Here are a few techniques to explore:
- One-cut method: This is the simplest method and involves folding your paper into thirds and making one cut along the edge to create a unique snowflake.
- Six-fold symmetry method: Fold paper in half, then in thirds, and then cut out V shapes on each edge, resulting in a six-pointed snowflake.
- Twelve-fold symmetry method: Fold paper in half and then in thirds twice, and then make a series of small cuts along the edges to create a more intricate, 12-pointed snowflake.
There are also many digital tools and resources available for creating snowflake designs, such as Adobe Illustrator or websites like SnowDays.
To find the perfect technique for you, experiment and try different methods until you find the one that matches your skills and style. Don’t be afraid to try new techniques and approaches to create your own signature snowflake designs.
Get Creative: Tips for Making Unique Snowflakes
Want to make your snowflakes stand out? Here are some tips:
- Start simple: Begin with basic snowflake designs and gradually work your way to more intricate patterns as you gain confidence.
- Experiment with materials: Try cutting snowflakes out of different types of paper, such as colored or patterned paper, to create unique designs.
- Incorporate personal touches: Add personal touches to your snowflakes by cutting designs that reflect your interests, such as stars, hearts, or music notes.
- Think outside the box: Try cutting unconventional designs, such as geometric shapes or abstract patterns.
- Use multiple layers: Create more depth and intricacy by layering multiple snowflakes on top of one another.
With these tips, you’ll be able to create snowflakes that are truly one-of-a-kind and show off your own unique sense of style.
The Art of Snowflake Cutting: A Brief History and Modern Approaches
Snowflake cutting has been around for centuries, with the earliest recorded designs dating back to the 1500s. Over time, snowflake cutting has evolved to include more modern techniques and tools, such as digital cutting machines and computer software.
Today, snowflake cutting is recognized as a unique form of art, and many artists have made a name for themselves using snowflakes as their medium. For example, Etsy shop owner and artist Jason Christman makes intricate snowflakes using a laser cutter and has sold his designs to customers all over the world.
To get involved in the snowflake cutting community, you can attend local craft fairs or join online groups to connect with other snowflake enthusiasts. You can also check out resources and tutorials on snowflake cutting to learn more about this fascinating art form.
DIY Winter Wonderland: How to Cut and Decorate Snowflakes for Your Home
Snowflakes are a popular decoration during the winter months and can add a touch of whimsy and elegance to any space.
Here are a few ideas for incorporating snowflakes into your home décor:
- Hang snowflakes from the ceiling using clear fishing line to create a stunning winter wonderland effect.
- Adhere snowflakes to windows using suction cups or static cling film to create a frosted, wintry look.
- String snowflakes together to create a unique garland to hang across your mantle or bookshelf.
- Use snowflakes as part of your centerpiece by scattering them on tables or placing them in glass bowls.
No matter how you choose to decorate, snowflakes are sure to add a cozy, festive feel to your home during the long winter months.
Conclusion
Cutting snowflakes can be a fun and fulfilling creative outlet that anyone can enjoy. We hope that this guide has provided you with the inspiration and motivation to start creating your own beautiful snowflakes. Remember to experiment with different techniques and materials, and most importantly, have fun! Don’t forget to share your creations and experiences with others as you become part of the snowflake cutting community.


