
How to Cut Brussels Sprouts: Tips and Techniques
Brussels sprouts are one of the most nutritious and delicious vegetables around, packed with vitamins and minerals and an essential ingredient in many recipes from salads to stews. But for many home cooks, the task of cutting and prepping these tiny cabbages can be daunting. Fortunately, there are several easy techniques you can use to cut Brussels sprouts quickly and efficiently. In this article, we will discuss some of the most popular methods of cutting Brussels sprouts, provide step-by-step instructions and helpful tips, and guide you in choosing the best method for your recipe.
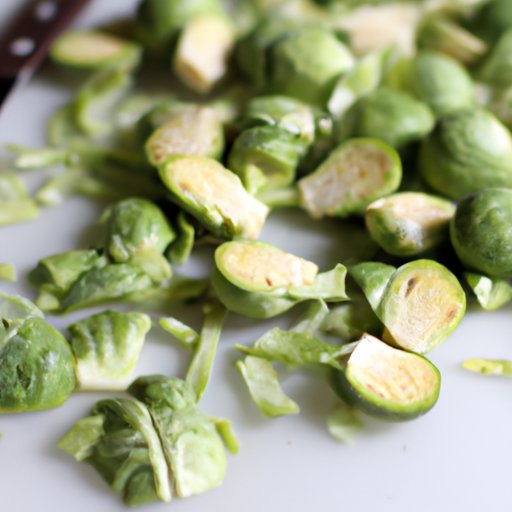
Traditional Method of Cutting Brussels Sprouts
The traditional method of cutting Brussels sprouts is to use a sharp kitchen knife. Here’s how to do it:
- Rinse the Brussels sprouts under cold water and pat them dry with a towel.
- Trim off the brown ends of the sprouts with a knife.
- Cut each sprout in half lengthwise.
- If desired, cut the halves into quarters by slicing them lengthwise again.
When cutting the Brussels sprouts, it’s important to use a sharp knife to avoid crushing them, which can result in an uneven cook. You can use either a chef’s knife or a paring knife, but be sure to use what you are comfortable with.
Using a Mandolin Slicer
A mandolin slicer is an excellent tool for cutting Brussels sprouts if you need to slice them thinly and uniformly, which is especially useful if you are making salads or slaws. Here’s how to slice Brussels sprouts with a mandolin slicer:
- Rinse the Brussels sprouts under cold water and pat them dry with a towel.
- Trim off the brown ends of the sprouts with a knife.
- Set the mandolin slicer to the desired thickness.
- Hold the sprout firmly at the stem end and run it back and forth over the slicer to slice it into thin discs.
It is important to be cautious while using a mandolin slicer as they can be dangerous machines, and always wear protective gloves while slicing. Keep in mind the thickness of the sprouts should be adjusted according to your preference and how it’s used for your recipe.
Using a Food Processor
A food processor is the quickest way to cut Brussels sprouts, particularly if you have to work with a large quantity of them. This method is perfect if you’re making super-coleslaws and recipes that require finely chopped sprouts. Here’s how to use a food processor to cut Brussels sprouts:
- Rinse the Brussels sprouts under cold water and pat them dry with a towel.
- Trim off the brown ends of the sprouts with a knife.
- Cut the sprouts into rough chunks and transfer them to the food processor.
- Pulse the machine for a few seconds until the sprouts are finely chopped to your desired size.
Ensure you don’t over-process the sprouts as it can result in a mashed texture, and make sure to clean your machine after every use with soap and warm water.
Choosing the Right Method for Your Recipe
The method you choose to cut your Brussels sprouts will greatly depend on what type of recipe you’re making. While cutting the sprouts can be quite time-consuming, it’s worth considering how different types of cuts can yield different textures. Halving them lengthwise produces a vibrant crunch that can stand up to hearty dishes, while slicing them thinly with a mandolin slicer makes for a bright and delicate salad.
Additionally, if you are cooking a substantial amount of Brussels sprouts, then you should opt for the food processor as it can cut a large amount quickly and uniformly without tiring your hands. Likewise, if you want to eliminate waste and be quick and detailed simultaneously, the kitchen scissors method is suitable for a stress-free experience.
Trimming and Preparing for Roasting
Roasting Brussels sprouts is a delicious and easy way to prepare them as a side dish. But before roasting, you need to trim and prepare the sprouts correctly to ensure they cook evenly and develop their natural sweetness.
- Rinse the Brussels sprouts under cold water and pat them dry with a towel.
- Remove the outer leaves and trim off the brown ends with a knife.
- Halve each sprout vertically through the stem.
- Toss the sprouts with olive oil, salt, and pepper, and roast in an oven at 400°F for 20 to 30 minutes until they are golden brown.
If you find your Brussels sprouts too bitter, blanch them in boiling water for about three minutes, drain the water, and season them accordingly.
Cutting Brussels Sprouts with Kitchen Scissors
One lesser-known yet incredibly effective method of cutting Brussels sprouts is to use kitchen scissors. This method prevents wastage and is much more practical if you’re making a large amount of them. Here’s how to cut Brussels sprouts with kitchen scissors:
- Rinse the Brussels sprouts under cold water and pat them dry with a towel.
- Remove the outer leaves and trim off the brown ends with a knife
- Hold the sprout firmly and begin cutting into small pieces with your kitchen scissors, cutting about 1 cm into the sprout at a time.
The Kitchen scissors method is much quicker than the traditional method of using a knife, and you will save on waste without any mess.
Conclusion
Cutting Brussels sprouts requires patience and care to achieve the perfect cut to elevate our recipes. While some methods may be more time-consuming, they often result in more visual and textural stir fry or slaw. If you’re into a quick cooking process and maintaining a neat setting, Kitchen scissors are the perfect tool for cutting Brussels sprouts.
Experiment with different methods to discover the one that works best for your recipes and chuck out any wasted sprouts. Follow the outlined steps, tips, and suggestions to make sure your Brussels sprouts are uniform, not bad, and ready to cook.


