Introduction
Have you ever looked at one of your shirts and thought it would look better without sleeves? Maybe it’s too hot outside, or maybe you just want to show off your arms. Whatever the reason, cutting off shirt sleeves is an easy and fun DIY project. But if you’re not careful, it can also be a bit tricky. That’s why this guide will take you through each step of the process, from preparing the materials to finishing touches.
I first encountered the challenge of cutting off sleeves when I was in college and wanted to turn my old band t-shirts into something more summery. It took me several tries to get it right, but once I did, I was thrilled with the result. Since then, I’ve enjoyed sharing my tips and tricks with friends and family. Now, I’m excited to share them with you!
Step-by-Step Guide
Before you get started, make sure you have everything you need:
- A shirt with sleeves
- A fabric marker or pen
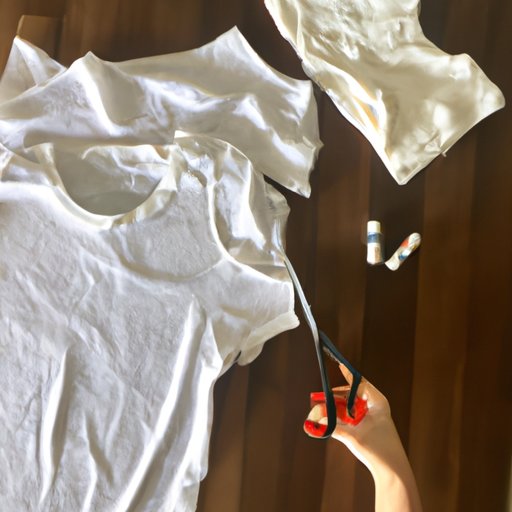
- A pair of fabric scissors
Preparation
Start by laying your shirt flat on a table or other work surface. Smooth out any wrinkles or bumps since this will make it easier to cut a straight line. If you’d like, you can iron the shirt first.
Next, use your fabric marker or pen to sketch the outline of where you want to cut the sleeves. You can make the line as straight or as curved as you like, but it’s essential to make sure both sleeves are even.
Cutting the Sleeves
With your outline complete, it’s time to start cutting! Take your fabric scissors and carefully follow the line you drew. Make sure you do not cut too far into the body of the shirt, as this will create an uneven look.
When cutting, move the scissors in a smooth motion and avoid making jerky or abrupt movements. This will help you achieve a clean cut with as few jagged edges as possible.
Finishing Touches
Once you’ve cut off the sleeves, you may notice some rough edges or irregularities. Don’t worry! You can easily fix this by trimming off any stray threads or uneven edges. If you like, you can also hem the edges to create a neater look.
Use Images
Images can be incredibly helpful when it comes to cutting off shirt sleeves. They can give you a visual guide to follow and show you what different styles look like.
Using Pointers
For example, you can use an image to point out specific areas that need attention, such as where to start and end your sleeve outline, or how to avoid snipping the wrong parts of the shirt.
Showing Different Styles
You can also use images to showcase different styles and creative options for cutting off shirt sleeves. For instance, you can display how to create a fringed look or cut-out designs.
Detailed Video Tutorial
If you’re more of a visual learner, a video tutorial can be even more helpful than written instructions. You can easily find tutorials on various platforms, such as YouTube or TikTok.
Demonstrating the Process
A video tutorial can show you every step of the process, from sketching the outline to cutting and trimming. This can help you get a better sense of the motions and techniques involved.
Tips for Shooting a Good Tutorial
If you’re interested in creating your own video tutorial, there are a few things to keep in mind. First, make sure you have good lighting and clear audio. You’ll also want to have a steady camera set up. Finally, don’t be afraid to show off your personality and have fun with it!
Safety Tips
When cutting off shirt sleeves, there are a few safety tips to keep in mind.
Preventing Accidents
First and foremost, make sure you are using fabric scissors rather than regular scissors. Regular scissors are not sharp enough and can cause fraying or uneven cuts. Secondly, be sure to keep your fingers and other body parts away from the sharp parts of the scissors.
Protecting Fingers
If you are worried about accidentally cutting yourself, you can wear a pair of gloves or finger guards. Additionally, make sure to work in a well-lit area so you can see what you’re doing clearly.
Creativity Tips
Cutting off shirt sleeves doesn’t have to be a one-size-fits-all endeavor. With a little creativity, you can create a unique, personalized look.
Getting Creative
First, consider playing with the shape and length of your sleeve outline. You can make it a straight line or angled, long or short, fluid or jagged. You can even experiment with cutting only one sleeve off.
Pushing the Boundaries
If you really want to push the boundaries, you can also try cutting out designs or patterns. For example, you can cut out a heart shape or create a diamond pattern.
Upcycling Tips
Cutting off shirt sleeves can be a great way to upcycle old clothes and reduce waste. Here are a few ideas for repurposing your shirt with cut-off sleeves:
Saving Resources
Cut off the sleeves and turn the shirt into a tank top. You can cut and hem the neckline to make it a bit more feminine, or leave it as is for a more casual look.
Reducing Waste
If you have an old shirt that you don’t wear anymore, consider cutting off the sleeves and turning it into a reusable shopping bag. You can sew the bottom hem shut, add handles, and you’ll have a stylish and eco-friendly bag in no time.
Styling Tips
Now that you’ve cut off your shirt sleeves and upcycled your wardrobe, it’s time to show off your new look. Here are some tips for styling your new shirt:
Matching with Outfits
Pair your cut-off sleeve shirt with a high-waisted skirt or shorts for a vintage-inspired look. Or, try wearing it with jeans for a more casual vibe.
Accessories that Work Well
To add some extra flair, you can also accessorize with a statement necklace or earrings. Alternatively, you can layer your shirt over a patterned or brightly colored tank top for a pop of color.
Conclusion
Cutting off shirt sleeves can be a fun and satisfying DIY project for anyone looking to upcycle their clothes or update their look. With this guide, you have all the information you need to get started. Make sure to follow safety tips and let your creativity shine. Don’t be afraid to share your creations or try out new styles.


