I. Introduction
Cutting toenails may seem like a mundane task, but it is an essential part of proper foot care. Neglecting to cut toenails correctly can lead to painful and unsightly foot problems such as ingrown toenails and fungal infections. In this article, we’ll explore the dos and don’ts of cutting toenails and provide step-by-step tutorials to achieve a perfect toenail trim. We’ll also cover how to achieve a professional-looking pedicure at home and tools and techniques for a safe and comfortable experience.
II. Expert Guide to Properly Cutting Your Toenails: Tips and Techniques
Common mistakes made while cutting toenails include cutting them too short, cutting them at an angle, and cutting the corners too much. These mistakes can lead to painful conditions such as ingrown toenails.
To properly cut your toenails, follow these steps:
- Soak your feet in warm water for 10 minutes to soften the nails.
- Trim straight across the nail, making sure to leave a little bit of white at the end.
- File the corners slightly to avoid sharp edges.
- Apply a moisturizer to the feet to keep them soft and smooth.
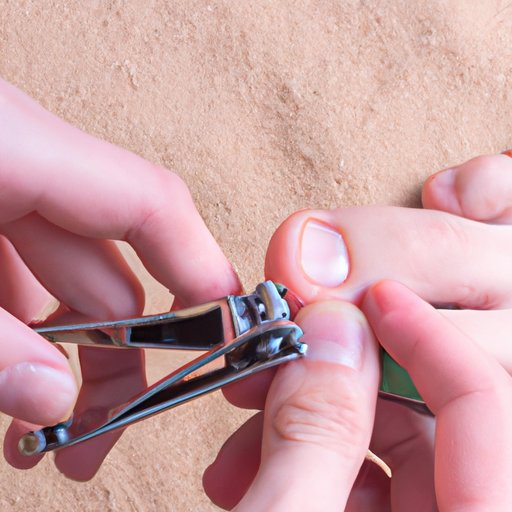
Illustrations can be helpful to demonstrate the proper technique for cutting toenails and can be found online or in foot care books.
III. The Dos and Don’ts of Cutting Toenails: A Comprehensive Guide
Before cutting your toenails, make sure to clean your feet and toenails with soap and water. This will help prevent infections from bacteria or fungi. It is also recommended to cut your toenails after a shower or bath while the nails are soft.
When cutting your toenails, avoid these common mistakes:
- Don’t cut your toenails too short.
- Don’t cut your toenails at an angle or in a curve.
- Don’t cut the corners of your toenails too much.
- Don’t tear or rip your toenails instead of cutting them.
Following these dos and don’ts will help prevent common foot problems such as ingrown toenails and fungal infections.
IV. 5 Steps for a Perfect Toenail Trim: A Step-by-Step Tutorial
Cutting toenails in 5 easy steps:
- Trim straight across the nail using toenail clippers.
- File the corners of the nails slightly to avoid sharp edges.
- Soothe the feet and nails with a moisturizer.
- Avoid wearing tight-fitting shoes or socks that may irritate the toes after cutting.
- Maintain proper foot care practices to keep the feet healthy and pain-free.
Additional tips and tricks to ensure a perfect trim include using a magnifying glass to see the nails better and avoiding cutting the toenails too often.
Common mistakes to avoid while following this tutorial include cutting the toenails too short and cutting the corners too much.
V. Foot Care 101: How to Cut Your Toenails to Keep Your Feet Healthy
Proper foot care includes cutting your toenails correctly. To avoid common foot problems, follow these tips:
- Trim toenails straight across and leave a little bit of white at the end.
- Don’t cut them too short or at an angle.
- File the corners of the nails slightly to prevent sharp edges.
- Apply a moisturizer to the feet after cutting to prevent dryness.
- Wear clean, comfortable socks and shoes that fit properly.
By following these basic foot care practices, you can prevent painful conditions such as ingrown toenails and fungal infections.
VI. A Guide to Cutting Your Toenails Without Pain or Stress
Common reasons for pain or discomfort while cutting toenails include improper technique, using dull or dirty clippers, and cutting the nails too short. To avoid pain and stress, follow these steps:
- Soak your feet in warm water for 10 minutes to soften the nails.
- Use sharp, clean toenail clippers.
- Cut the toenails straight across, leaving a little bit of white at the end.
- File the corners of the nails slightly to prevent sharp edges.
- Apply a moisturizer to the feet after cutting to prevent dryness.
Tools and techniques to ease stress and discomfort include using a magnifying glass to see the nails better, taking breaks as needed, and choosing a comfortable position while cutting.
VII. Fancy Feet: How to Achieve a Professional Looking Pedicure at Home
Doing a pedicure at home can save time and money. To achieve a professional-looking pedicure, follow these steps:
- Remove old nail polish with nail polish remover.
- Soak your feet in warm water for 10-15 minutes.
- Push back cuticles gently with a cuticle pusher.
- Trim toenails straight across and file them to the desired length and shape.
- Use a pumice stone or foot file to remove rough skin on your feet.
- Apply a moisturizing lotion to your feet.
- Paint your toenails with your favorite color of nail polish.
- Allow time for the nail polish to dry.
Tools and products needed for a DIY pedicure include nail polish remover, cuticle pusher, toenail clippers, foot file or pumice stone, lotion, and nail polish.
VIII. Tricks and Tools for a Safe and Effective Toenail Cut
Toenail clippers come in different shapes and sizes. Choose the appropriate size and shape for your toenails to ensure a safe and effective cut. Sanitize your toenail clippers regularly by wiping them with alcohol or washing them with soap and water.
Other tools that can aid in a safe and effective toenail cut include a magnifying glass to see the nails better, a footrest or stool to get in a comfortable position, and a file to smooth rough edges.
IX. Conclusion
Properly cutting your toenails is an essential part of foot care. By avoiding common mistakes and following the dos and don’ts, you can prevent painful foot problems and maintain healthy feet. Step-by-step tutorials and tips and tools for a safe and effective toenail cut and professional-looking pedicure are provided.


