I. Introduction
Tying a tie can be a daunting task, especially for beginners. Not only are there many different types of knots to choose from, but there are also rules about matching ties to shirts and suits. In this article, we will provide a comprehensive guide on how to tie a tie, covering everything from step-by-step instructions to expert tips and advice.
II. How to Tie a Tie for Beginners
If you’re new to tying a tie, a basic knot like the Windsor knot is a good starting point. Here are the steps to follow:
- Start with the wide end of the tie on your right side and the thin end on your left side. The wide end should be about 12 inches lower than the thin end.
- Cross the wide end over the thin end.
- Bring the wide end up and over the thin end again.
- Loop the wide end under the thin end and bring it up again.
- Finally, bring the wide end down through the knot in front.
To see these steps in action, check out visual aids like videos or diagrams. When tying a tie, it’s important to avoid common mistakes like twisting the tie or making the knot too loose or too tight.
III. Different Ways to Tie a Necktie for Different Occasions and Outfits
While the Windsor knot is a classic option, there are many other knots to choose from depending on the occasion and outfit. Here are six different tie knots to consider:
- Four-in-Hand: A simple, asymmetrical knot that is best suited for narrow collars and casual events.
- Half Windsor: A slightly larger knot that is suitable for most occasions and collars.
- Full Windsor: A symmetrical, large knot that is best for formal events and wide collars.
- Pratt knot: A versatile knot that is suitable for most occasions and collars.
- Oriental knot: A large, asymmetrical knot that is best for formal events and wide collars.
- Kelvin knot: A smaller, symmetrical knot that is best for narrow collars and casual events.
To achieve each knot, follow specific instructions that match the knot you want to tie. When choosing a knot, also consider the kind of shirt and suit you will be wearing.
IV. Expert Tips on Proper Tie Length, Knot Size, and Fabric
Proper length is key when it comes to tying a tie. Here’s how to determine the proper length:
- Start with the wide end of the tie on your right side and the thin end on your left side. The wide end should be at your midsection or slightly above it.
- Cross the wide end over the thin end once.
- Bring the wide end up and over the thin end again.
- Loop the wide end under the thin end and bring it up again.
- Finally, bring the wide end down through the knot in front.
The knot size should also match the occasion and collar type. For example, a large Windsor knot is suitable for formal events with wide collars, while a smaller knot like the Pratt knot is more versatile. Finally, the best fabric for a perfect knot is silk, as it is smooth and easy to work with.
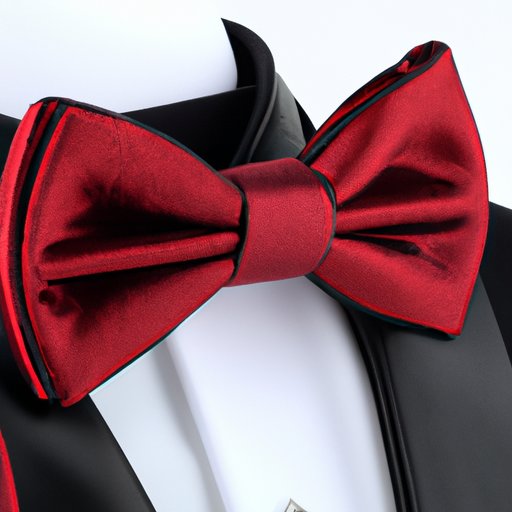
V. How to Tie a Bow Tie in 5 Easy Steps
A bow tie may seem more challenging than a necktie, but it’s actually quite simple once you get the hang of it. Here are the steps to follow:
- Start with one end of the bow tie longer than the other end.
- Place the longer end over the shorter end.
- Loop the longer end over and behind the shorter end.
- Create a small bow by folding the shorter end in half and placing it over the center of the longer end.
- Adjust the bow tie until it is symmetrical and fits properly.
As with a necktie, visual aids can help you learn to tie a bow tie more easily.
VI. Matching Tie Patterns and Colors with Shirts and Suits
When it comes to matching ties with shirts and suits, there are some general rules to follow. Here are a few examples to keep in mind:
- For formal events, stick with classic patterns like solid colors or simple stripes.
- For casual events, feel free to experiment with bolder patterns like polka dots or paisley.
- When matching colors, choose a tie that harmonizes with your shirt and suit rather than matching exactly.
If you’re new to matching ties with shirts and suits, start with simple combinations and work your way up to more complex looks.
VII. Avoiding Common Mistakes When Tying a Tie and How to Fix Them
Even the most experienced tie-wearers can make mistakes when tying a tie. Here are some common mistakes to avoid and how to fix them:
- Wrong knot size: If your knot is too small or too big, try using a different knot that matches your collar and occasion better.
- Wrong tie length: If your tie is too short or too long, adjust the knot until it sits at the proper length.
- Twisted tie: If your tie is twisted, undo the knot and start over.
By identifying and correcting your mistakes, you can perfect your tie-tying skills with a bit of patience and practice.
VIII. Conclusion
Tying a tie may not be the easiest task, but with our comprehensive guide, you have all the tools you need to tie a perfect knot every time. Whether you’re a beginner or an expert, remember to practice and experiment with different knots and combinations to find your own unique style. With a bit of effort and creativity, you can make any outfit look polished and sophisticated.


