I. Introduction
Drawing a balloon may seem like a simple task, but many people still struggle with this seemingly effortless feat. Balloons may be a common subject for artists, but creating a realistic and accurate depiction is not always easy. However, with practice and a few tips and tricks, anyone can learn how to draw a beautiful balloon with confidence. This article will provide a step-by-step guide, tips for adding depth and dimension, overcoming common mistakes, and even a discussion of the therapeutic benefits of drawing balloons.
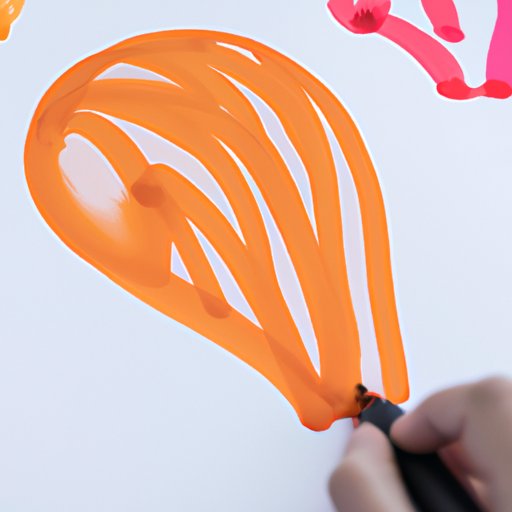
II. Mastering the Art of Balloon Sketching: A Step-by-Step Guide
Before you start sketching, it’s important to understand the basic shapes that make up a balloon. By starting with simple shapes, building more complex forms becomes much more comfortable. Begin by drawing a small circle to serve as the knot at the top of the balloon. Next, draw a larger circle underneath the knot to form the main part of the balloon. Use rounded lines to connect the knot and the main part of the balloon.
To achieve a three-dimensional look, add a curved line towards the bottom of the balloon opposite to the knot. From there, using the curved line as a guide, draw a curved line on either side of the balloon, creating an oval shape. This will be your shadows, creating the illusion of depth and dimension. Shade in the oval shape with light pencil strokes.
Finally, add in the string, which can either be straight or curved, depending on your preference. With this basic guide, you can start creating your balloon! Remember that practice makes perfect, so don’t be afraid to try different styles and experiment with your lines and shading to find what works best for you.
III. 10 Tips for Drawing Realistic Balloons
1. When shading, capture the light and shadow to create a realistic look. Use light pencil strokes, and gradually build up darker areas.
2. Add texture by varying the pressure of your pencil strokes to create depth. This can be achieved by using a darker grade pencil and adding a bit of shading in certain areas, like the knot or the shadows below the balloon.
3. Experiment with colors to make your balloon unique. Use a combination of pencils to create shading and depth, or try using colored pencils to create a different effect.
4. Avoid using outlines when creating realistic balloons. Instead, use gentle curves and shading to define the shape.
5. Consider the light source and where it’s coming from when creating shadows and highlights.
6. Use your eraser to create highlights on the balloon’s surface. By erasing small, light areas on the surface, you can create a subtle shine or gloss.
7. Avoid filling in the balloon entirely. Instead, use negative space to define the shape and create depth.
8. Make sure the proportions of your balloon are correct. A common mistake is making the knot too small or the main part too large.
9. Blend your shading with a blending tool, like a blending stump or a piece of tissue paper, to create a smoother, more natural look.
10. Use a reference photo to help with difficult angles or shapes. This can help you identify where the shadows and highlights should be placed.
IV. Overcoming Common Mistakes When Drawing Balloons
As with any drawing, there are common mistakes that beginners make. Some of these mistakes include making the knot too small or the main part too large, using outlines to define the shape, and using too much shadow or not enough highlights. To avoid these mistakes, start with simple shapes and work your way up to more complex forms. Use reference photos to help guide your work, and take your time with shading and blending to achieve a realistic look. If you do make mistakes, don’t be discouraged! Use your eraser to correct them, and keep practicing.
V. The Benefits of Drawing Balloons for Mindfulness and Creativity
Drawing, in general, has therapeutic benefits. It’s a relaxing and meditative way to unwind and reduce stress. Drawing balloons, in particular, can help with focus, creativity, and mindfulness. As you sketch the curves and shadows of a balloon, you’re forced to stay in the present moment, which helps to ease anxiety and promote calm. Drawing balloons can also help to boost creativity by allowing you to explore different styles and experiment with shading and color. Incorporate balloon drawing into your mindfulness practice, and see the positive impacts on your mental health.
VI. Drawing Balloons 101: Materials, Techniques, and Inspiration
Before you start drawing, you’ll need some basic materials. A pencil, eraser, and shading tools are a great start. You may also want to invest in colored pencils or watercolor pencils for unique effects. Techniques for achieving specific styles include using different grades of pencils for shading and texture, using an eraser for highlights and shine and using a blending stump or tissue paper for a smoother look. When it comes to inspiration, there are a variety of famous balloon artworks to draw from, including Jeff Koons’ oversized metal balloon sculptures or Banksy’s politically charged balloon graffiti.
VII. Conclusion
Drawing a balloon may seem like a simple task, but creating a realistic and accurate depiction takes practice and patience. Start with basic shapes, work your way up to more complex forms, and be sure to use shading and texture to create depth. Overcoming common mistakes is important but not to be discouraged by. Draw on the therapeutic benefits of drawing balloons to boost creativity. Finally, gather your materials, experiment with techniques, and take inspiration from the masters. Don’t forget, to practice makes perfect. Keep pushing your boundaries, and eventually, you’ll be creating beautiful balloons with ease.


