I. Introduction
Graduation caps are highly symbolic and are used all over the world to signify the completion of education and the start of a new chapter in life. However, drawing them can be a challenge for many people due to their unique shape. In this article, we will provide you with an easy step-by-step guide to drawing a graduation cap and also provide tips on sketching and adding detail to your drawing.
II. Step-by-Step Guide on Drawing a Graduation Cap
The first step to drawing a graduation cap is to identify the basic shapes needed, including the square, rectangle, and circle. Here’s how you can create each shape:
– The square: Draw a straight vertical line, then two horizontal lines connecting the vertical line at the top and bottom. Connect the two horizontal lines on each end to form the square shape.
– The rectangle: Draw a straight vertical line, then two horizontal lines connecting the vertical line at the top and bottom. Next, extend the horizontal lines to the right until you reach the desired length.
– The circle: Draw a horizontal line. On the left side, draw two diagonal lines that meet at the center of the horizontal line to form a triangular shape. Repeat this on the right side, then connect the top of both triangles to form a circle in the center.
After you have created these shapes, you can use them to draw the graduation cap. You’ll also need a ruler to help with measurements and angles. Follow these steps:
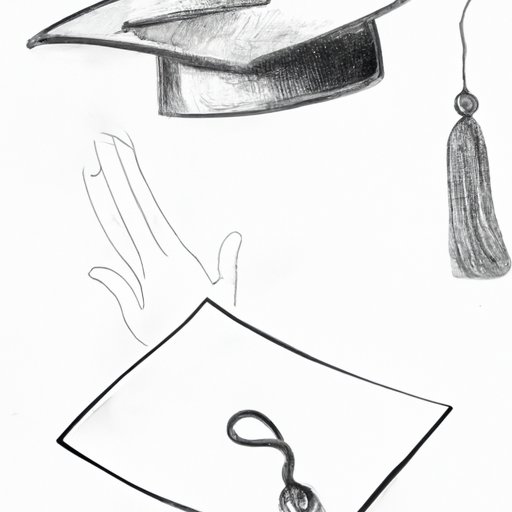
– Draw a rectangle shape for the cap base and a square for the top of the cap.
– Using the ruler, draw two diagonal lines on the square to create a diamond shape. Connect the corners of the diamond to the corners of the square base to form a point.
– Sketch out the tassel on the side of the cap, adding additional detail as desired.
– Finally, shade in the cap to create a 3D effect, adding additional shading as desired.
Use visual aids (e.g. images, diagrams) to guide you along the way and to provide clarity to the instructions.
III. Preparatory Materials
To draw a graduation cap, you’ll need a few basic materials, including pencils, a ruler, and paper. It’s also recommended to use high-quality materials to create a clean and polished look to your drawing. Other materials you may want to consider include erasers, pens, and markers. Make sure to prepare your materials beforehand for optimal use.
IV. Common Mistakes When Drawing a Graduation Cap
Common mistakes made by beginners when drawing graduation caps include issues with proportions, symmetry, and shading. Here are some solutions to these common problems:
– Proportions: Use a ruler to create precise measurements and angles.
– Symmetry: Check to make sure the two sides of the cap are identical using a ruler or visual inspection.
– Shading: Use lighter shades to create highlights and darker shades to create shadows, with a focus on creating 3D effects on the cap.
Again, use visual aids to demonstrate each solution and create clarity in your explanations.
V. Different Styles of Graduation Caps
There are several different styles of graduation cap designs used around the world, including the traditional mortarboard, tam, and beret. Each style has its own unique origins and reasons for use. Explore these styles to get inspiration for your own individualized graduation cap designs.
VI. Tips on Sketching
Sketching is an integral part of drawing a graduation cap, and it is recommended to loosen up before getting started. Here are some practical tips for sketching a graduation cap:
– Start with basic shapes and proportions, then refine the details.
– Use light pencil marks to sketch the basic shapes, then press harder to create darker outlines for the cap.
– Pay attention to the negative space (the space around the cap) to create a balanced drawing.
Use sketches to demonstrate each tip and provide visual examples for readers.
VII. Adding Detail to Your Graduation Cap Drawing
Once you have your basic graduation cap drawing, it’s time to add intricate details such as stitching and lining. Use visual aids (e.g. close-up images) to demonstrate this process and provide clear explanations of the steps involved.
VIII. Video Tutorial on Drawing a Graduation Cap
If you prefer to learn through video, we recommend checking out this easy-to-follow video tutorial on drawing a graduation cap:
Insert link to tutorial here.
Video tutorials can be a great way to learn and get a better grasp on the steps involved in drawing a graduation cap.
IX. Conclusion
Drawing a graduation cap can be a challenge, but with the right materials and step-by-step guidance, it can be a fun and rewarding experience. We hope this article has provided you with the tools you need to create a beautiful graduation cap drawing. Remember to have fun and explore your creativity!
Additional resources you may want to explore include books and websites dedicated to drawing and sketching.


