I. Introduction
If you’ve ever wanted to draw a husky but weren’t sure where to start, you’ve come to the right place. In this article, we’ll provide you with a step-by-step guide to drawing a husky, as well as tips and tricks for beginners. Whether you’re an experienced artist or just starting, this guide will help you capture the unique characteristics and personality of these beautiful animals.
II. A Step-by-Step Guide to Drawing a Husky: Tips and Tricks for Beginners
The first step to drawing a husky is to gather your materials. You’ll need paper, pencils (preferably graphite), an eraser, and a sharpener. Once you have your supplies, it’s time to start sketching.
To begin, sketch out the basic shapes of the husky’s body using light, loose lines. Start with an oval for the head, followed by circles for the shoulders, hips, and knee joints. Once you have the basic shapes roughed in, sketch in the legs, tail, and ears using the same loose style.
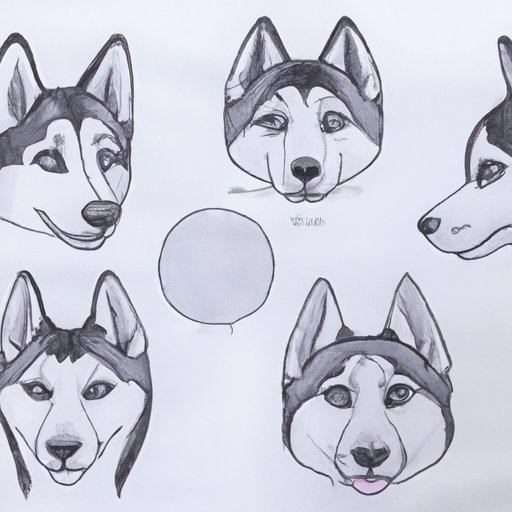
As you continue to sketch, start adding more details to your husky. Draw in the eyes, nose, and mouth, paying careful attention to the placement and proportions. Use reference photos if necessary to get this part just right.
Next, start refining the details of your husky, such as the fur, muscles, and bone structure. Pay attention to the direction of the fur and the shape of the muscles, using light and dark shading to start creating depth in your drawing.
Finally, add texture to your husky’s coat, paying close attention to the length and density of the fur. Use your pencils to create subtle shading and highlights throughout the drawing, accentuating the three-dimensional shape of the husky’s body.
As a beginner, there are a few tips and tricks to keep in mind. First, use light, loose lines when sketching the basic shapes to avoid erasing later on. Second, take your time and build up the drawing slowly, adding details and shading as you go. Finally, use reference photos to help guide you in creating a realistic representation of a husky.
III. The Art of Capturing the Essence of a Husky in Your Drawing
To truly capture the essence of a husky in your drawing, you’ll need to understand their unique characteristics. Huskies are known for their thick, fluffy coats, pointed ears, and bushy tails. They are also known for their intelligent and loyal personalities, making them a popular subject for artists.
Techniques for capturing the essence of a husky in your drawing include paying close attention to the details of the face and fur, as well as adding shading and highlights to create depth and texture. Additionally, incorporating personality and emotion into your drawing can help bring it to life, giving the husky a distinct character all its own.
IV. From Pencil Sketch to Masterpiece: Techniques for Drawing Realistic Huskies
If you’re looking to take your husky drawing skills to the next level, it’s important to master different pencil and shading techniques. This can include using cross-hatching, stippling, or even smudging to create different textures and effects. Additionally, paying close attention to the lighting and shadows in your drawing can help create a more realistic representation of a husky.
When it comes to adding depth and dimension to your drawing, there are a few tips to keep in mind. First, use darker pencils or more pressure to create shadows and darker areas. Second, use lighter pencils or less pressure to create highlights and brighter areas. Finally, don’t be afraid to experiment and try different techniques to find what works best for you.
Of course, one of the best ways to improve your husky drawing skills is to study examples of realistic husky drawings. Look for artists who specialize in animal drawings, and pay attention to their techniques and style. You can also find plenty of online tutorials and classes to help improve your skills.
V. How to Draw a Husky: Exploring the Best Tools and Materials for Your Drawing
When it comes to drawing a husky, having the right tools and materials can make all the difference. This can include high-quality pencils, paper, and erasers, as well as other materials such as blending stumps, kneaded erasers, or fixative spray.
When selecting your pencils, choose ones with a soft lead (such as a 2B or 4B) for shading and darker areas, and harder lead (such as an HB or 2H) for lighter areas and details. Additionally, consider using a paper with a bit of texture to help create a more natural-looking fur texture.
For beginners, there are plenty of recommended tools and materials to choose from. Look for starter sets that include a range of pencils and other materials, so you can experiment and find what works best for you. As you become more experienced, you can invest in higher-quality materials and tools.
VI. 7 Easy Steps to Drawing a Perfectly Proportioned Husky from Any Angle
When drawing a husky from any angle, it’s important to understand their unique proportions. Generally speaking, huskies have a slightly longer body than legs, and their shoulders are at a slight angle to their body. Additionally, their tails are thick and bushy, while their ears are pointed and erect.
To draw a husky from any angle, follow these seven easy steps:
- Sketch out the basic shapes of the husky’s head, body, and legs.
- Add the tail and ears, paying attention to their unique shapes and proportions.
- Sketch in the details of the face, including the eyes, nose, and mouth.
- Add shading and texture to create depth and dimension.
- Adjust proportions as necessary to create a realistic representation of the husky from your chosen angle.
- Add additional details, such as fur texture or background elements, as desired.
- Meticulously refine your drawing until you are happy with the final product.
Of course, there may be some trial and error involved as you experiment with different angles and poses. But with practice, you can become adept at drawing huskies from any angle or position.
VII. Conclusion
Learning how to draw a husky can be a rewarding and fulfilling experience for artists of all skill levels. By following the steps and tips outlined in this article, you can create a realistic and detailed representation of a husky, capturing their unique characteristics and personality.
As you continue to practice and refine your skills, don’t be afraid to seek out additional resources and tips for improvement. There are plenty of online tutorials, classes, and communities dedicated to helping artists improve their skills and connect with others who share their passion.


