Introduction
Do you want to master the art of drawing a skeleton hand? Drawing a skeleton hand can seem daunting, but with this step-by-step tutorial and anatomy guide, you will be able to create a realistic and accurate skeleton hand drawing in no time. In this article, we will cover all the essential steps and techniques to draw a skeleton hand, various anatomy details, and reference sheets to help improve your skills and knowledge.
Step-by-Step Tutorial
The first step is to draw a basic hand shape, which will act as the foundation for the skeleton hand drawing. Draw a rough and simple hand shape, after that, start to add the bones and details.
Step 1: Start by drawing the metacarpals, which are the bones extending from the wrist to the base of the fingers. Draw them as simple lines with eight small bumps for the carpal bones.
Step 2: Next, draw the phalanges, the finger bones. Draw three phalanges for each finger, except for the thumb, which has two.
Step 3: Draw the wrist bones, which connect the hand to the rest of the arm. Pay attention to the details and angles of the wrist bones to make your drawing look more lifelike.
Step 4: Sketch the knuckles, which are located at the base of each finger.
Step 5: Add shading to bring out the depth and dimension of your drawing. Shade with a light touch and gradually build up the value.
Reference Sheets
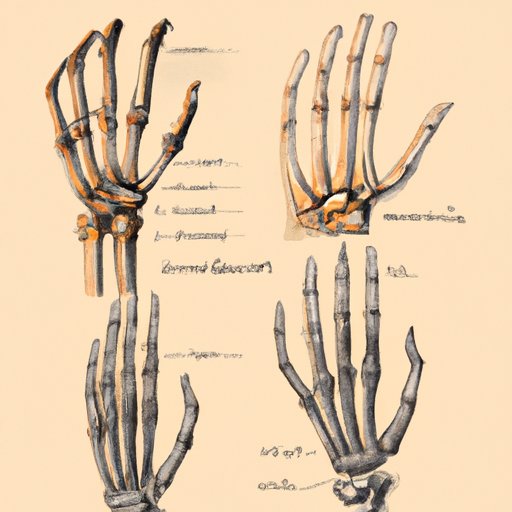
Creating reference sheets is an excellent way to accurately draw a skeleton hand. Make a reference sheet that labels the bones in the hand, including different angles. Use the reference sheet when you need to draw a skeleton hand from a different perspective or improve the accuracy of your drawing.
Video Tutorial
Watching a video tutorial can improve your understanding of the steps involved in drawing a skeleton hand. We have created a video tutorial that demonstrates the steps to draw a skeleton hand and more in-depth anatomy details. You can draw alongside the video and pause when needed.
Comparing Human Hands and Skeleton Hands
It’s essential to understand the similarities and differences between human hands and skeleton hands. To create a realistic skeleton hand drawing, you need to know how it differs from a flesh and blood hand. We have provided a detailed guide to draw both types, covering the distinct features and anatomy of each.
To draw a human hand, follow the steps for the skeleton hand and add flesh. Take the drawing to the next level by adding the muscles, tendons, and veins for a realistic look.
Sketchbook Challenge
Now that you have learned the basics of drawing a skeleton hand, why not take the sketchbook challenge? Draw the skeleton hand from various perspectives, experiment with different shading techniques, and add creative touches. The challenge is to improve your skills, creativity, and to have fun with it.
Anatomy Lesson
Understanding the anatomy of the hand can benefit your drawings and make them more accurate. The hand has twenty-seven bones and many muscles, tendons, and ligaments that work together to create intricate movements. We have provided an anatomy lesson that goes into greater detail about the hand’s structure, relevant bones, and more in-depth instructions on how to draw the skeleton hand.
Conclusion
Hopefully, this article has given you the information and guidance needed to draw a realistic and accurate skeleton hand. Regular practice and patience are essential to improve your skills. Remember to use the reference sheets and anatomy lessons in the future to make your drawings more accurate.
We encourage you to continue exploring your creativity and take the sketchbook challenge to improve your skills further.


