I. Introduction
Who doesn’t love Batman? The Caped Crusader has been a staple in pop culture since his creation in 1939. With his iconic look and dark persona, drawing Batman is a popular pastime for artists and fans alike. In this article, we’ll guide you through the process of drawing Batman step by step in a beginner-friendly way, from breaking down the drawing process to capturing his unique style and details. Whether you’re a beginner or an experienced artist, this guide will help you bring the Dark Knight to life on paper.
II. How to Draw Batman Step by Step: A Beginner’s Guide
Before we dive into the details, it’s important to note that drawing Batman (or any character, for that matter) is all about breaking down the process into simple steps. Don’t worry about getting the details perfect right off the bat – start with basic shapes and build up to more complex details.
To start, draw a circle for Batman’s head and a vertical line down the center of the face to help you place his facial features. Next, add two horizontal lines for the eyes and a small curved line for the nose. From there, add the cowl by drawing a curved line from the top of the head down to the sides of the face. Add the ears by drawing two triangles on top of the head, and then add the jawline and mouth.
Move on to the body by drawing a pair of intersecting lines for the shoulders and a larger circle for the chest. Draw the arms and legs as simple cylinders, and then add detail where necessary. Add the emblem on Batman’s chest and his utility belt, and then finish by adding the cape and any additional details.
Remember, don’t worry about getting everything perfect in your first attempt. Practice makes perfect, so don’t be afraid to try again or make adjustments as you go. To help you along the way, check out step-by-step guides online and practice drawing Batman from different angles.
III. Learning from the Best: Drawing Batman like a Pro
Studying the work of famous Batman illustrators can help you improve your own drawing skills and add new techniques to your toolbox. Jim Lee and Neal Adams are just two of the many talented artists who have contributed to Batman’s legacy in comics. Pay close attention to the way they use shadows and light to create depth and shape.
One technique used by many illustrators is the use of dynamic lines to convey movement and action. Practice drawing Batman in different action poses and experiment with different line weights to see how it changes the overall feel of your drawing.
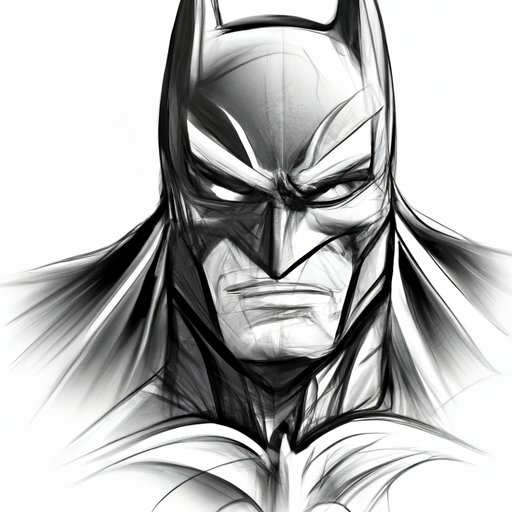
IV. A Guide to Capturing Batman’s Iconic Look
Part of what makes Batman such an iconic character is his distinct appearance. Capturing his features accurately is essential to creating a convincing drawing.
Start by focusing on key features like the cowl and cape. The cowl should be pointed and feature two white eyes, and the cape should be long and flowing, draping down from the shoulders. Draw Batman’s utility belt using small rectangular shapes, and add detail where necessary.
For the body, emphasize Batman’s muscular build by adding shading and muscle definition. Don’t be afraid to use reference images to ensure you get the proportions right. A good tip is to draw a stick figure to start, and then add muscle mass and clothing details on top of that.
V. Drawing the Dark Knight: Finding Inspiration from the Comics
Batman has taken many forms in comic books over the years, from the original 1939 version to the recent Dark Knight Returns storyline. Drawing inspiration from different versions of the character can help you develop your own style and give your drawings a unique look.
Pay attention to details like the shape of the cowl, the length of the cape, or the type of utility belt used by different artists in different eras. Incorporating these details into your own drawings can add an extra layer of depth and personality to your work.
VI. Putting Your Own Spin on Batman: Personalizing Your Drawing
While capturing the essence of the character is important, don’t forget to put your own spin on it. Experiment with different styles and techniques to make your Batman drawing unique.
Consider the lighting and background of your drawing. By changing the lighting or adding a dramatic background, you can create a Batman drawing that stands out from the rest.
Make sure to practice regularly and take inspiration from your favorite artists and styles. With enough practice and experimentation, you’ll find a drawing style that’s unique to you.
VII. Beyond the Basics: Advanced Techniques for Drawing Batman
Once you’ve mastered the basics of drawing Batman, it’s time to move on to more advanced techniques. Shading and detailing can help add depth and dimensionality to your drawing. Pay close attention to how light falls on different parts of Batman’s body and use that to guide your shading choices.
Another advanced technique is using crosshatching to create texture and shadow. Practice with different line weights and angles to create a sense of depth and dimensionality in your drawing. Remember that some details, like the intricate details on Batman’s utility belt, require patience and attention to detail.
VIII. Conclusion
Learning how to draw Batman is a fun and rewarding experience that anyone can tackle. By breaking down the process into simple steps, studying the work of famous illustrators, and experimenting with your own style, you can develop your skills and create your own unique take on the Dark Knight.
Remember to be patient with yourself, practice regularly, and have fun. With some persistence and passion, you too can draw Batman like a pro.


