Introduction
Drawing realistic hands can be a challenge for any artist. Whether you’re a seasoned professional or just starting out, getting the proportions and shapes just right takes practice and patience. However, with the right techniques and some helpful tips and tricks, anyone can improve their hand illustration skills. In this article, we’ll explore 10 easy steps for mastering the basics, offer tips and tricks for perfecting proportions, dive into the anatomy of the hand, and show you how to create authentic and realistic illustrations.
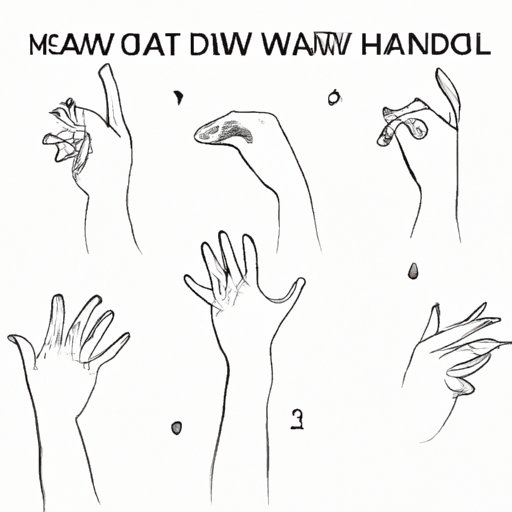
10 Easy Steps to Mastering the Art of Drawing Hands
When it comes to drawing hands, starting with basic shapes and proportions is key. Here are 10 easy steps to follow for more effective hand illustration:
Step 1: Start with the Palm
The palm of the hand is the foundation for all other hand shapes and positions. Start by drawing an oval shape to represent the palm.
Step 2: Add the Thumb
The thumb can be tricky to get right, but drawing it is essential for creating accurate hand illustrations. Draw a long, straight line for the base of the thumb and a shorter, curved line for the top of the thumb.
Step 3: Add the Fingers One at a Time
When drawing the fingers, add them one at a time, starting with the index finger. Use curved lines to represent the knuckles and joints.
Step 4: Break the Fingers Down into Shapes
To make it easier to get the proportions of the fingers right, break them down into smaller shapes. Draw rectangles for the base of the fingers and triangle shapes for the tips.
Step 5: Refine the Shape of the Hand
Using the basic shapes as a guide, refine the shape of the hand and add any additional details, such as lines for the tendons and wrinkles.
Step 6: Add Texture and Detail
To make your hand illustrations more realistic, add texture and detail, such as the creases and lines on the palm and fingers.
Step 7: Use Light and Shadow to Add Depth
Light and shadow can help add realism and depth to your hand illustrations. Shade the areas of the hand that are furthest away from the light source and leave the areas closest to the light source unshaded.
Step 8: Experiment with Different Hand Positions
Practice drawing hands in different positions and angles to improve your skills and expand your creative range.
Step 9: Use Reference Images for Inspiration
Looking at photographs and other art for inspiration can help you get a better sense of hand proportions and shapes.
Step 10: Practice, Practice, Practice
As with any skill, the more you practice, the better you will become. Set aside time each day to work on your hand illustration skills.
Tips and Tricks: Drawing Perfectly Proportioned Hands in 5 Simple Steps
Getting the proportions of the hand right is essential for creating effective and realistic illustrations. Here are five simple steps to follow:
Step 1: Use Reference Images
Using reference images, such as photographs, can help you get a better sense of how the hand should look in different positions.
Step 2: Measure and Compare
Use a pencil to compare the different parts of the hand, such as the length of the fingers in relation to the palm.
Step 3: Break the Hand Down Into Shapes
Breaking the hand down into basic shapes can help you accurately capture its proportions.
Step 4: Focus on One Area at a Time
Rather than trying to draw the entire hand at once, focus on one area at a time, such as the palm or the fingers.
Step 5: Practice Drawing Hands in Different Positions
Practicing drawing hands in different positions can help you develop a better understanding of their proportions and shapes.
Hand Illustration Hacks: A Beginner’s Guide to Drawing Hands
Drawing hands can be challenging, but with some helpful shortcuts and tricks, it can be easier than you think. Here are some beginner-friendly ways to draw hands more easily:
Use Basic Shapes to Guide Hand Placement
Using basic shapes, such as circles and rectangles, as a guide for hand placement can help you get the proportions right.
Use Lines to Create Movement and Direction
Adding lines to your hand illustrations can help create movement and direction, making them appear more dynamic and alive.
Experiment with Different Styles and Techniques
Don’t be afraid to experiment with different styles and techniques, such as using colored pencils or watercolors to add depth and texture to your illustrations.
Practice Drawing from Your Imagination
Practice drawing hands from your imagination, rather than only relying on reference images. This can help develop your creative skills and give you more freedom when drawing.
From Sketch to Realism: How to Draw Hands That Look Authentic
Drawing hands that look authentic requires a keen eye for detail and a willingness to observe real hands. Here are some tips for creating more realistic illustrations:
Start with Still-Life Arrangements
Practicing drawing hands in a still-life arrangement can help you get a better sense of their shapes and proportions.
Focus on One Hand at a Time
Rather than trying to draw both hands at once, focus on one hand at a time to ensure accuracy and attention to detail.
Pay Attention to Lighting and Shadow
Lighting and shadow are essential when it comes to creating realistic hand illustrations. Observe how real hands are lit and use that to inform your own drawings.
Breaking Down the Anatomy of the Hand: A Comprehensive Guide to Drawing Hands
Understanding the underlying anatomy of the hand can greatly improve the accuracy and realism of your illustrations. Here’s a breakdown of the bones, joints, and muscles that make up the hand:
The Bones of the Hand
The hand is composed of 27 bones, including eight bones in the wrist, five bones in the palm, and 14 bones in the fingers.
The Joints of the Hand
The joints of the hand include the carpometacarpal joint, the metacarpophalangeal joint, and the interphalangeal joint.
The Muscles of the Hand
The muscles of the hand are divided into three groups: the intrinsic muscles, the extrinsic muscles, and the thenar and hypothenar eminences.
Conclusion
Drawing hands can be challenging, but by following these tips and tricks, you can improve your skills and create more effective and realistic illustrations. Remember to practice, experiment with different styles and techniques, and never be afraid to push your creativity to new heights. With time and dedication, anyone can master the art of drawing hands.


