Introduction
Are you struggling to draw Harry Potter characters like the pros? Don’t be discouraged, even the most talented artists started as beginners. Fortunately, drawing Harry Potter is not as difficult as it seems. In this comprehensive guide, we will show you how to draw Harry Potter characters like a pro in 10 easy steps. From sketching to shading and coloring, we will cover everything you need to create stunning Harry Potter artworks. So, grab your pencils and let’s get started!
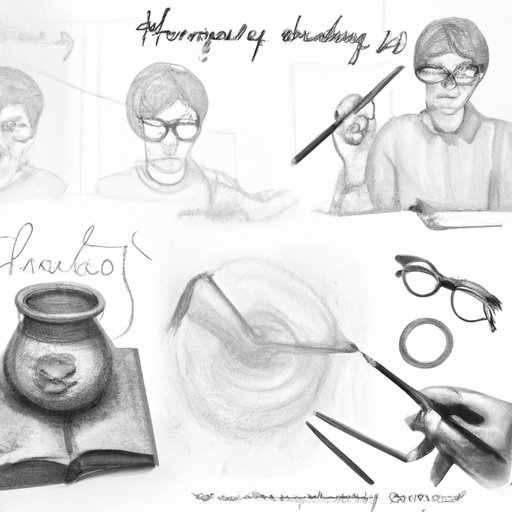
10 Easy Steps to Drawing Harry Potter Like a Pro
Step 1: Start with light sketch lines to create the basic structure for the character.
Step 2: Add details to the face, such as the glasses, scar, and lightning bolt tattoo on Harry Potter’s forehead.
Step 3: Draw the hair and make sure to add the iconic messy look.
Step 4: Draw the neck and add the Hogwarts robes.
Step 5: Add more details to the robes, such as the Gryffindor emblem.
Step 6: Shade in the hair, neck, and robes.
Step 7: Start working on the background of the drawing.
Step 8: Add more shading to the drawing.
Step 9: Finish the drawing by adding final details and highlights.
Step 10: Sign your masterpiece!
From Sketch to Wizard: A Comprehensive Guide to Drawing Harry Potter
Before you begin drawing Harry Potter, it’s important to start with a sketch. A sketch helps to establish the basic structure of the character and allows you to make changes before committing to the final drawing.
When it comes to drawing Harry Potter, there are a few key elements that are essential to include. These include Harry’s glasses, lightning bolt-shaped scar, and messy hair. Adding these details creates a recognizable and authentic drawing of Harry Potter.
Once you have completed the initial sketch, it’s time to develop it into a fully-realized drawing. This involves adding more details, refining lines, and adding shading to create depth and dimension.
Unlocking the Magic: Techniques for Drawing Harry Potter Characters
To create high-quality Harry Potter drawings, you need to understand different techniques such as shading, highlighting, and line work. Shading is an important technique that helps create depth and dimensionality in your drawing. Highlighting helps to create contrast and make certain features of the drawing stand out. Line work is important for adding details and textures to the drawing.
By experiment with different techniques, you can create unique and captivating Harry Potter drawings that capture the essence of the character.
Get Your Pencils Ready! Drawing Harry Potter for Beginners
If you’re a beginner at drawing Harry Potter characters, don’t worry, it’s all about practice and patience. Here are some tips to get you started:
● Start with simple sketches and gradually work your way up to more complex drawings.
● Use reference images to help guide your work.
● Don’t be afraid to make mistakes, it’s all part of the learning process.
● Focus on the process, not the result. It’s important to enjoy the journey of creating art and not just the final product.
Additional resources such as tutorials, books, and online communities can also be helpful resources for beginners to learn and improve their drawing skills.
Mastering the Art of Drawing Harry Potter: Tips and Tricks
For those looking to take their Harry Potter drawings to the next level, here are some expert tips and tricks:
● Pay attention to small details such as wrinkles, shadows, and highlights.
● Experiment with different art materials such as charcoal, ink, and watercolors.
● Practice regularly and consistently to improve your skills.
● Embrace your unique drawing style and let your creativity shine through in your artwork.
Drawing Harry Potter: A Step-by-Step Tutorial for Fans of All Ages
Want to learn how to draw a specific Harry Potter character? Here’s a step-by-step tutorial for drawing Hermione Granger:
Step 1: Start with a circle for the head and add the neck.
Step 2: Draw the basic structure of the face, including the eyes, nose, and mouth.
Step 3: Sketch the hair and add details, such as curls and frizz.
Step 4: Draw the neck and add clothing details, such as the Hogwarts robes and Gryffindor emblem.
Step 5: Shade in the hair, neck, and robes, adding shadows and highlights.
Step 6: Finish the drawing by adding final details, such as the wand and other accessories.
Conclusion
Drawing Harry Potter characters may seem daunting at first, but with practice, patience, and the tips and techniques outlined in this guide, you too can create stunning artworks. From sketching to shading and coloring, the key to drawing Harry Potter is to embrace your unique style and let your creativity shine through in your art. So, grab your pencils and start drawing like a wizard!
Additional resources such as books, tutorials, and online communities can also be helpful for readers looking to improve their drawing skills and continue their artistic journey.


