I. Introduction
Are you a Pokemon fan who wants to learn how to draw your favorite character Pikachu? If so, you’ve come to the right place. In this article, we’ll give you a step-by-step guide on how to draw Pikachu, discuss common mistakes, show you a paper cut-out Pikachu, and much more. Learning how to draw Pikachu is not only fun, but it’s also a useful skill to have when you need an image of a cute character. So, let’s get started.
II. A Step-by-Step Guide
If you’re new to drawing, don’t worry. We’ll start with the basics and show you how to draw Pikachu’s body, facial features, and lightning bolt-shaped tail. Here’s what you’ll need:
- A pencil
- Paper
- An eraser
- A black pen or marker
B. Beginning steps for drawing Pikachu
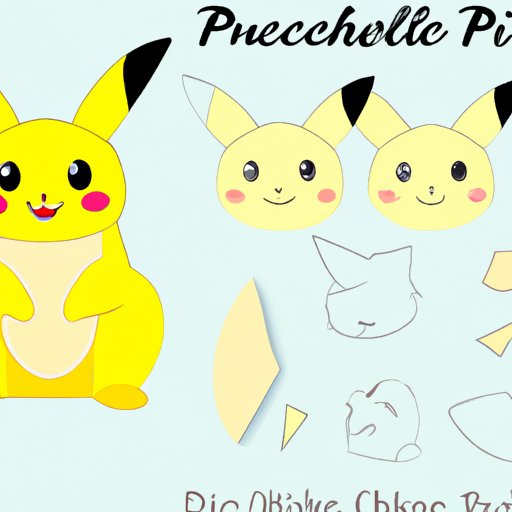
Start by drawing a circle in the center of your paper. This will be Pikachu’s head. Next draw two slightly curved lines on either side of the circle. These will be Pikachu’s cheeks. Add two more short lines below the cheeks, which will serve as Pikachu’s mouth.
C. Step-by-Step instructions for creating Pikachu’s body and features
1. Add Pikachu’s ears: Draw two pointy ears on top of the head. Make sure that they are roughly the same size and shape.
2. Enhance the face: Add Pikachu’s eyes: they should be two large ovals in the center of the head. Inside each eye, draw a smaller circle and fill it in.
3. Draw Pikachu’s nose: it’s a simple upside-down triangle placed below the eyes.
4. Add the cheeks: Give Pikachu rosy cheeks by drawing circular or oval shapes on each cheek.
5. Draw Pikachu’s body: Start with a bean shape under the head to define the neck and body. Extend the body by drawing a large, vertical oval shape for the torso. Connect the torso to the bean you drew initially.
6. Add Pikachu’s arms: Pikachu’s arms come from the sides of the body, they are narrow, cylindrical shapes that taper off into a point.
7. Finish the legs: Start by drawing Pikachu’s feet, which are oval shapes. Then, draw two cylindrical legs that connect the feet to the body.
8. Give Pikachu its iconic tail: Pikachu’s tail is lightning bolt-shaped, so start by drawing a long, thin zig-zag shape above the body.
D. Tips for making the drawing process more manageable
Don’t worry too much about getting everything perfect on your first try. Drawing takes time and practice. It’s important to stay patient and to take frequent breaks if you need them. Also, start with simple shapes and build from there. This will help you ensure that important proportions and shapes are captured correctly before adding finer details.
III. Common Mistakes
A. Overview of common mistakes made when drawing Pikachu
Some of the most common mistakes people make when drawing Pikachu include:
- Drawing Pikachu’s ears too small or too large
- Making the tail too big or too small in proportion to the body
- Having too little or too much space between the eyes and the cheeks
- Focusing too much on the details and forgetting the basic shapes that make up Pikachu’s body.
B. How to avoid these mistakes
If you’re making any of these mistakes, don’t worry. They’re easy to correct. Start by referencing the original picture of Pikachu to get an idea of proportions and shapes. Use basic shapes like circles and ovals as a guide and add details afterward. Don’t get too caught up in details too early.
C. Tips for perfecting the drawing
It’s important to practice consistently. The more you practice, the better you’ll become. If you’re having trouble with proportions or small details, try breaking down the drawing into simple shapes to get a better idea of placement. Don’t forget to use references when you get stuck.
IV. Video Tutorial
A. Brief introduction to the video tutorial
For a visual guide on drawing Pikachu, check out the following video tutorial.
B. Video breakdown of each step in the drawing process
C. Helpful tips and tricks for drawing Pikachu
The video tutorial also offers some helpful tips and tricks, such as breaking down the drawing into smaller parts and using references.
D. Explanation of how viewers can pause or rewind as needed
If you’re having trouble keeping up with the video, don’t worry. You can pause and rewind as needed to make sure you’re following along at your own pace.
V. Inspirational Showcase
A. Brief introduction to the inspiration showcase
Looking for some inspiration? Check out these amazing Pikachu drawings by different artists, showcasing different styles and techniques.
B. A range of Pikachu drawings done by different artists

Each of these Pikachu drawings has a unique style and technique. There’s no right or wrong way to draw Pikachu, so have fun and experiment with different styles.
C. Explanation of different styles and techniques used in the drawings
You can see some artists chose to focus more on Pikachu’s cuteness, while others go for a more realistic approach. Some draw Pikachu with shading and texture, while others use simpler line work. There’s an endless amount of possibility when it comes to drawing Pikachu, so find what works for you.
VI. Paper Cut-Out Pikachu
A. Overview of how to create a paper cut-out Pikachu

Another fun way to draw Pikachu is by doing a paper cut-out. Follow these simple steps to create your paper Pikachu:
B. Materials needed
- Paper
- Scissors
C. Step-by-step instructions for creating a paper cut-out Pikachu
- Start with a square piece of paper, colored side facing down
- Fold both diagonals in half and unfold. Repeat with the creases running the other way.
- Fold the bottom and top edges into the center crease. Fold along the dashed lines.
- Valley-fold both sides in half along the crease.
- Make folds following the dotted lines and fold in the bottom two corners.
- Fold the flap down along the dotted line and then fold it back up along the same line. Then fold down along the solid line creating a new crease.
- Open the flap and create the head in the shape of Pikachu’s head.
- Fold Pikachu’s ears along the dotted lines and attached to the head.
- Draw in details such as Pikachu’s eyes and mouth.
D. Display suggestions for the finished product
Once you’re done creating your paper cut-out Pikachu, it’s time to show it off. Display it on a window or a light source to create a shadow effect.
VII. Conclusion
A. Recap of main points covered in the article
We covered a lot in this article, starting with the step-by-step guide to draw Pikachu, common mistakes, and tips for perfecting your drawing. Then, we showed you a video tutorial for visual learners to follow, followed by an inspirational showcase of various Pikachu drawings, including different styles and techniques. Finally, we finished with a fun way to draw Pikachu with a paper cut-out.
B. Final thoughts on the importance of learning to draw Pikachu
Learning to draw Pikachu not only allows you to create your favorite character, but it can also improve your drawing skills and help your hand-eye coordination. Whether you just want to draw Pikachu for fun or aspire to become a professional artist, you can never go wrong with improving your drawing skills.
C. Encouragement for readers to try out the techniques taught in the article
Don’t be afraid to try out the techniques taught in this article. Remember, practice makes perfect, and you can always build upon your previous drawings to get better.


