Introduction
Whether you’re an experienced artist looking to expand your portfolio or someone just looking to improve your drawing skills, drawing lizards is a challenging but rewarding exercise in patience and creativity. Lizards are fascinating creatures with unique physical qualities that make them fantastic subjects for all kinds of artwork, from realistic portraits to quirky cartoons. In this article, we’ll explore how to draw the lizard, step-by-step, and provide tips and resources to help improve your skills.
Step-by-Step Lizard Drawing Tutorial
Before you start, it’s essential to note that drawing a lizard can be difficult, but if you follow the steps carefully, you’ll see progress. It’s essential to have a step-by-step tutorial to guide you along the way. This guide will help you create a smooth and accurate lizard drawing.
Step 1: Start by drawing the head. Lizards come in different shapes and sizes, but most have a triangular face. You can start by drawing a small triangle or oval shape for the head, depending on how you want your lizard to look.
Step 2: Draw the body. You can draw an elongated oval shape for the body and curve it at the bottom to create the belly. Don’t forget to leave enough space for the legs and tail.
Step 3: Draw the legs. Most lizards have four legs. They have long and thin legs that are suitable for climbing. The legs usually have long fingers, which help them grasp objects.
Step 4: Draw the tail. Lizards have long and thin tails that are longer than their bodies. Draw a tapered shape for the tail and add some detail to make it look realistic.
Step 5: Add some details. You can add spots, scales, or stripes to make the lizard look more interesting. Don’t forget to add the eyes, nostrils, and mouth.
Tip: Use light pencil marks when drawing the initial sketches. Once you’re satisfied with the shape, you can use darker lines to create a more defined drawing.
Understanding Lizard Anatomy
Knowing lizard anatomy is critical to developing accurate and realistic drawings. It’s essential to have an understanding of the basic structure and features of a lizard.
Lizards have scaly skin, which is designed to protect them from predators. The scales are small and are arranged in a particular pattern that varies from species to species. A lizard’s skin also changes color depending on its mood, temperature, and surroundings.
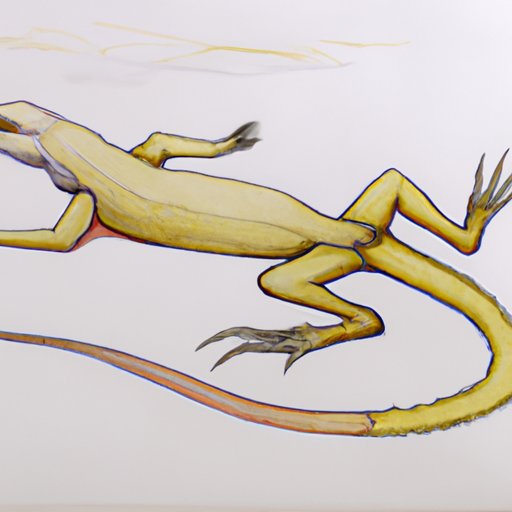
Lizards have long and flexible bodies that are built for movement. They have four legs, a long tail, a distinct neck, and a triangular head. Their eyes can move independently, which allows them to see in different directions without moving their head.
Tip: Look at reference images of different lizards to familiarize yourself with their anatomy. Practice drawing lizards by using anatomical studies to improve your skills.
Using Reference Images
Using reference images is essential for artists of all levels. It can help you develop your skills and create more accurate and realistic drawings.
There are many resources available online that provide high-quality images of lizards. You can find photos of lizards in their natural habitat, close-up shots that show details of their skin and features, and illustrations that highlight their anatomy.
When using reference images, it’s important to keep in mind that you’re not copying the image but using it as a guide. Use the image to learn about the lizard’s features, colors, and proportions.
Tip: Use a grid system to help you accurately capture the proportions of the image.
Lizard Drawing Exercises
To become better at drawing lizards, you need to practice regularly. Here are some fun drawing exercises that can help improve your skills:
Exercise 1: Draw multiple lizards in different positions. Start by drawing a lizard in a standard pose, then draw the same lizard doing different activities, such as climbing a tree or basking in the sun.
Exercise 2: Draw a lizard from a distance. Choose a reference image that shows a lizard in its natural habitat and draw it from a distance, paying close attention to the surrounding environment.
Exercise 3: Draw a lizard in motion. Draw a lizard in mid-movement, such as running or jumping. Pay attention to the movement of the body, legs, and tail.
Tip: Use different drawing materials, such as pencils, markers, or charcoal, to experiment with different styles and techniques.
Common Lizard Drawing Mistakes
Here are some common mistakes that people make when drawing lizards:
Mistake 1: Drawing the head too small or too large in proportion to the rest of the body.
Mistake 2: Drawing the legs too short or too thick.
Mistake 3: Not paying attention to the details of the tail, such as its size and shape.
Tip: Be patient and take your time when drawing. Check your proportions by using a reference image or by taking a break and looking at your drawing with fresh eyes.
Tips for Capturing Lizard Movement
Lizards are fast and agile creatures, and capturing their movement in a drawing can be challenging. Here are some tips to help you achieve it:
Tip 1: Draw loose sketches to capture the general movement of the lizard before adding details.
Tip 2: Use dynamic lines to show the direction and speed of the lizard’s movement.
Tip 3: Pay close attention to the lizard’s body language, such as the position of its legs, tail, and head.
Tip 4: Use shading and texture to create a sense of depth and movement.
Example: Draw a lizard jumping over a rock or crawling up a tree branch to convey movement and energy.
Lizard Drawing Tools and Materials
When drawing lizards, you can use a wide range of tools and materials. Here are some examples:
1. Pencils: Use a range of pencils, including HB, 2B, and 4B, to create a range of tones and textures.
2. Charcoal: Charcoal is great for creating bold and dramatic lines and shading.
3. Markers: Use fine-tipped markers to create clean, sharp lines and add color to your drawings.
4. Watercolors: Watercolors are perfect for creating subtle, delicate tones and textures.
Tip: Experiment with different materials to find the ones that best suit your style and skill level.
Conclusion
In conclusion, drawing lizards is an enjoyable and challenging exercise that requires patience, practice, and dedication to improve. Understanding lizard anatomy, using reference images, and practicing regularly can help you create more accurate and realistic drawings. By following the step-by-step guide and the tips provided in this article, you are sure to achieve great results.


