I. Introduction
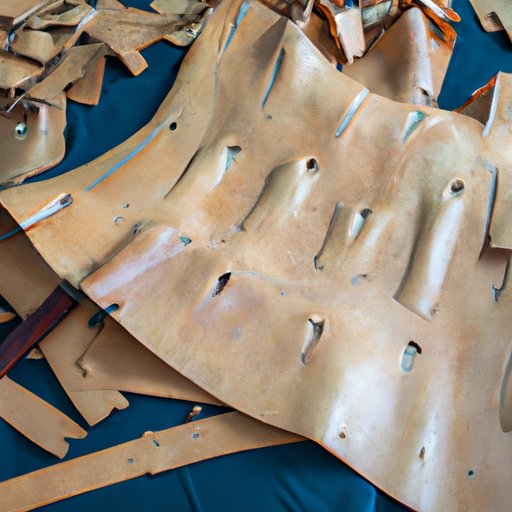
Leather armor is an essential part of role-playing games, cosplay, and medieval reenactments. While plain brown leather is the traditional look, many people prefer to personalize their armor with unique colors and styles. Dyeing leather armor can seem intimidating, but it’s a fun and creative way to customize your gear. This article will give you an introduction to the materials and techniques involved in the process, offer step-by-step instructions, and provide expert tips and insights on achieving the perfect color.
II. A Step-by-Step Guide
The key to dyeing leather armor is to be patient and take your time. Rushing the process can lead to uneven color or damage to the leather. Follow these steps to dye your armor:
Materials needed:
- Leather armor
- Dye
- Sponge or brush
- Bucket
- Clean water
- Sealant
Prepping the leather:
- Clean the armor thoroughly with a damp cloth and let it dry.
- Using a sandpaper, lightly sand the leather. This will create an even surface for the dye to adhere to.
- Wet the leather with clean water. This will help the dye to spread evenly.
Applying the dye:
- Read the instructions on the dye package carefully before beginning.
- Apply the dye to a small, inconspicuous area of the armor to test the color and make sure it won’t damage or discolor the leather.
- Once you’re sure the dye is safe to use, apply it to the rest of the armor with a sponge or brush, making sure to cover every area evenly.
- Wipe off any excess dye with a clean cloth.
Allowing the dye to set:
- Check the instructions on the dye package to determine how long it needs to sit before being rinsed.
- Let the dye sit on the armor for the recommended time, making sure not to touch it while it sets.
Sealing the dye:
- Once the dye has set, apply a sealant to the armor. This will prevent the dye from bleeding or rubbing off.
- Let the sealant dry completely before handling or wearing the armor.
Remember to wear protective gloves and work in a well-ventilated area while dyeing your leather armor. If you’re dyeing a whole set of armor, it may take a few hours to complete the process. Be patient and take breaks as needed to avoid fatigue or mistakes.
III. A Comparison of Different Types of Dyes
When it comes to dyeing leather armor, there are three main types of dyes to consider: oil-based dyes, alcohol-based dyes, and water-based dyes.
Oil-based dyes:
Oil-based dyes are known for their deep, rich color and long-lasting finish. They are often used on high-quality leather armor and tend to be more expensive than other types of dyes. However, oil-based dyes can be difficult to work with and may require a lot of preparation and expertise.
Alcohol-based dyes:
Alcohol-based dyes are a popular choice for dyeing leather armor because they are easy to use and produce vibrant colors. They dry quickly and are often less expensive than oil-based dyes. However, they are not as long-lasting and may require multiple coats for a deep color.
Water-based dyes:
Water-based dyes are a good choice for beginners because they are easy to use and clean up quickly. They are also less expensive than oil-based dyes. However, they tend to produce a more muted color and may not be as long-lasting as other types of dyes.
Ultimately, the type of dye you choose will depend on your budget, skill level, and the look you want to achieve. It’s a good idea to test the dye on a small, inconspicuous area of the armor before committing to a color or type of dye.
IV. A Historical Perspective
Leather armor has a rich history that dates back to ancient times. The earliest examples were made from animal hides and were used to protect warriors in battle. Over time, different cultures developed unique styles of leather armor and often used dyes to create intricate patterns and designs.
For example, the Mongol Empire was known for using a red dye made from madder root to create their distinctive armor. The Egyptians used a blue dye made from indigo plants to create a unique look. In medieval Europe, knights often wore leather armor that was dyed black or brown to match their steeds.
Today, dyeing leather armor is a popular way to pay homage to these historical traditions and to personalize one’s armor. Whether you’re a medieval reenactor or a cosplayer, dyeing leather armor is a fun and creative way to express yourself and show off your personality.
V. Tips and Tricks for Achieving the Perfect Color
While dyeing leather armor can be a fun and rewarding process, it’s important to keep in mind that achieving the perfect color can be tricky. Here are some expert tips and tricks to help you along the way:
Mixing dyes for custom shades:
If you can’t find the perfect color, try mixing dyes together to create a custom shade. This can be especially helpful if you want to match your armor to a specific costume or prop.
Applying multiple coats for greater depth:
If you want to achieve a deep, vibrant color, consider applying multiple coats of dye. Be sure to let each coat dry completely before applying the next one.
Sanding the leather for a more even finish:
If you’re having trouble achieving an even color, try sanding the leather before applying the dye. This will create a more uniform surface for the dye to adhere to.
Common problems that may occur during the dyeing process include uneven color, dye bleeding onto fabrics, and streaking. Be sure to follow the instructions carefully and don’t hesitate to seek out expert advice if you’re having difficulty.
VI. A Profile of a Leather Dyeing Expert
To gain expert insight into the art of leather dyeing, I interviewed John, an experienced leatherworker and cosplayer who specializes in dyeing leather armor.
What inspired you to start dyeing leather armor?
As a cosplayer, I was always looking for ways to make my costumes more authentic and true to the source material. Dyeing leather armor allowed me to create unique looks that were tailored specifically to my costumes.
What advice do you have for beginners who are just starting to learn how to dye leather armor?
Be patient, and start with a small project to get a feel for the process. Make sure you have all of the necessary materials and follow the instructions carefully. And don’t be afraid to ask for help or seek out tutorials online or in-person.
What is your favorite part of the dyeing process?
I love seeing the transformation from plain leather to a vibrant, colorful piece of armor. It’s a rewarding feeling to know that I’ve created something unique and personalized.
VII. Conclusion
Dyeing leather armor is a fun and creative way to customize your gear and express your personality. By following these step-by-step instructions, considering the pros and cons of different types of dyes, and using expert tips and tricks for achieving the perfect color, you’ll be well on your way to creating a stunning piece of armor. So go ahead and give it a try! With a little patience and some practice, you’ll be a leather dyeing expert in no time.


