Introduction
When it comes to hanging heavy items on your wall, such as shelves or artwork, locating a stud is crucial for reliability and safety. Studs are the vertical framing members that provide the structure and support for your wall, and they need to be located before any significant installation. In this article, we will go over various techniques for finding a stud in your wall without damaging it.
The Ultimate Guide to Finding a Stud in Your Wall
A stud is a vertical framing member running the length of a wall that serves as the support for the surface. It is always essential to locate it when planning to hang heavy artworks or shelves. There are three methods to locate a stud.
Knocking on the Wall
Knocking on the walls is the most straightforward method for locating a stud. Pounding your fist on the wall can help determine the location; the sound will change when knocked over a stud. The wall has two types of sounds, one hollow sound, and another that sounds solid. A solid sound indicates that you have found a stud.
Pros: This method is cost-effective, and it only requires your hand. It is also less complicated.
Cons: It is less efficient if the wall is thick or has multiple layers.Experience or trial and error is needed to get the right feeling for it.
Using a Stud Finder
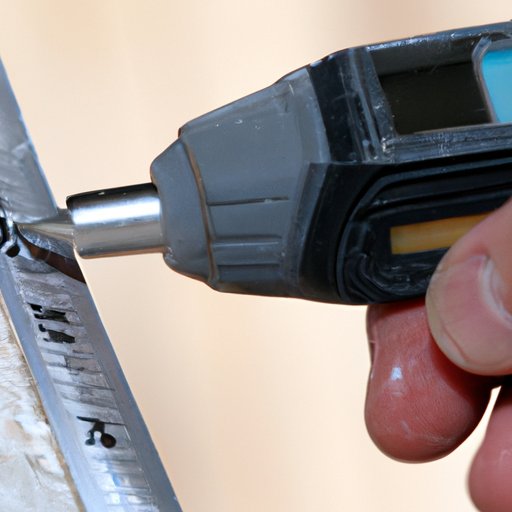
A stud finder is a hand-held electronic device used to detect studs behind drywall. It’s a quicker and more efficient method of finding studs. It is ideal for larger walls and those with multiple layers because it can penetrate several materials.
Pros: It is easy to use, more efficient, and gives more accurate results in identifying studs.
Cons: It requires electrical power or battery to function, and it is sometimes inaccurate when used on walls with electrical currents or wires in them.
Measuring
Another way of locating a stud is by using a measuring tape to measure the distance between two studs. Studs are typically spaced 16 inches apart from each other, so if you find one of them, it’s easier to locate the others.
Pros: This method is budget-friendly and is ideal for walls with either wood or metal studs.
Cons: This method is time-consuming, requires patience, and may result in making unnecessary holes in your walls without producing the desired results.
DIY: How to Locate a Stud in Your Drywall
The easiest and cost-effective way of locating a stud in your drywall involves a magnet. To locate a stud using a magnet, follow these steps:
Step 1: Materials
You will need a rare earth magnet, a string, a small piece of masking tape, and a pencil.
Step 2: Tape the Magnet
Place a piece of masking tape on the magnet’s backside and attach the string. Ensure that the magnet and the string are all on the same level. This will ensure an accurate measurement of the wall’s surface and the magnet.
Step 3: Place the Magnet on the Wall
Launch the magnet on the wall and keep the string taut. The magnet will cling to the steel stud behind the drywall. The mark should be where you want to screw or install the hardware.
Step 4: Repeat the Process
Repeat this process if required to locate more studs for support before fixing your mounting hardware to the wall.
Tips for effectively using a magnet
Using an effective magnet is key to locating a stud correctly. If the magnet is not strong enough, it won’t detect the stud, so ensure that the magnet is a rare earth magnet to improve effectiveness.
The Foolproof Method for Locating Studs in Your Wall
The current building-code standards require that studs be spaced at a maximum of 16 inches apart. This means that once you locate the first stud, you can quickly determine the other studs’ exact location by measuring the distance from the center of the first stud to the center of the next. Here’s how:
Step 1: Locate the First Stud
The first step is to locate the first stud. You can use any method that you find easiest or quicker.
Step 2: Measure the Distance
From the stud’s center, measure out 16 inches to the right, then knock to verify if there’s a stud there. If there isn’t, measure out 16 inches to the left to determine the location of the next stud.
Step 3: Mark the Spot
Mark the wall with a pencil at the spot where you verified the location of a stud. You can also use blue painter’s tape to make the marks more visible. Repeat this process for every 16 inches from the first stud.
Tips for Accurately Measuring and Marking the Wall
Your accuracy is key when marking measurements; ensure that you measure from the center of the studs and mark the spot with a pencil to avoid making big holes in the wall. Another important point to remember is that studs’ spacing isn’t always constant – it’s essential to have a backup plan like using a magnet or a stud finder if the distance is wider than 16 inches.
Stud Finder 101: Tips and Tricks for Finding Studs in Your Wall
A stud finder is a handheld electronic device that detects the presence of wood studs behind drywall. Here’s how to use a stud finder:
Step 1: Prepare the Device
Insert a battery and turn on the device. It will begin to calibrate itself, so make sure it doesn’t come in contact with any metal surfaces. When ready, place it against a wall, and the device will infer the wall’s material, and a red or green light will confirm it’s ready to use.
Step 2: Slide the Device Along the Wall
Gently slide the device horizontally back and forth until it beeps and the light changes from green to red. This indicates that it has detected a stud.
Step 3: Mark the Spot
Mark the area where the device indicated a stud’s presence with a pencil or blue painter’s tape. Repeat this process as necessary for additional studs.
Tips for Effectively Using a Stud Finder
Always double-check by scanning the length of the wall for extra studs. Also, it would help if you keep the stud finder parallel to the wall for maximum effectiveness. If you detect an electrical current using the stud finder, it may give false positives; turn off the power and recheck the wall for accuracy.
Stop Guessing! Follow These Steps to Accurately Find a Stud in Your Drywall
Guessing is not a good method of finding a stud, and it may cause unnecessary damage to the wall. Here’s how to use the knocking method:
Step 1: Find a Baseboard or Crown Molding
Locate the baseboard, crown molding, or chair rail near the wall you want to locate your stud. These molding and trim pieces are usually secured to a stud.
Step 2: Tap the Wall
Tap the wall with your knuckles or a small hammer near the baseboard, crown molding, or chair rail. If you hear a hollow sound, move 2 inches to the right or left and tap again. Repeat this process until you find a solid sound.
Step 3: Verify with a Nail
Drive a small finishing nail into the wall near where you heard the solid sound. If you hit a stud, you will feel some resistance from the nail.
Tips for Using the Knocking Method
This method requires a keen sense of hearing for the sound to differentiate the studs. Ensure that you tap gently and listen to the sound carefully for accurate results.
From Knocking to Measuring: Techniques for Finding a Stud in Your Wall
In conclusion, the process of finding a stud in your wall is a crucial skill to master. It is a simple process that requires patience and carefulness to get accurate results. We provided different methods excellent in their own way, but to increase efficiency, combining several techniques will lead to a positive result.
Conclusion
We hope this article has been helpful in explaining how to locate a stud in your wall. Using the methods we’ve provided is crucial for preventing unnecessary damages to your wall, ensuring the safety of installed structures and items, and avoiding hazards such as electrical wires. Understanding the basics of stud detection will save you both time and money in the long run while also providing peace of mind.


