Introduction
If you’re renovating your home or tackling a DIY project, you’re likely to encounter the need to finish drywall. This process involves taping, mudding, sanding, and painting the surface of your drywall to achieve a smooth, professional-looking finish. Knowing how to finish drywall is an essential skill for any DIY enthusiast or homeowner, as it can save you money and give you greater control over the final result. In this article, we’ll guide you through the process of finishing drywall, including common mistakes to avoid, time-saving tips, and best practices for different types of drywall.
Step-by-Step Guide
Before you begin finishing your drywall, make sure you have all the necessary tools and materials. These may include:
- Joint compound
- Taping knife (6-inch and 12-inch)
- Sandpaper (120-grit and 220-grit)
- Paint roller and tray
- Primer and paint
- Fiberglass mesh tape or paper tape
- Spackle or drywall patching compound
Once you have your supplies, you’re ready to start finishing your drywall. Here are the basic steps involved:
- Taping: Start by covering all the joints of your drywall with fiberglass mesh tape or paper tape. Use a 6-inch taping knife to apply a thin layer of joint compound over the tape, smoothing out any wrinkles or bubbles as you go.
- Mudding: Once the tape is in place, apply a layer of joint compound over the tape and extend it about 6 inches beyond the edges of the tape. Use a 12-inch taping knife to smooth out the compound, removing any excess and creating a smooth, even surface.
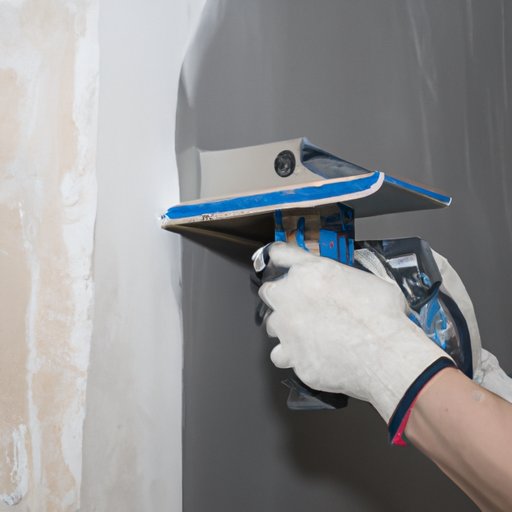
- Sanding: After the compound has dried, use a 120-grit sandpaper to smooth out any bumps or ridges in the surface of the drywall. Be careful not to sand too much, or you may damage the tape underneath.
- Painting: Once the surface is smooth, you’re ready to prime and paint as desired. Use a roller to apply the primer, allowing it to dry for at least 24 hours before applying the final coat of paint.
As you complete these steps, there are a few tips and techniques that can help you achieve a more professional finish:
- Apply thin coats of joint compound, rather than thick ones, to avoid excess buildup. This will also make sanding easier later on.
- Use crosshatching or criss-cross patterns when applying joint compound to ensure even coverage.
- Allow each layer of joint compound to dry completely before sanding or adding additional layers. This will prevent cracking or bubbling in the final surface.
- Use a slightly damp sponge to smooth out any bumps or ridges in the surface of the drywall, rather than sanding too much and creating dust.
Common Mistakes to Avoid
While finishing drywall may seem straightforward, there are some common mistakes that people often make that can affect the final result. Here are a few things to watch out for:
- Applying too much joint compound, which can cause excess buildup and make sanding more difficult.
- Not allowing enough drying time between coats, which can cause bubbling, cracking, or peeling in the final surface.
- Using a taping knife that is too small, which can create uneven coverage and make mudding more difficult.
- Skipping the sanding step or sanding too aggressively, which can damage the tape or create an uneven surface.
- Not priming the surface before painting, which can cause the paint to peel or crack over time.
To avoid these mistakes, be sure to follow the instructions carefully and take the time to allow each layer to dry completely before moving on to the next step. Use the recommended tools and materials, and don’t rush the process.
Time-Saving Tips
Finishing drywall can be a time-consuming process, but there are some tips and tricks that can help you streamline the process and get the job done more efficiently. Here are a few ideas:
- Use a wider taping knife, such as a 10-inch or 12-inch knife, to cover more surface area at once.
- Use a small amount of dish soap in a bucket of water to help clean your tools more easily and prevent buildup of joint compound.
- Use a wet sponge to smooth out joint compound, rather than sanding excessively and creating dust.
- Buy pre-mixed joint compound, which can save time and eliminate the need for mixing and measuring ingredients.
- Invest in a dustless sanding system, which can reduce the amount of dust created during the sanding process.
Best Practices for Different Types of Drywall
There are several different types of drywall available, each with its own unique properties and requirements. Here are a few tips for finishing different types of drywall:
- Standard drywall: This is the most common type of drywall and is suitable for most applications. Follow the steps outlined above for finishing standard drywall.
- Moisture-resistant drywall: This type of drywall is designed for use in areas with high humidity, such as bathrooms or kitchens. Be sure to apply a moisture-resistant primer and paint, and allow extra drying time between coats.
- Fire-resistant drywall: This type of drywall is designed for use in areas where fire resistance is important, such as garages or utility rooms. Be sure to follow the manufacturer’s instructions carefully, and use fire-resistant joint tape and compound.
DIY vs. Hiring a Professional
Now that you know how to finish drywall, you may be wondering whether to tackle the job yourself or hire a professional. Here are a few things to consider:
- Cost: Finishing drywall yourself can save you money on labor costs, but you’ll need to factor in the cost of tools and materials.
- Experience: If you’re comfortable with DIY projects and have some experience with home renovation projects, finishing drywall yourself may be feasible. However, if you’re new to the process or have a large, complex project, it may be better to hire a professional for the best results.
- Time: Finishing drywall can be a time-consuming process, so consider whether you’re willing to devote the necessary time to the project. If you’re on a tight schedule or have limited time available, hiring a professional can save you time and stress.
Ultimately, the decision of whether to finish drywall yourself or hire a professional will depend on your own skills, experience, and preferences. Consider all the factors carefully before making your decision.
Conclusion
Finishing drywall is an important skill for any DIY enthusiast or homeowner. By following the steps outlined in this article, you can achieve a smooth, professional-looking finish on your drywall, while avoiding common mistakes and saving time and money.


